Technology
Install and Connect Using the VPN Profile for MacOS
Last modified 4/23/2026
Note
These steps are written for the latest version of MacOS.
Students, faculty, and staff at Illinois State University using a Mac may configure the built-in Apple VPN client for MacOS in order to access restricted resources from off campus.
The VPN Profile for MacOS is a profile that the University makes available which may be used configure the Apple built-in VPN client for MacOS to establish a VPN connection with the University from off campus. If you have already installed the VPN profile on your Mac, you may skip to the section below entitled Connect with the VPN Profile. If you need to install the profile on your Mac, proceed to the section entitled Download and Install the ISU VPN Profile for MacOS.
Note: These instructions are for users who would like to use the built-in Apple VPN client for MacOS. If you prefer to use the Cisco Secure Client VPN client for Mac, access these instructions at: Using the Cisco Secure Client VPN Client
- Download and Install the ISU VPN Profile for MacOS
You may connect with the VPN Profile for MacOS in order to access restricted electronic resources from an off campus location. It is not necessary to connect with VPN when you are on campus. Students, faculty, and staff may download and install the VPN Profile for MacOS following the instructions below:
- Navigate to the downloads page and scroll down to VPN Profile and select Mac.
- Select Download to begin the download (Figure 1):
Figure 1: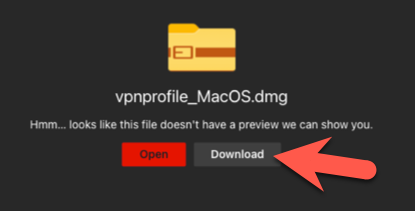
- Locate the downloaded file in Finder and click on the file (Figure 2):
Figure 2: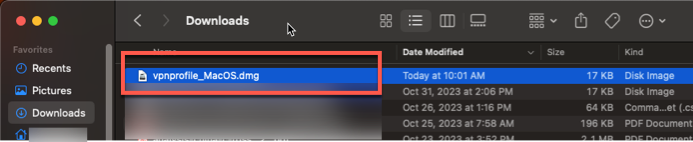
- After the ISU VPN Profile pane appears, you may simply close the pane.
- Launch Apple System Settings > General > Device Management (you may need to scroll down) (Figure 3):
- In older versions of MacOS you may need to go to System Settings > Privacy & Security > Profiles.
Figure 3: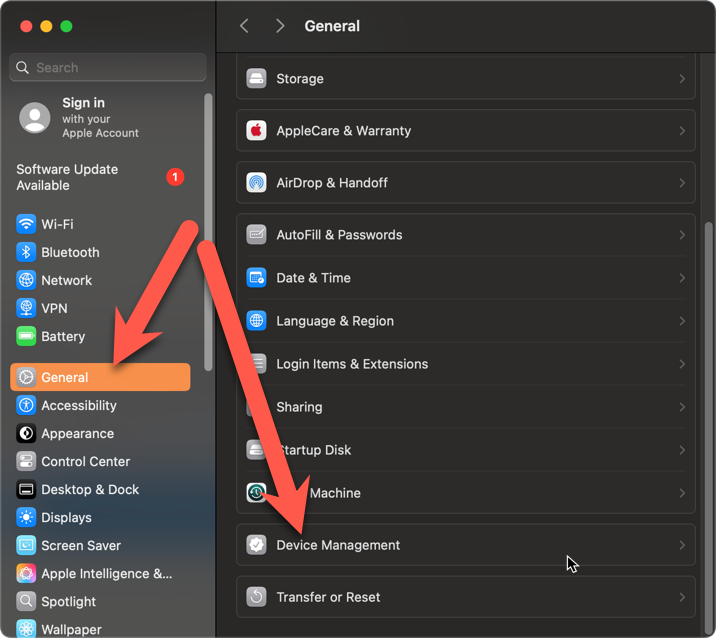
- In older versions of MacOS you may need to go to System Settings > Privacy & Security > Profiles.
- Click on the downloaded Profile to begin the install (Figure 4):
Figure 4: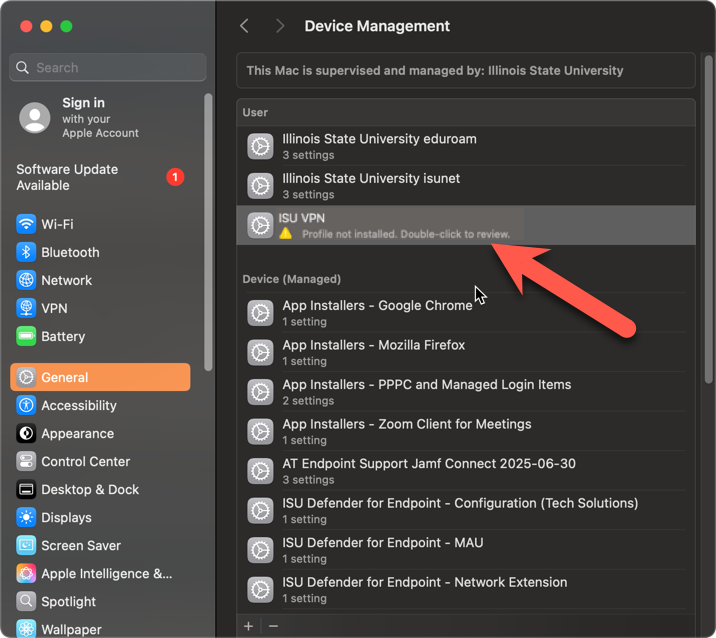
- When prompted, click Install to install the profile (Figure 5):
Figure 5: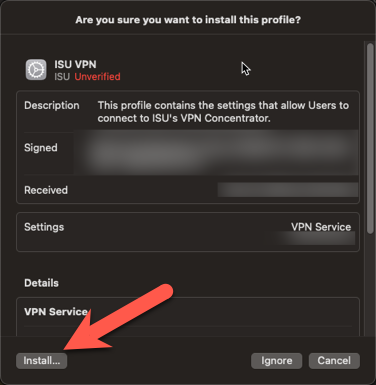
- If you receive the following prompt, click Continue (Figure 6):
Figure 6: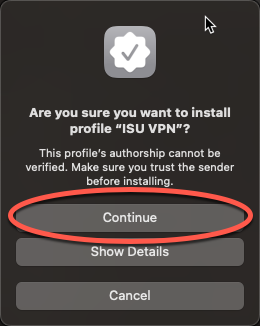
- When prompted Enter Settings for "ISU VPN", leave the password field blank and simply click Install to continue (Figure 7):
- You will still need to enter your ISU password to connect to VPN, but it is not necessary to enter it here.
Figure 7: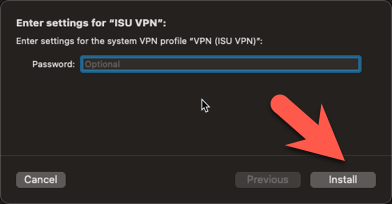
- You will still need to enter your ISU password to connect to VPN, but it is not necessary to enter it here.
- If your Mac requires an administrative user name and password to install software, you may be prompted to enter the credentials and click OK (Figure 8):
- If an administrative password is required for an ISU-owned Mac and you do not have those credentials, your direct support team will need to complete this installation for you.
Figure 8: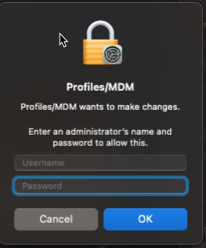
- If an administrative password is required for an ISU-owned Mac and you do not have those credentials, your direct support team will need to complete this installation for you.
- The Profile is installed (Figure 9):
Figure 9:
- Add VPN Menu to the MacOS Menu Bar
Installing the VPN profile does not automatically add a VPN menu to your menu bar in MacOS. To add a VPN menu to your menu bar, do the following:
- Click Apple Menu > System Settings > Control Center.
- Scroll down to the heading Menu Bar Only > VPN > and click the menu options next to VPN to select Show in Menu Bar (Figure 1):
Figure 1: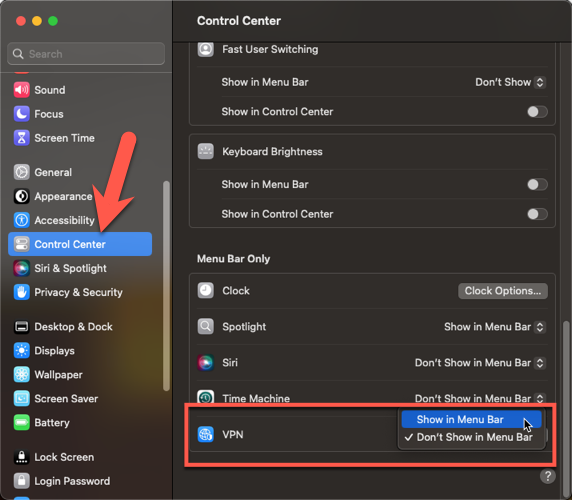
- You will now see the Apple VPN icon in your menu bar at the top-right of your screen (Figure 2):
Figure 2:
You may now click on the VPN icon to sign in to the ISU VPN service using the built-in Apple VPN appliance.
- Connect with the VPN Profile
You must have the VPN profile installed to complete these instructions (see above section entitled Download and Install the ISU VPN Profile for MacOS). To connect using the VPN profile with MacOS, do the following:
- Locate the VPN menu on the menu bar (Figure 1):
- The VPN menu is a black icon with vertical lines and is located on the right side of the menu bar near the wireless icon.
- If you do not see the VPN menu, you can add the icon to your menu bar (see section above entitled Add VPN Menu to the MacOS Menu Bar).
Figure 1:
- Click the VPN menu > Connect ISU VPN.
- Enter your ULID and password when prompted and click OK (Figure 2):
Figure 2: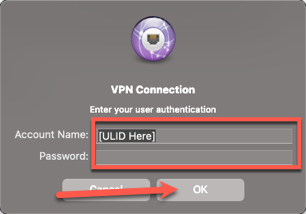
- You will be prompted to answer an Multi-Factor Authentication (MFA) challenge in order to complete sign-in to the ISU VPN service. If you do not have MFA configured on your ISU ULID account, you will need to do so in order to be able to access the ISU VPN service. For more information regarding MFA, please see:
- Once the VPN connection has been established, you will see a message that says, Welcome to ISU. Click OK (Figure 3):
Figure 3: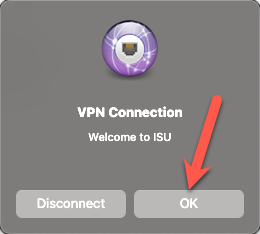
You have now established a VPN connection. To disconnect, click the VPN icon on the top menu bar and select Disconnect ISU VPN (Figure 4):
Figure 4: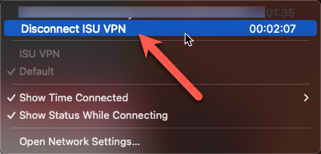
- Disconnect from VPN
When you are finished using your VPN connection, you should disconnect. Use the following steps:
- Locate the VPN menu on the menu bar (Figure 1):
- The VPN menu is a black icon with vertical lines and is located on the right side of the menu bar near the wireless icon.
- If you do not see the VPN menu, you can add the icon to your menu bar (see section above entitled Add VPN Menu to the MacOS Menu Bar).
Figure 1:
- Select VPN menu > Disconnect ISU VPN.(Figure 2):
Figure 2:
You are now disconnected from the VPN connection.
How to Get Help
Technical assistance is available through the Illinois State University Technology Support Center at:
- Phone: (309) 438-4357
- Email: SupportCenter@IllinoisState.edu
- Submit a Request via Web Form: Help.IllinoisState.edu/get-it-help
- Live Chat: Help.IllinoisState.edu/get-it-help
Feedback
To suggest an update to this article, ISU students, faculty, and staff should submit an Update Knowledge/Help Article request and all others should use the Get IT Help form.