Technology
Distributing Forms and Collecting Responses in Microsoft Forms
Last modified 4/17/2026
Once a form is created, distribute the form and view responses that are collected.
Collect Responses
Use the Collect Responses button to distribute your form.
When you are ready to distribute the forms, click the Collect Responses button. This will open the Send and collect responses window.
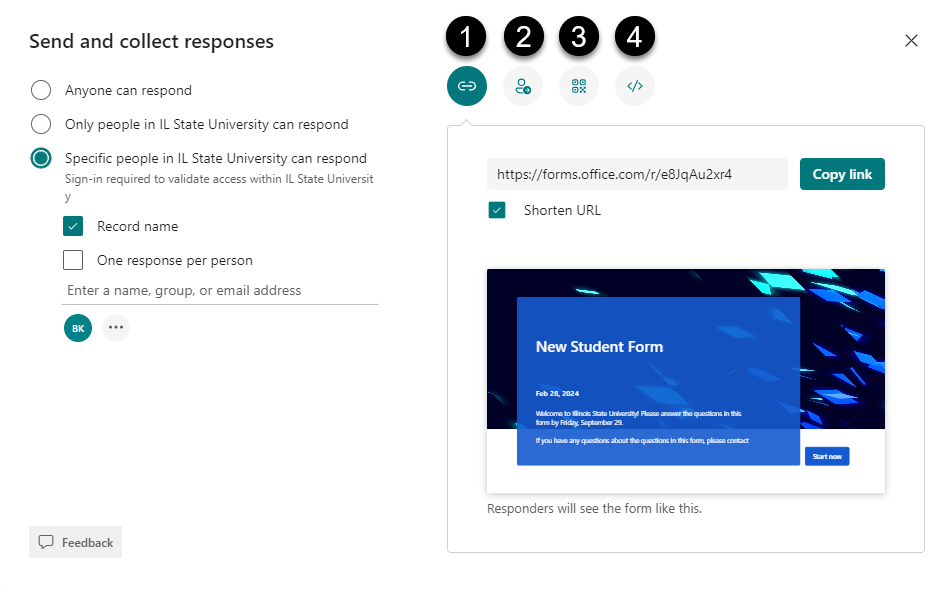
On the left side of this window, specify the type of respondent that can fill out the form. Use the radio button next to Specific people in IL State University can respond and use the fields below to specify the names or email addresses of who can fill out the form. Additionally, use this radio button to send out the form to a team in Microsoft Teams.
On the right side of the form are four icons that provide different ways to distribute your form:
- Copy link - Select the Copy link icon to open an area that has a unique URL to your form. Click the Copy link button to copy the URL.
- Invitation - Click the Invitation button open an area in which email addresses, Microsoft Teams chat, or Microsoft Teams team names can be entered. Then, click the Send button to send the invitation.
- QR code - Click the QR code icon to open a QR code Microsoft creates for your form. Click the Download button below the QR code to download the QR code.
- Embed - Click the Embed icon to open HTML code to embed your form into a webpage.
Responses
At the top left of the screen are the Questions and Responses tab. Click the Responses tab to see an overall view of how people have responded to the questions.
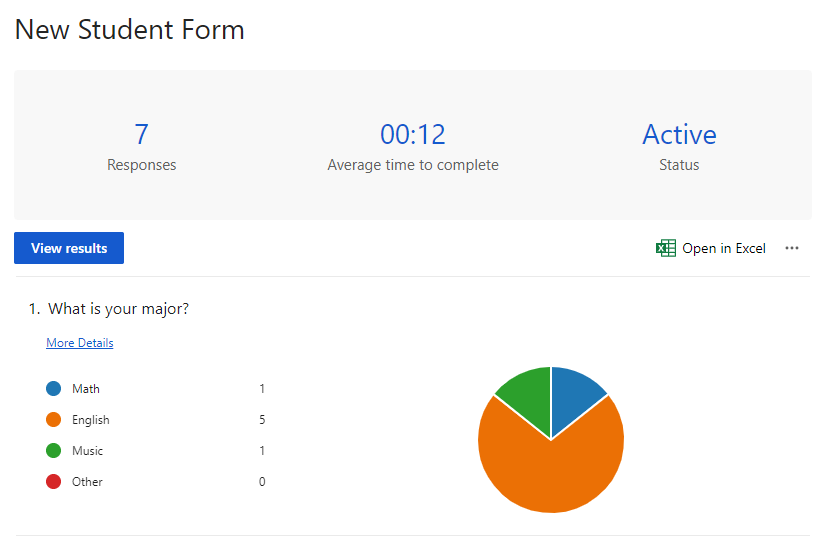
The top of this tab will contain overall information about the responses: Number of responses, average time to complete, and the form's status.
Below this summary is the Open in Excel button. Click this button to open your responses in an Excel spreadsheet.
The questions asked in your form will appear below along with graphs summarizing the information. Click the More Details link to open a new window to see a table containing specific responses.
View Individual Responses
At the top of the Responses tab is the View results button. Select this button to view individual responses. This will open the first form submitted.
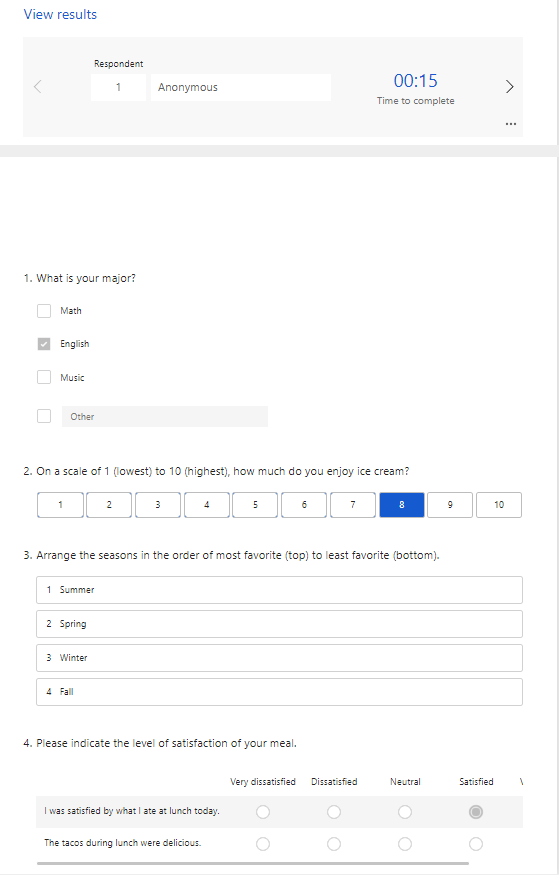
Use the arrows at the top of the screen to scroll through and individually view each response.
Use the More options for responses menu (three dots) to delete or print the individual response.
Present
Select the Present tab at the top right of the screen to open a group of slides. Each slide contains a question from your form along with a visual graphics summarizing the information. Click the arrows below the graph to scroll through all slides.
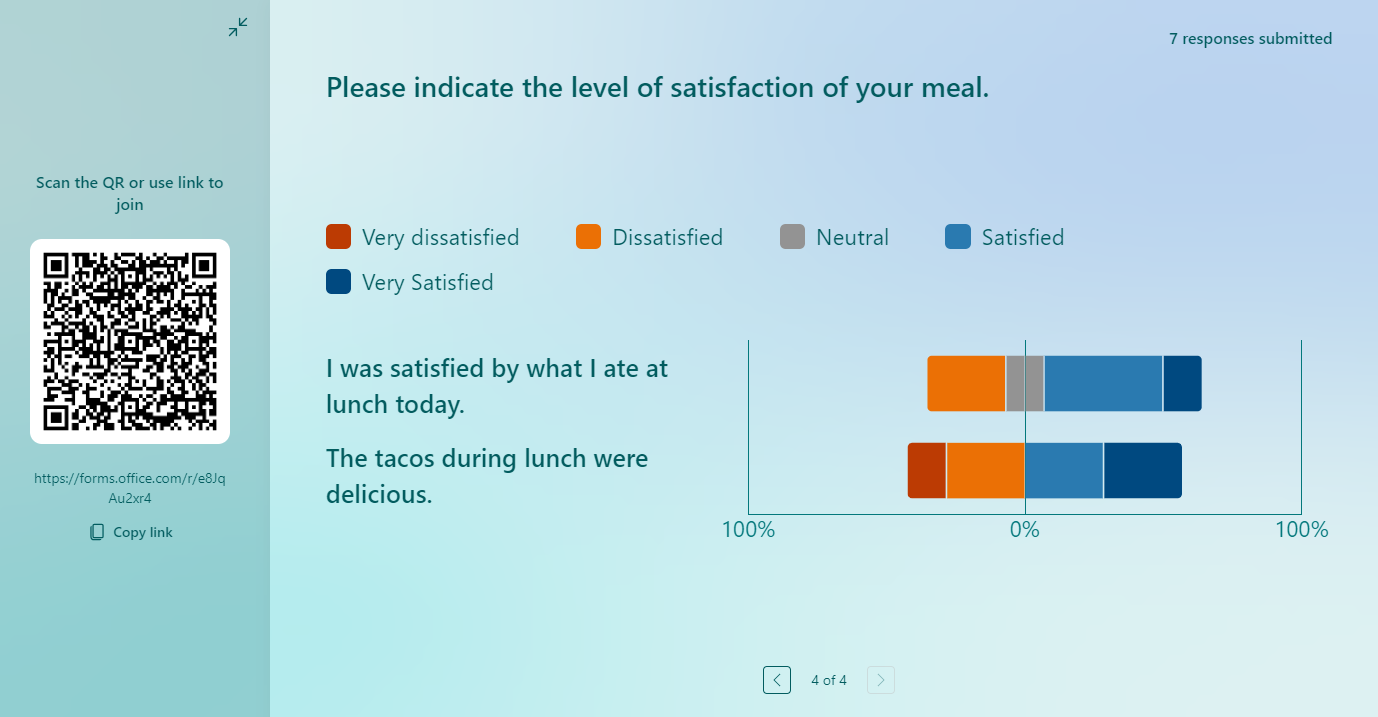
Click the X button at the top right of the screen to close the slide and return to the Responses page.
How to Get Help
Technical assistance is available through the Illinois State University Technology Support Center at:
- Phone: (309) 438-4357
- Email: SupportCenter@IllinoisState.edu
- Submit a Request via Web Form: Get IT Help Form
- Live Chat: IT Help Live Chat
Feedback
To suggest an update to this article, ISU students, faculty, and staff should submit an Update Knowledge/Help Article request and all others should use the Get IT Help form.