Technology
Connecting to the ISUNet Wireless Network with Android
Last modified 4/23/2026
Use an Android device to access isunet, a secure wireless network that is accessible throughout campus.
These instructions require you to be within range of the isunet wireless network.
- Simple Instructions
Automatically configuring your Android smartphone or tablet for ISUNet wireless access is easy. These simple instructions give you the basics. See the Detailed Instructions below for more in-depth steps.
- Select isunet-StartHere from the list of wireless networks provided
- Launch a web browser, such as Chrome or Firefox and navigate to the Wi-Fi Setup page.
- Follow the on-screen instructions
Your Android smartphone will automatically be configured for isunet or eduroam wireless access. When the configuration is done, you will need to remove isunet-StartHere from the Network Preferences.
- Due to a limitation with Google, the Join Now must remain installed on the phone even though it's only necessary for initial enrollment. If it's removed, the configuration profile is auto-purged by the OS. Google plans on addressing this limitation in the future.
- Location Permission - Due to permission changes enforced by Google in Android 10, the Join Now app will prompt for Location Permission for strictly configuration reasons.
- In order to automatically move your phone to the configuration network, which can be done manually.
- To check for a conflicting isunet or eduroam profile that was configured by other means. If you choose to not grant location permission in the app, verify that you have forgotten any previous isunet or eduroam profiles prior to running the app.
- For more information on how to Forget a Network on an Android Device, see: Forgetting Networks on Android Devices.
- Overview of Permission Changes per Android 10 Development Team
- Legacy Method - if you still have concerns about the location permission, you may still connect to isunet or eduroam via the Legacy Instructions which are listed at the bottom of this article - you will need to remember to update your password on your Android phone the next time you change your password.
- Detailed Instructions
To automatically configure your device to connect to isunet, do the following:
- Select isunet-StartHere from the list of wireless networks provided.
- Launch a web browser, such as Chrome or Firefox and navigate to wifisetup.ilstu.edu. You should be presented with the following (Figure 1).
Figure 1: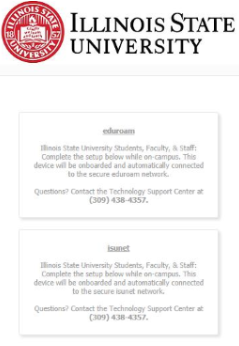
- You will be presented with two configuration options; One for Eduroam and one for ISUNet. Both networks will provide the same level of access while you are on campus (Figure 1).
3a. For more information on the Eduroam network, see: Eduroam at Illinois State University. - Next, click the Download button and you will be directed to the Google Play Store to install the JoinNow App (See Figures 2a - 2b)
Figure 2a:
Figure 2b: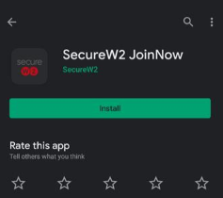
- After installing the SecureW2 JoinNow App, return back to Chrome/Firefox, and click the JoinNow button (Figure 2a) to begin the configuration process.
- You will be prompted for “Location Permission Required” as stated earlier - click “Yes, App will configure and connect” and choose “While using the app” or “Only this time” (Figures 3a - 3b).
Figure 3a: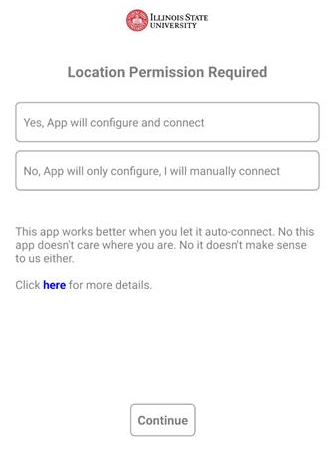
Figure 3b: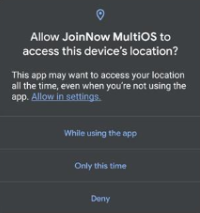
- Give your device a unique name in the 'Name your device' field. This can be whatever you want to name your device (e.g., Android, or My Phone, etc.). Click the Next button to launch the Central Login window and sign in with your ULID and Password (Figure 4).
Figure 4: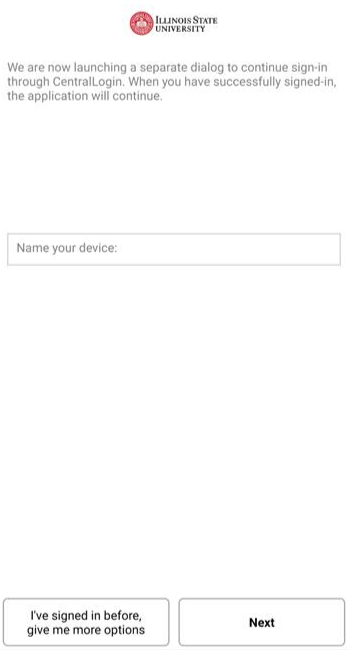
- Once Central Login has loaded, enter your ULID and password, and then click the Sign In button.
- Click the Next button to proceed with automatically joining isunet/eduroam - or manually select the network (Figure 5)
Figure 5:
- Legacy Instructions
If you do not wish to run the app for the initial configuration, we have provided instructions for the legacy method. The JoinNow app is recommended as it configures your devices for EAP-TLS authentication with additional security, but also students, faculty, and staff can benefit from not losing wireless access when they change their password.
To manually configure isunet or eduroam with an Android device, do the following:
- Press the Home button to go to the Home Screen.
1a. The Home button is located along the bottom of your device. its icon looks like the outline of a House. - The steps to get to Settings on Android can differ by device. Try one or more of the following:
2a. Press the Menu button to bring up the mini-options screen. The Menu button is located along the bottom of your device. Its icon is four stacked (horizontal) lines.
2b. Press Settings.
2c. Press the clock icon located in the system icon tray in the lower-right corner of your screen. This will bring up a menu. Press the clock icon again and then press Settings. - Press Wireless & Networks.
- Press Wi-Fi Settings.
- If it is not already on, turn on WiFi
- Press isunet or eduroam under WiFi Networks
A window will appear which contains the Wi-Fi settings for isunet.
7a. The EAP method should be PEAP.
7b. The Phase 2 authentication should be MSCHAPV2.
7c. The CA certificate should be (unspecified) or use system certificates.7d. Under Identity, enter your ULID.Note
Android 7 may not list unspecified as an option. Users need to select Use system certificates and type wireless.ilstu.edu in the Domain field.
7e. Leave Anonymous identity blank.
7f. Under Password, enter your password.8. Click Connect.
How to Get Help
Technical assistance is available through the Illinois State University Technology Support Center at:
- Phone: (309) 438-4357
- Email: SupportCenter@IllinoisState.edu
- Submit a Request via Web Form: Help.IllinoisState.edu/get-it-help
- Live Chat: Help.IllinoisState.edu/get-it-help
Feedback
To suggest an update to this article, ISU students, faculty, and staff should submit an Update Knowledge/Help Article request and all others should use the Get IT Help form.