Technology
Recording a Zoom Meeting
Last modified 4/21/2026
Note:
The features mentioned in this article reflect the latest version of the Zoom desktop client. For information on how to update Zoom, see Updating Zoom
Zoom allows meetings to be recorded. These recordings may be saved either locally to your computer or to the cloud.
Before You Begin
Recording Zoom meetings locally to your computer is available to anyone with a Zoom license. As of Summer semester 2020, course instructors will have access to Zoom Cloud Recording automatically. However, Staff members that want access to Zoom Cloud Recording will need to request it. Staff can make a request for Zoom Cloud Recording by submitting a Help Ticket using the Get IT Help Form.
The following must be understood prior to recording your meetings in any location:
- Consent must be provided by all meeting attendees before recording the session.
- Zoom recordings should avoid gallery view (thumbprint-sized photos) to avoid any violation of FERPA. Meeting hosts should change their view prior to recording. Instructions on how to do so can be found here: Switching Views in a Zoom Meeting.
- View the Illinois State FERPA information for more information on FERPA.
- Recordings or screenshots of meetings should not be shared or posted to external services (e.g. social media).
- Cloud storage is shared by all ISU users and is limited. It is highly recommended that Zoom meetings be stored on your computer as recordings may be deleted from cloud storage to free up space for others.
- Recording a meeting makes it more vulnerable to being shared with others and/or downloaded to personal computers.
Recording a Meeting
Below are some quick tips on recording a meeting locally and to the cloud. Also below are two articles that detail recording locally and to the cloud, respectfully.
Important!
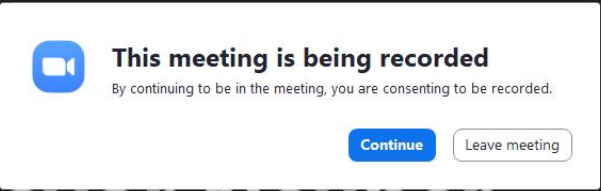
Consent must be provided by all meeting attendees before recording the session. Zoom will prompt all participants with a notice to consent before joining a recorded meeting. The prompt will look like the example below.
When you are in a Zoom meeting you have several tools available to you, including recording. Here is how to record your meeting:
Start your meeting as the host.
Note:
Only hosts and co-hosts can start a cloud recording. Participants will only be able to record to their computer unless you make them a co-host.
- Click the Record button in the Zoom toolbar.
- Select Record to the Computer if you want to record locally. Select Record to the Cloud if you want to record your meeting to the cloud.
- When your presentation is finished, click Pause/Stop Recording or End Meeting.
Once the recording has stopped, local recordings will automatically open once the recording has processed. In the folder you will see the files for audio and video portions of the recording.
If recording to the cloud, the meeting host will receive a notice that an email will be sent to your ISU email account once the cloud recording is ready. Cloud recordings are not available immediately. It may take several hours before they are available. This email contains links to view the recording details and to share your recording with viewers.
Tips for Recording a Meeting to the Cloud
These tips are for those who have been granted access to Zoom Cloud Recording. As of Summer 2020, course instructors will automatically have the ability to record Zoom meetings to the Cloud. Staff will need to request it. If you do not have access to Zoom Cloud recording, you can ignore these tips and skip to the next section, 'Alternatives to Zoom Recording'.
While functionally, the steps for recording locally are the same for recording a meeting to the cloud, there are some tips to be aware of to ensure you have the smoothest experience with Cloud recording.
- In your Zoom Account Settings, (accessible by going to Illinois State Zoom Portal and logging in with your ULID and Password) if you set your meeting recordings to start automatically, ensure you specify in Settings where the recording will be saved - either locally to your computer or to the cloud. This setting can be found under Settings → Recordings → Automatic Recording.
- Instructors can enable email notifications for when a cloud recording is complete and available, since saving a recording to the cloud takes time to render. This setting can be found under Settings → Meeting → Email Notification.
- Users who are recording a meeting to the cloud can specify what can be recorded during the meeting (i.e., only audio, chat, video, etc.). This setting can be found under Settings → Recording → Cloud Recording.
Alternatives to Zoom Recording
The following alternatives are available for use before recording and storing lectures online. Items listed in the Before you Begin section must also be adhered to in these tools. More information and how-tos on these alternative tools are available through the CTLT Lecture Recording Options page.
Zoom Recording Alternatives
- Record Narration Directly in PowerPoint
- Screencast-O-Matic Pro
- Camtasia
Where to Store Recorded Lectures/Meetings
- Canvas Files Tool
- Microsoft Stream
Troubleshooting Your Recordings
Below are some common troubleshooting methods for Zoom recordings. Please review the tips below, and if your issue is not covered in this troubleshooting section, please call the Technology Support Center at (309)-438-4357, or submit a help ticket at Get IT Help Form.
How long will it take to render my Zoom recording?
There are multiple variables when it comes to rendering a Zoom meeting. These variables include how long the meeting ran, if there was screen sharing, how much server space there is, and more. The longer the meeting, the longer the rendering time will be. If you find that your recording is taking an unusually long time to render, please do not attempt to restart your machine, as it can corrupt the recording. Your recording should not take longer than a couple of hours to render.
I turned off my machine while my recording was rendering and now the recording is gone. What happened?
If you turn off your machine while your recording is rendering, you will corrupt the video file and the video will not be saved. Please avoid turning off your machine or putting it into sleep mode while the video is rendering. To find out more about corrupted recordings, please visit this Zoom Knowledge Base Website for more information.
I saved my recording, but it is nowhere to be found. What happened?
By default, your recorded meeting should be saved in your Documents folder under a folder named Zoom. You can specify where you would like to save your recording if you would rather it be saved somewhere else on your computer. To find out more about locating Zoom recordings, please visit this Zoom Knowledge Base Website for more information.
Video Demonstration
Select the following link to view a video that demonstrates the steps listed above: How to Record a Zoom Meeting and Save it to Your Computer
How to Get Help
Technical assistance is available through the Illinois State University Technology Support Center at:
- Phone: (309) 438-4357
- Email: SupportCenter@IllinoisState.edu
- Submit a Request via Web Form: Get IT Help Form
- Live Chat: IT Help Live Chat
Feedback
To suggest an update to this article, ISU students, faculty, and staff should submit an Update Knowledge/Help Article request and all others should use the Get IT Help form.