Technology
Hosting a Zoom Meeting
Last modified 4/21/2026
Note:
The features mentioned in this article reflect the latest version of the Zoom desktop client. For information on how to update Zoom, see Updating Zoom
To host a Zoom meeting, perform the following:
- Open a browser and navigate to the Illinois State Zoom Portal.
- Click Host (See Figure 1) and login with your ULID and password.
Figure 1: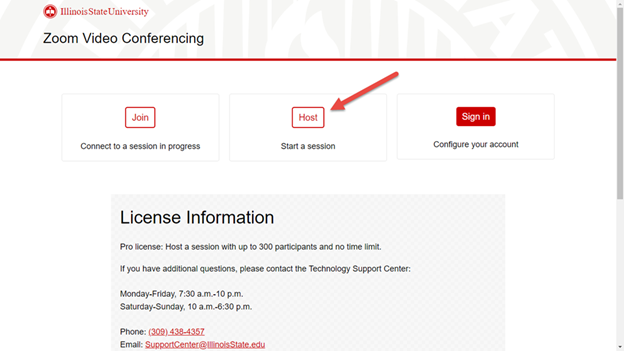
- You may be asked to download the software. If you are, accept the prompt that appears and allow the software to download. If you are not, proceed to Step 6.
- When the download is complete, go to your Downloads folder and click one of the following:
- Zoom_software.exe for Windows.
- Zoom_software.dmg for Mac.
- Zoom will now install on your computer.
- Launch Zoom.
- Choose a name by which you will appear to others.
- Once connected, a box will appear. Click Join with Computer Audio to connect your microphone and speakers to the call (See Figure 2).
Figure 2: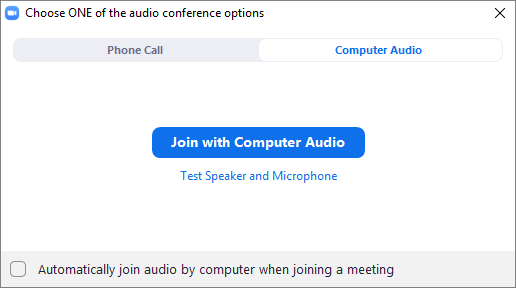
- To invite people into your meeting as you are hosting it, click Manage Participants in the meeting toolbar then click Invite at the bottom of the pop-out window. (See Figure 3).
Figure 3:
- To end the meeting, click End Meeting in the bottom right corner of the meeting toolbar or close the meeting window.
Other Features in the Zoom Toolbar
Among being able to record your meetings, you have a handful of other tools available to you to easily moderate your meeting. Review the picture below to find out more about these features.

A.) Audio/Video Settings: You can either mute or unmute your mic, as well as enable push-to-talk so that you can talk at the click of a button instead of having your mic always on, if you prefer. You can click the microphone icon to quickly mute if needed.
B.) Security: The security feature allows you to secure your meeting in multiple ways. From this button, you can lock the meeting, enable a waiting room, grant participants the ability to share their screen, allow chat sessions in the meeting, allow participants to rename themselves, and remove participants.
C.) Manage Participants: This is where you will invite participants to your meeting while you are hosting it; you will simply click the Manage Participants button and click Invite at the bottom of the pop-out window. You can also manage the participants that are in the meeting. You can rename them, quick chat, make host, allow them to record you, remove them from the meeting, and ping other users with alerts such as Yes, No, Raise Hand, I Need a Break, and more.
D.) Chat: From here, you can individually chat with one or more people or chat with every participant in the meeting.
E.) Share Screen: You can share your screen with viewers so that they can see what is on your screen at the moment.
F.) Record: This allows you to record your meeting for later viewing.
G.) Breakout Rooms: This feature allows you to either automatically or manually assign participants into smaller rooms. This could be helpful for assigning people to groups for a group project.
Having Audio Issues?
If you are having audio issues on your computer, please refer to the following knowledge article on how to configure your audio settings on your Windows or Mac machine:
If you are having audio issues in Zoom itself, but your audio device is working fine, please read the following Zoom article on configuring and testing your audio devices in a Zoom meeting:
Video Resources
The following links will open a video that demonstrates how to use a certain feature in Zoom:
- Showing a Video in Zoom
- Pinning Participants in Zoom
- How to Record a Zoom Meeting and Save it to Your Computer
- Troubleshooting: Participants Cannot Hear You in Zoom
- How to Join a Zoom Meeting at Illinois State University
- Downloading Zoom Client at Illinois State University
How to Get Help
Technical assistance is available through the Illinois State University Technology Support Center at:
- Phone: (309) 438-4357
- Email: SupportCenter@IllinoisState.edu
- Submit a Request via Web Form: Get IT Help Form
- Live Chat: IT Help Live Chat
Feedback
To suggest an update to this article, ISU students, faculty, and staff should submit an Update Knowledge/Help Article request and all others should use the Get IT Help form.