Technology
View the Advisee Student Center in Campus Solutions
Last modified 11/21/2024
Learn how to access the Advisee Student Center to view details about a student.
The Advisee Student Center is available to view student details, such as the advisee’s schedule, class grades, term statistics, and personal information.
The student center page of the Advisor Center is similar to what the student will see when they select the Campus Solutions button in My.IllinoisState.edu.
Log in to Campus Solutions
To log in to Campus Solutions:
Log in to cs.illinoisstate.edu via Central Login.
- For more information about Central Login at ISU, please refer to: Central Login
Once you log in, the options on your screen will depend on your security access.
Off Campus Authentication Note
If you are off campus, Campus Solutions will require an MFA request approval. Follow this link to set up your MFA if you still need to. MFA Info/Setup
Requesting Access
To obtain access to Campus Solutions, be assigned with a certain role, or gain access to view certain student groups or service indicators, contact the Technology Support Center.
How to View the Advisee Student Center
- On your homepage, click the Academic Advisement tile.
- To review the student center of one of your advisees, click the My Advisees link on the left side of the screen.
This will open a list of your advisees on the right side of the screen. Click on the row of the applicable student. Then, skip steps #3-#5 and move to step #6.
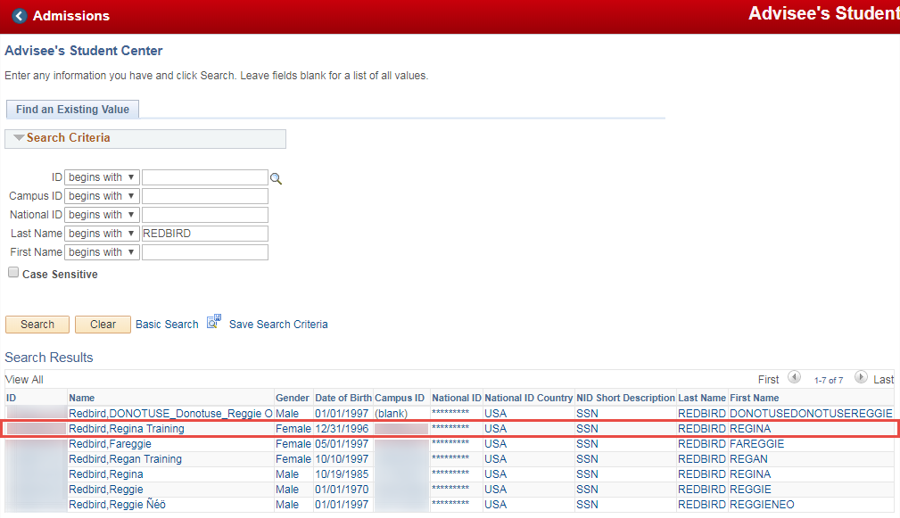
- To view the student center of a student who is not in your My Advisees section, click the Student Search link.
- The Find an Existing Value tab will open on the right side of the screen.
Enter any known search criteria in the search fields that are in this tab. Click the Search button.
- A list of students will appear below the Search Results section. Click the student’s row.
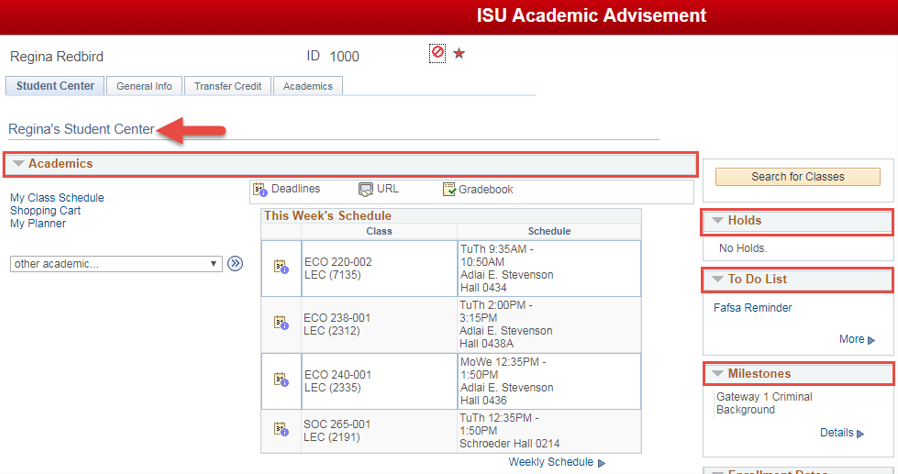
- This will open the selected student’s advisee student center.
Use this page to view the student’s Academics, Holds, To Do List, and Milestones sections.
- The Holds section lists the student’s holds. This section displays negative and positive service indicators. Service indicators are flags in the system that restrict or provide services to students.
Negative service indicators are not necessarily an indication that the student has done something incorrectly or had gotten into trouble. For example, all incoming students will have a negative service indicator before meeting with their advisor regarding course registration. Once the student has met with their advisor, this hold is lifted and they will be able to register for classes.
Positive service indicators provide services to selected students. For example, prospective athletes may have this hold to indicate that they should contact their prospective coach with questions.
If a hold is listed in this section, a Details link will appear below. Click this link.
- This will open the student’s Your Holds page. This page will display the Item List table. More specific information about the student’s hold(s) will be listed here. Learn about when the hold was put into place in the Start Date field and who had placed the hold in the Department field.
The name of the service indicator is a link. Click this link.
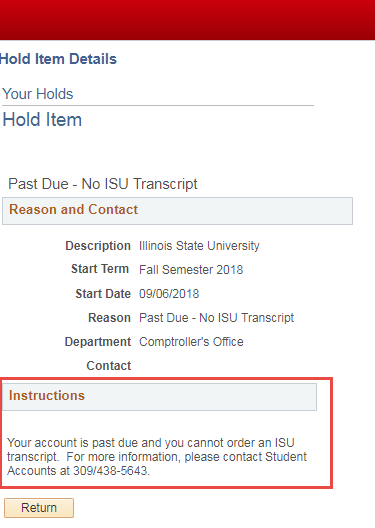
- This will open the student’s Your Holds: Hold Item This will display some additional information about the hold. This screen is useful for viewing the contact information of the department that placed the hold in the Instructions section.
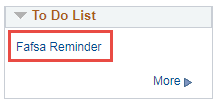
- In the student’s Student Center, the To Do List section is located below the Holds section. The To Do List will list tasks the student needs to complete. Tasks that are not completed by the deadline will move up to the Holds section.
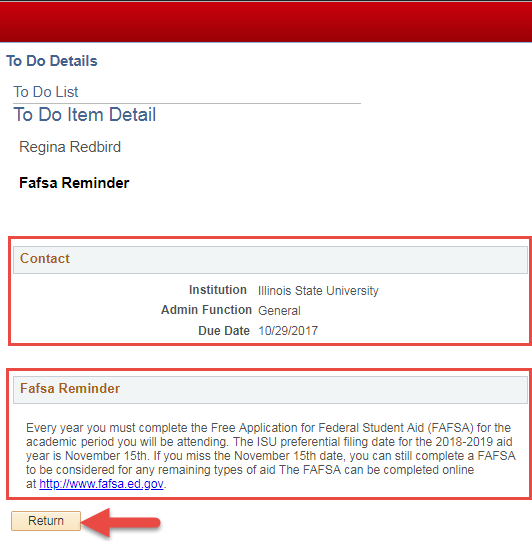
The task is a hyperlink. Click this link. - This will open the To Do List: To Do Item Detail page. View information about this to do item, such as the contact information of who had assigned this task in the Contact section. Additionally, view a more detailed description of the task in the section below.
Click the Return button to return to the student’s Student Center. - In the To Do List section, click the More link.
- This will open the student’s To Do List screen.
The to-do item is listed in the To Do Item column is a link. Click this link to open the To Do List: To Do Item Detail page described in step #11.A list of all the student’s To Do List items will appear on this screen in the Item List table. View information such as the due date of the To Do item in the Due Date column and the status in the Status column.
Click the Cancel button to return to the Student Center.
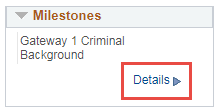
- The Milestones section is located below the To Do List This section is primarily used by the Teacher Education department to assign items that were formerly known as Gateways.
Gateways are requirements that student teacher candidates are required to complete before starting student teaching. However, other departments may use this section for their own degree requirements.
Click the Details link.
- This will open the Milestone List This screen contains the Milestone List table. In this table is a list of milestone(s) that the student is required to complete. View the status of the milestone in the Status column and the department who assigned the milestone in the Program Description column.
The name of the milestone is a link. Click this link.
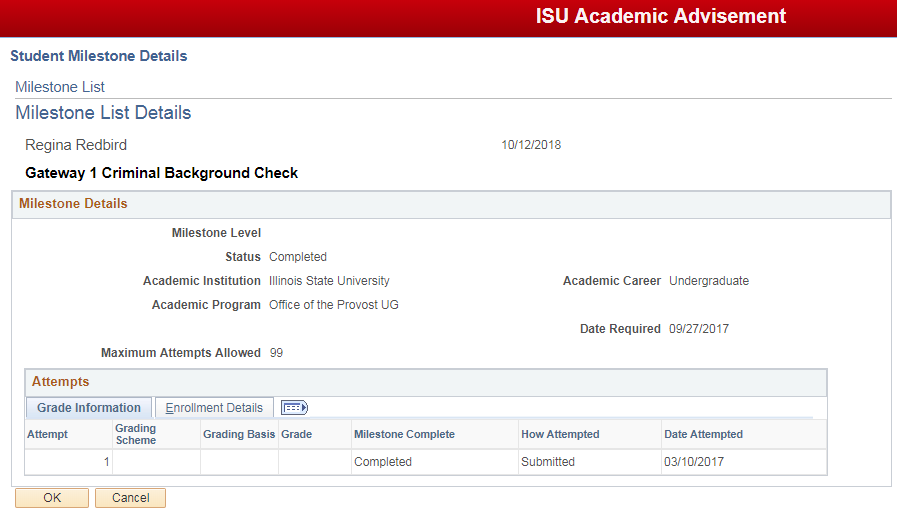
- This will open the Milestone List: Milestone List Details screen. View additional information about the selected milestone on this screen.
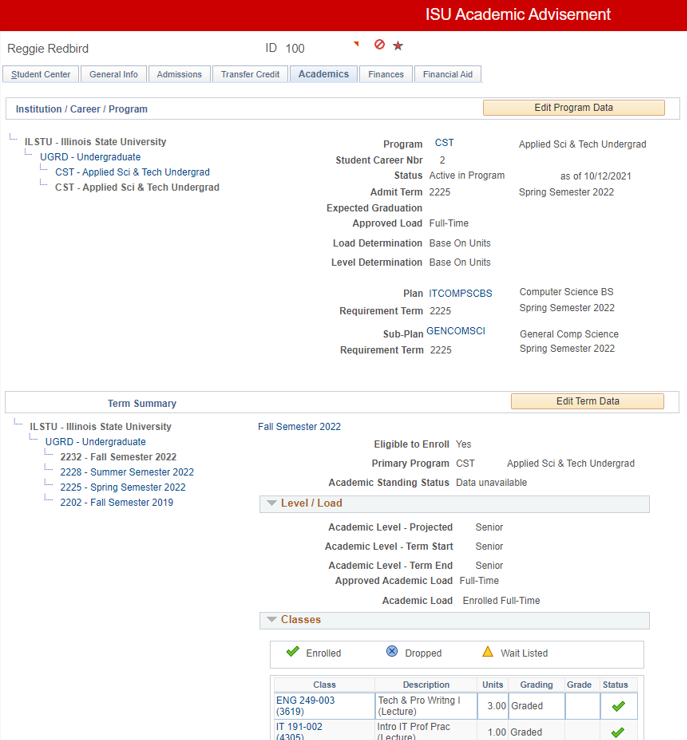
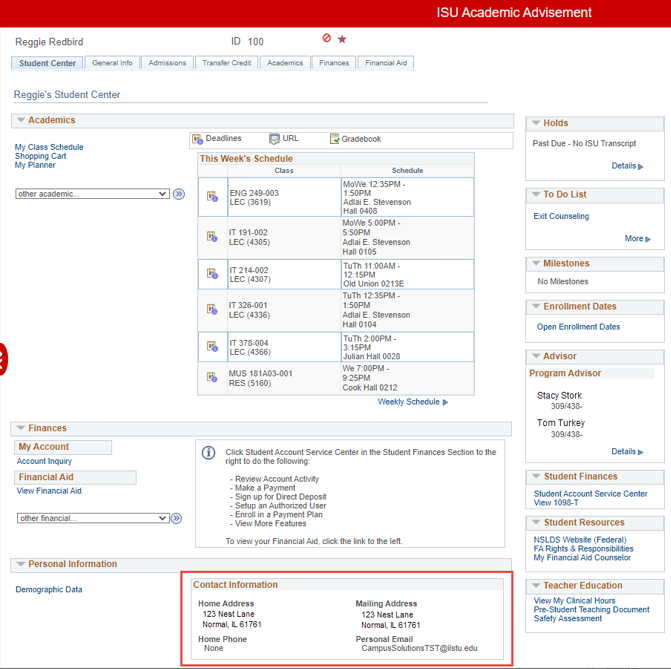
- In the student’s "Student Center" tab, view the "Academics" section to view information such as the student’s schedule in the "This Week’s Schedule" section. Use the Academics tab to view other academic information.
- In the Academics tab, view all courses that the student has taken at the university along with the grade received, the number of units each course is worth, and the course’s status (if the course is taken, was transferred into the student’s records from a non-ISU institution, or is currently in progress). Additionally, view academic information about the student, such as their program, plan, and subplan.
Each course title is a link. Click this link to open a window to view a full description of the course.
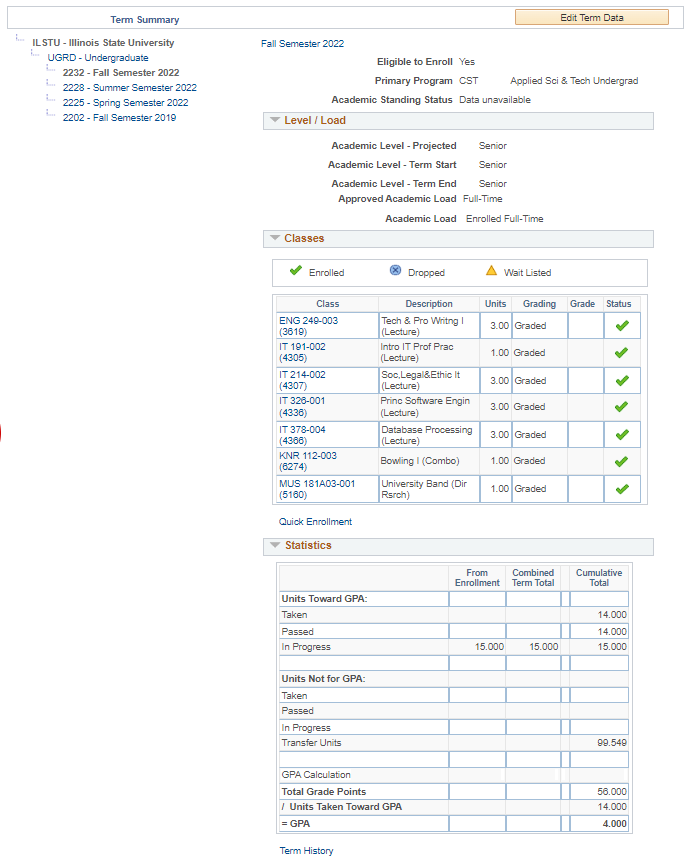
- Scroll down the student’s "Academics" tab to the Term Summary section to view the student’s grades.
The chart in this section displays the grades that the student received for each course for the current semester. Additionally, view the cumulative GPA in the Cumulative Total column.
On the left side of the screen is a list of the semesters that the student was enrolled as a student. Select each semester to view the grades that the student received for the classes for the selected semester along with the cumulative GPA they had earned by the selected semester. - In the student’s Student Center tab, view the student’s personal information in the Personal Information section.
The Contact Information section will display the student’s contact information: Home Address, Mailing Address, Phone, and Personal Email.Click the Demographic Data link.
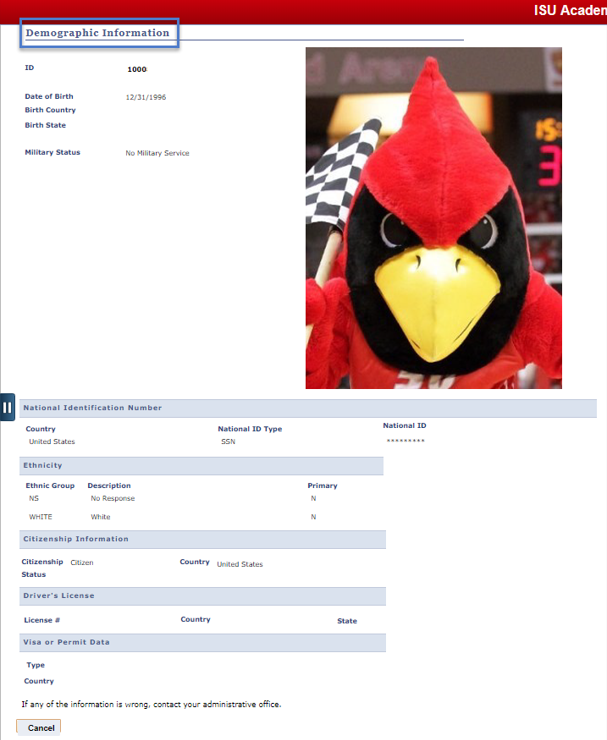
- This will open the Demographic Information window. View demographic information about the student along with their picture.
The top of the page has the following fields: Date of Birth, Birth Country, Birth State, and Military Status.The sections on this page are: National Identification Number (also known as Social Security number; most people will not have access to this information), Ethnicity, Citizenship Information, Driver’s License, and Visa or Permit Data.
Click the Cancel button to close this window. - The Enrollment Dates section will display the enrollment date and time when it has been assigned to a student.
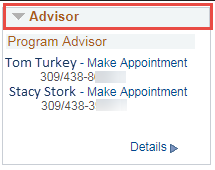
The term, “Open Enrollment Dates” means that there is no enrollment date and time assigned as of this time. - The Advisor section will display the student’s advisor(s) along with their phone number.
Next to the advisor’s name may have a hyperlink titled Make Appointment. This hyperlink will open the advisor's Achieve page; Achieve is an online appointment book. Click this link to open the advisor's Achieve page in a new browser tab and sign up for appointments to meet with the advisor.
Additional Assistance
How to Get Help
Technical assistance is available through the Illinois State University Technology Support Center at:
- Phone: (309) 438-4357
- Email: SupportCenter@IllinoisState.edu
- Submit a Request via Web Form: Help.IllinoisState.edu/get-it-help
- Live Chat: Help.IllinoisState.edu/get-it-help
