Technology
Adding a Shared Mailbox in Outlook
Last modified 1/9/2025
This article describes how to add a shared mailbox to your Exchange account in Outlook.
Before You Begin
Despite its name, a shared mailbox provides access to more than just email. Like any Exchange account, a shared mailbox grants access to email, calendar, and contacts.
To add a shared mailbox in Outlook 2016, you must first be granted permission to access that shared mailbox. Your department might request a shared mailbox and designate a few employees to have access to it.
- You can request a shared mailbox by navigating to https://help.illinoisstate.edu/get-it-help,
- After logging in with your ULID and password, click Submit Detailed Request → Click the Office 365 and Web tab → Click Request Resources for a Group or Team.
A shared mailbox allows you to work together with other staff members in shared environment. Changes made by one person are seen by others who have access to the shared mailbox. For example, if one person adds an event to the calendar for the shared mailbox, that event is accessible to the others. Likewise, if an email message was deleted from the Inbox by one person, it is deleted for the others as well.
To learn how to send emails from a shared mailbox review the article Sending Email from Shared Mailboxes
Adding a Shared Mailbox
- Windows (Old Outlook)
To add a shared mailbox in Outlook, do the following:
- Open Outlook.
- Click File.
- Click Info on the left.
- Click the Account Settings button and select Account Settings.
- Select your Microsoft Exchange account.
- Click the Change button at the top of the window (Figure 1).
Figure 1:
- Click More Settings.
- Click the Advanced tab.
- Click the Add button (Figure 2).
Figure 2:
- Enter the name of the shared mailbox and click OK.
- Click Apply and then click OK.
- Click Next.
- Click Finish.
- Click Close.
- Click Mail on the left. The shared mailbox appears on the left side of the screen. Expand the mailbox to view its contents.
You have now added the shared mailbox to Outlook.
- Windows (New Outlook)
- Open the New Outlook application
- With Outlook opened, hover your mouse over the Folder dropdown button and right-click it, then click Add shared folder or mailbox (See Figure 1).
Figure 1: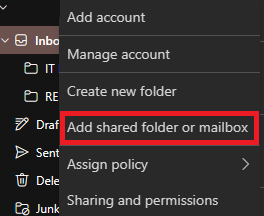
- You will then need to enter the name or the email address of the person who has a shared folder.
- Press Add once you have entered the name of the shared mailbox (See Figure 2). The shared folder will now be added to your folder panel.
Figure 2: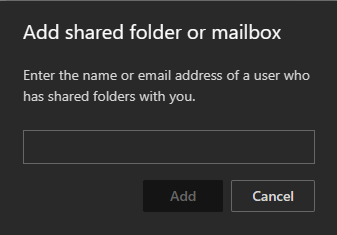
- Mac
To add a shared mailbox in Outlook on a Mac, do the following:
1. Open the Outlook app on your Mac.
2. Navigate to the Outlook tab in the upper left hand corner of your Mac and choose Settings.
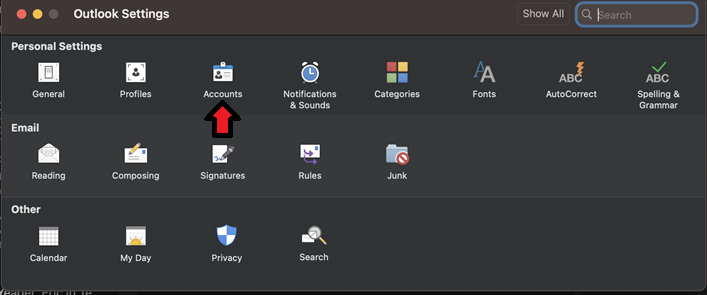
3. In the Settings menu, choose the Accounts icon to open the Account menu. (Figure 1).
Figure 1:
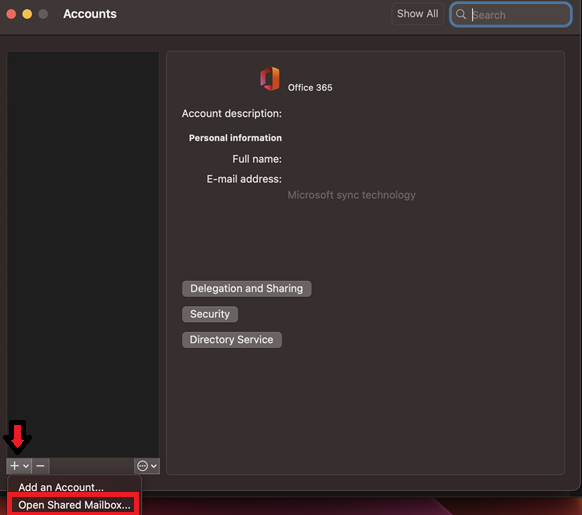
4. Navigate to the + icon in the lower left corner of the menu and choose Open Shared Mailbox. (Figure 2).
Figure 2:
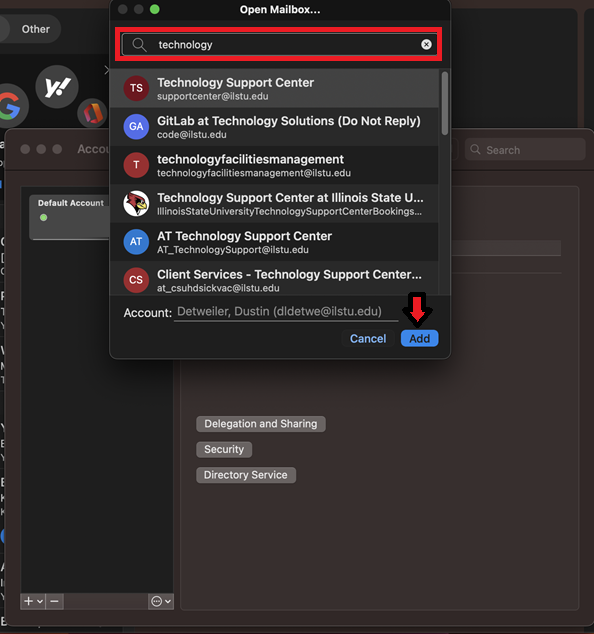
5. Start typing in the name of the shared mailbox in the search bar at the top. A list of mailboxes will populate, once you see the one you need, choose it and click Add in the lower right corner. Note: A permissions check will run to verify you have access to that shared mailbox. (Figure 3)
Figure 3:
Once the permission check is complete the shared mailbox will be added to your Outlook.
How to Get Help
Technical assistance is available through the Illinois State University Technology Support Center at:
- Phone: (309) 438-4357
- Email: SupportCenter@IllinoisState.edu
- Submit a Request via Web Form: Help.IllinoisState.edu/get-it-help
- Live Chat: Help.IllinoisState.edu/get-it-help