Technology
Replacing Ink and Maintenance Boxes
Last modified 4/24/2026
Removing and Installing Ink Cartridges
Removing and Installing Ink Cartridges
Make sure you have your replacement cartridges handy before you begin. You must install new cartridges immediately after removing the old ones.
Note: Replace all expended ink cartridges. You cannot print if any of the ink cartridges are expended or any ink slots are empty.
- Turn on your product.
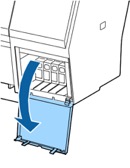
- Press the open ink cover button.
- Do one of the following if necessary:
- If any of the cartridges are completely expended, the corresponding ink cartridge cover unlocks.
- If the cartridges are not completely expended, select the ink bay that you want to open, and press the OK button.
- The ink cartridge cover unlocks.
- Open the ink cartridge cover.
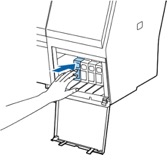
Note: Do not try to open the ink cartridge cover until it unlocks. - Press in on the ink cartridge you want to replace. The ink cartridge pops out slightly.
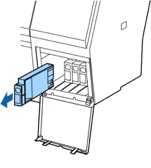
- Pull out the ink cartridge.
Note: Dispose of used cartridges carefully. Do not take the used cartridge apart or try to refill it.
Warning: If ink gets on your skin, wash it thoroughly with soap and water. If ink gets into your eyes, flush them immediately with water. If ink gets into your mouth, spit it out and see a doctor right away. Keep ink cartridges out of the reach of children. - Remove the new cartridge from the package. Then gently shake the cartridge for about five seconds.

Caution: Do not touch the green chip on the cartridge. - Insert the new cartridge with the arrow facing up and push it in until it clicks into place.

Caution: Do not remove and re-insert cartridges more often than necessary. Doing so can break the needle valve seal and allow air to enter the ink tubes, damaging the nozzles. - Close the ink cartridge cover and push it in until it clicks into place. Your product begins charging the ink delivery system.
Note: Do not turn off the product during ink charging.
Caution: If you remove an ink cartridge for later use, protect the ink supply area from dirt and dust and store it in the same environment as the printer. The valve in the ink supply port is designed to contain any excess ink, but do not touch the ink supply port or surrounding area. Always store ink cartridges with the label facing up; do not store cartridges upside-down.
Note: If a cleaning cycle is initiated during the "Ink Low" status and the level of ink remaining in the cartridge is estimated to be less than required for a cleaning, the printer will prompt that there is “not enough ink to complete the process.” At this stage a fuller cartridge needs to be installed to complete the maintenance. At the end of the printer cleaning maintenance, the original cartridge can be re-inserted and used until its "Ink Cartridge Expended" status is reached. It does not have to be discarded.
Replacing Maintenance Boxes
The maintenance box absorbs ink used in maintenance operations such as head cleaning and changing black ink. Replace the maintenance box when you see a message on the LCD screen. (The SC- P8000/SC-P9000 have two maintenance boxes.)
Note: Do not reuse maintenance boxes you have removed from the printer and exposed to air for a long period of time. The box will not absorb any more ink.
- Check the LCD screen to determine which maintenance box needs to be replaced (SC-P8000/SC- P9000).
- Turn off your product.
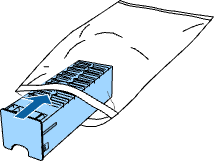
- Remove the new maintenance box from the package.
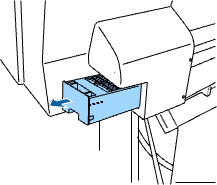
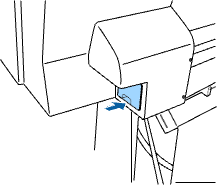
Caution: Do not touch the chip on the side of the maintenance box or you may damage the product. - Use the handle on the bottom of the maintenance box to carefully pull it out of the product without tilting the box.
- Place the used maintenance box in the bag supplied with the new box and seal the bag.
- Insert the new maintenance box in the slot.
Feedback
To suggest an update to this article, ISU students, faculty, and staff should submit an Update Knowledge/Help Article request and all others should use the Get IT Help form.