Technology
Removing Roll Paper
Last modified 4/24/2026
When you finish printing on roll paper, you should remove it from the printer to avoid indenting or creasing the paper.
- Open the roll paper cover.
- Press the load paper button to release the paper. The following may now occur:
- If automatic media tracking is on, the barcode and paper information is printed.
- If you are not using the optional Auto Take-Up Reel, the paper rewinds automatically.
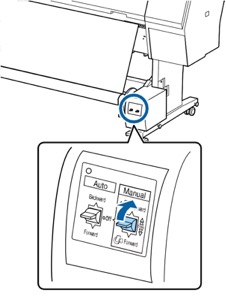
- If you are using the optional Auto Take-Up Reel, rewind the paper using the Manual switch.
- Firmly push down the lock lever on the roll paper holder to release it.
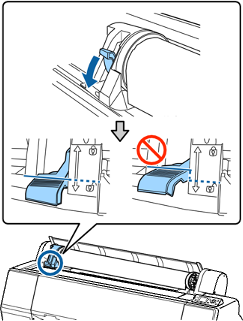
Note: Make sure you push the lock lever all the way down to unlock it completely. - Using the handle, slide the roll paper holder all the way to the left and remove it from the end of the roll.
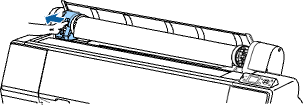
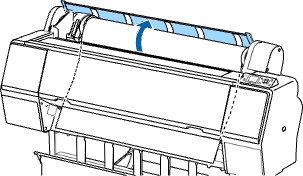
Note: Always use the handle when sliding the roll paper holder. - Roll the paper forward so that it rests on top of the printer.

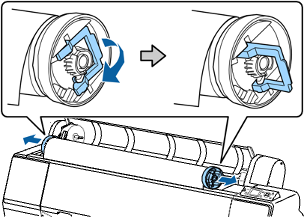
- Pull up the tension levers on the roll media adapters and remove the adapters from both ends of the paper roll.
- Rewind the paper carefully and place it in its original package.
Note: Store roll paper on its end or horizontally (if the packaging end-caps are installed). Never store roll paper on its edge, as a flat spot can develop and lead to imaging artifacts on the prints.
Feedback
To suggest an update to this article, ISU students, faculty, and staff should submit an Update Knowledge/Help Article request and all others should use the Get IT Help form.