Technology
Connecting to the ISUNet Wireless Network with Mac
Last modified 4/23/2026
This article describes how to automatically configure your computer for access to the ISU secure wireless network “isunet," or “eduroam” which is available throughout most of campus. If you have already configured your computer to the ISU wireless network for the current school year, you do not need to complete the following instructions, you should just select “isunet” or “eduroam” in the wireless network selection. However, if you are unable to connect, you can ‘forget’ the network and go through the following instructions.
The first time a user tries to access the network via a wireless connection, a process to ‘setup’ the computer is performed.
This process adds the required certificates to the personal computer which makes the computer eligible to access ISU network.
Note
To complete these instructions, you must be in a location where “isunet-StartHere” and “isunet” or “eduroam” are available.
- Simple Instructions
Automatically configuring your MacOS computer for “isunet” wireless access is easy. These simple instructions give you the basics. See the “Detailed Instructions” below for more in-depth steps.
- Select “isunet-StartHere” from the list of wireless networks provided.
- Launch a web browser, such as Chrome, or Safari.
- Follow the on-screen instructions.
Your computer will automatically be configured for “isunet” or “eduroam” wireless access. When the configuration is done, you will need to remove ‘isunet-StartHere’ from the Network Preferences.
- Detailed Instructions
To automatically configure your device to connect to “isunet,” do the following:
- Click on the wireless symbol from the menu bar. This is the Wi-Fi menu.
- If the wireless is not already on, click Turn Wi-Fi On.
- Select isunet-StartHere from the list of available wireless networks in the AirPort or Wi-Fi menu.
- Launch a web browser, such as Chrome or Safari, and navigate to https://wifisetup.ilstu.edu - you should be presented with the following (Figure 1).
Figure 1: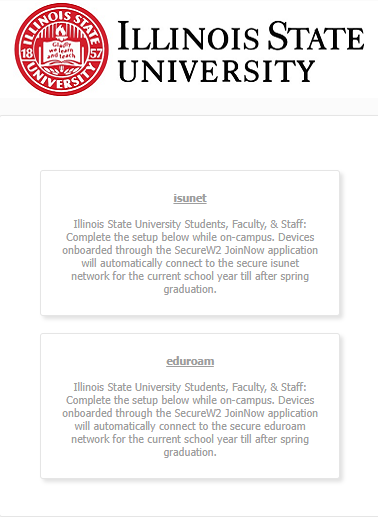
- You will be presented with two configuration options - one for eduroam and one for isunet. Both networks will provide the same level of access while you are on campus. Click the option for isunet. (See Figure 1 above).
- Click the button Join Now button to download the ilstu_wifisetup_.dmg file, which is needed to secure your access (See Figure 2).
Figure 2: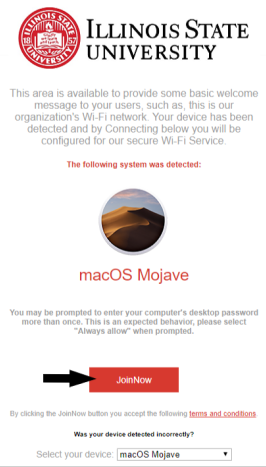
- Once downloaded, refer to the Downloads folder in your dock.
- Open the ilstu_wifisetup_.dmg file. You will receive a “ilstu_wifisetup_ is an app downloaded from the internet. Are you sure you want to open it?” from cloud.securew2com - click Open (Figure 3).
Figure 3: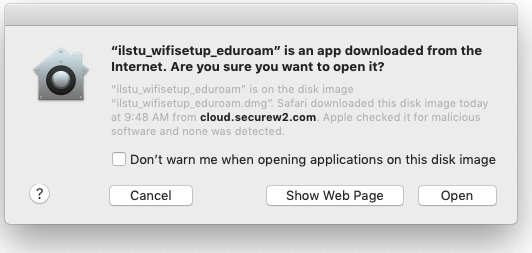
- The SecureW2 JoinNow MultiOS window will open to “We are now launching a separate dialog to continue sign-in through CentralLogin” (Figure 4), review the information, and then click the Next button.
Figure 4: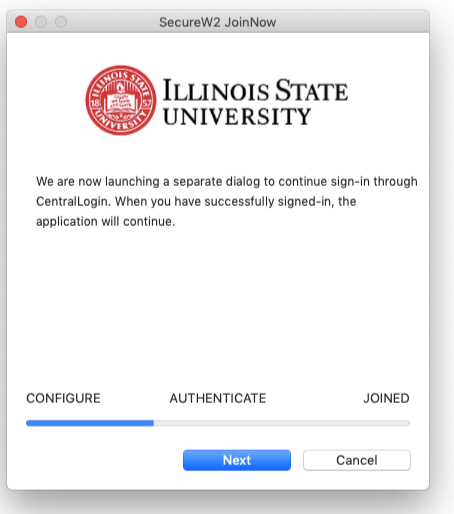
- Enter your ULID and password, and then click the Sign in button. SecureW2 will continue through the steps to secure your device.
- When informed that “ilstu_wifisetup_eduroam” wants to make changes, enter your computer’s user name and password, click the OK button (Figure 5).
Figure 5:
- As the JoinNow MultiOS application runs, you will be informed of more security dialogs you may have to step through and need to chose “Always Allow” (Figure 6).
Figure 6: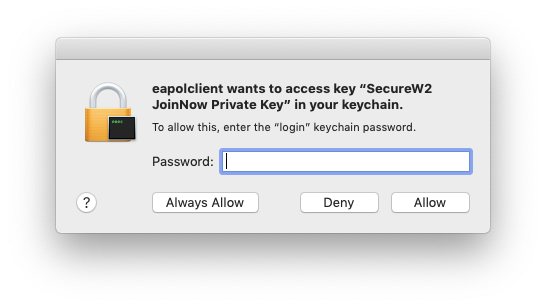
- Click Always Allow when prompted for eapolclient wants to access key “SecureW2 JoinNow Private Key” in your keychain (Figure 6 above).
- SecureW2 Join Now will then attempt to authenticate to “isunet” or “eduroam."
- Once SecureW2 completes the enrollment process and moves you over to isunet or eduroam. The dialog box will end with “Joined." Click Done to close out the dialog box. Your computer is now securely configured for wireless access for the current school year up to after Spring Graduation. Password changes will no longer disrupt your wireless access now that it has been configured with SecureW2, however, if your password expires then it must be changed before access will be restored
For more information on expired ULIDs, see: ULID Password Expiration
- Removing ISUNet-StartHere
- There’s still one step remaining, and that is to remove the “isunet-StartHere” wireless network
- Click on the Wireless Symbol on the menu bar at the top of the screen and select Network Preferences.
- Make sure “Wi-Fi” is selected and click the Advanced button (Figure 7).
Figure 7: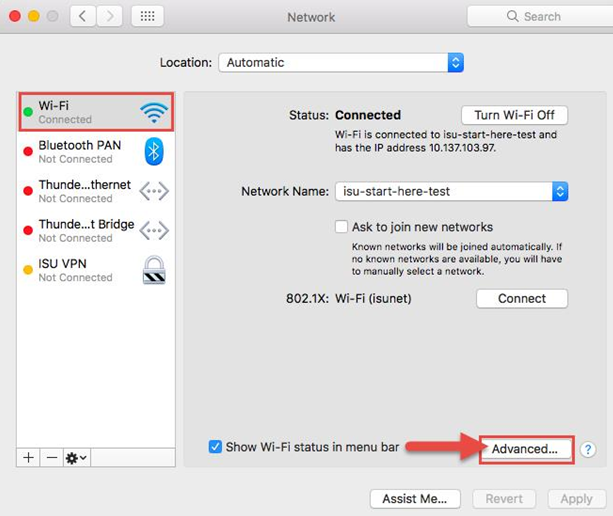
- Find 'isunet-StartHere' in the list of networks. Click to select it and then click the - minus button to remove it from the list (Figure 8).
Figure 8: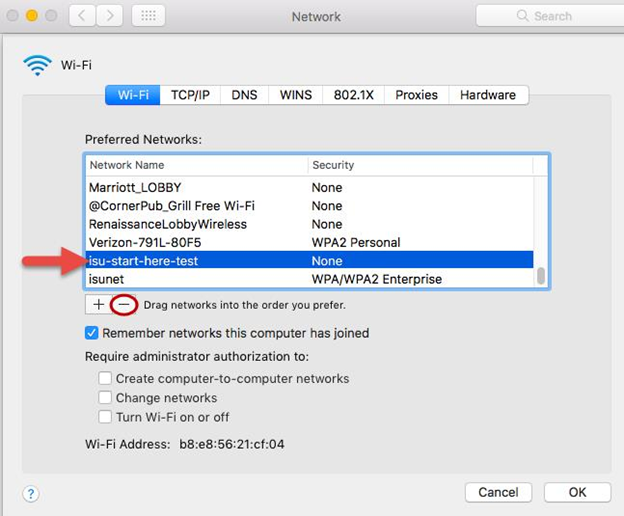
- Click the OK button.
- Turn your wifi off and then turn it back on and the machine should automatically connect to the “isunet” wireless network.
How to Get Help
Technical assistance is available through the Illinois State University Technology Support Center at:
- Phone: (309) 438-4357
- Email: SupportCenter@IllinoisState.edu
- Submit a Request via Web Form: Help.IllinoisState.edu/get-it-help
- Live Chat: Help.IllinoisState.edu/get-it-help
Feedback
To suggest an update to this article, ISU students, faculty, and staff should submit an Update Knowledge/Help Article request and all others should use the Get IT Help form.