Technology
How to Add the Zoom Plugin to Microsoft Outlook to Easily Schedule a Meeting
Last modified 11/20/2024
Overview
The Zoom Microsoft Outlook Plugin is designed to make scheduling a meeting in Microsoft Outlook quick and convenient. The Plugin allows you to schedule and start instant Zoom meetings, as well as make existing meeting events, “Zoom meetings”, all in the click of a button. The Outlook Plugin can also sync free/busy times to the Zoom Client based on your Outlook Calendar events (PC only, requires version 3.5 or higher - download the latest version).
Note
Due to new security protocol, the Outlook Plugin is only supported on Mac OS 10.14.1 and above. If you are running an older version, we recommend updating Mac OS, using the Office 365 (Outlook Web) Add-in, or disabling System Integrity Protection (SIP) on the operating system.
Prerequisites
- Windows: Microsoft Outlook 2010 or higher.
- Mac: Microsoft Outlook 2011 or higher
- You must have the Zoom client installed and be logged in to your account
- Install the Zoom Microsoft Outlook Plugin from Zoom
Before You Begin
In order to schedule a meeting in Zoom through your Outlook application, you must first download the Zoom Microsoft Outlook Plugin MSI file from Zoom’s download center. Once the download is complete, Run the MSI file and Follow the install wizard to complete the installation. If Outlook is running and you are running the install wizard, you will need to restart Outlook before using the plugin. If Outlook is not running and you’ve completed the download, simply start Outlook and the plugin will be installed; no need to restart your computer.
Scheduling A Meeting With the Plugin
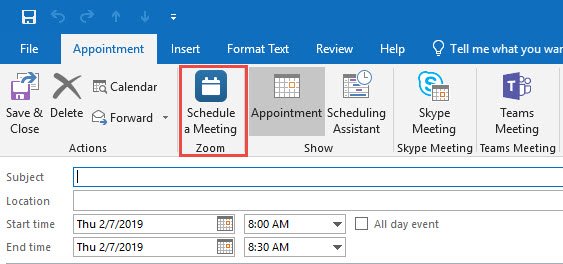
- 1.Select the Schedule a Meeting button (Figure 1)
- Figure 1

- Figure 1
- Use the Schedule a Meeting window to select your desired settings.
Figure 2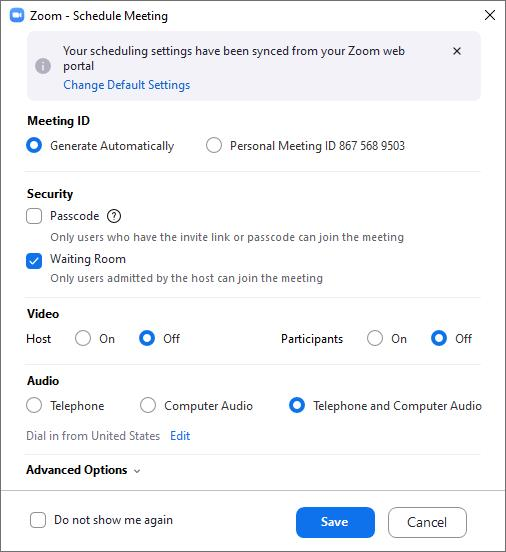
- Meeting ID: Meeting IDs are used to classify your meeting. As a Zoom user, you have your own unique Zoom ID. This option allows you to use a randomly generated ID or your unique Personal Meeting ID.
- Security: In this section, you can require a passcode for entry into the meeting, or you can enable a waiting room. By default, hosts are required to either have a waiting room or a passcode enabled to protect the meeting.
- Video: Here, you can enable/disable the camera for either the host or participants.
- Audio: Here, you can set the meeting audio to either telephone audio, computer audio, or both.
- Advanced Options: Here, you can set multiple different meeting options such as allowing participants to join at any time, muting upon entry, and more. We highly recommend you enable the Only authenticated users can join setting within advanced options so you can avoid unwanted guests from entering your meeting.
Click Save when you have enabled your desired settings. After clicking Save, Zoom will automatically fill out the details of the meeting in a pending email. You can set the meeting times as you see fit. Once you are satisfied with the meeting details, click Send. Your invitation will automatically generate with the Zoom meeting information. The user will receive an inbox notification prompting them to join the meeting
(See Figure 3)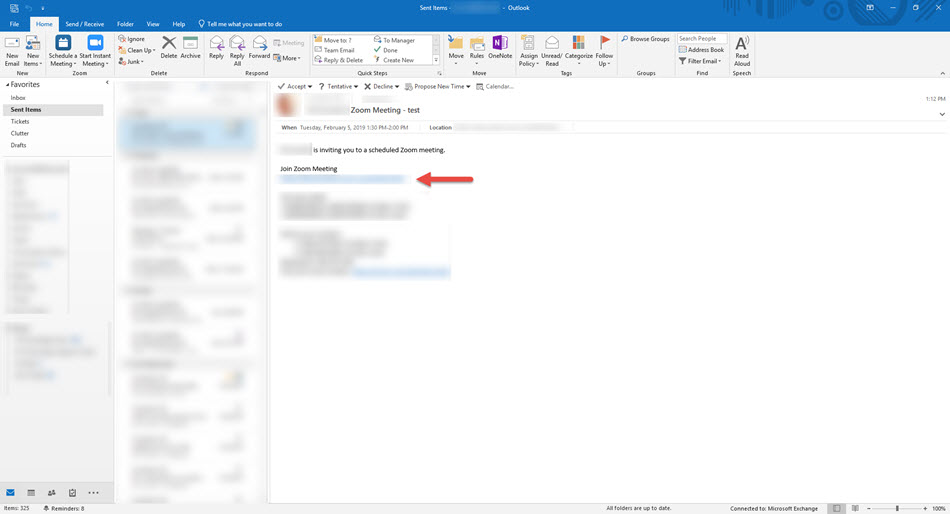
Note
You can cancel the Zoom meeting or change the settings of the Zoom meeting in the calendar invitation by selecting the corresponding buttons in the menu.
Making a New Calendar Invitation for a Zoom Meeting with the Zoom Plugin
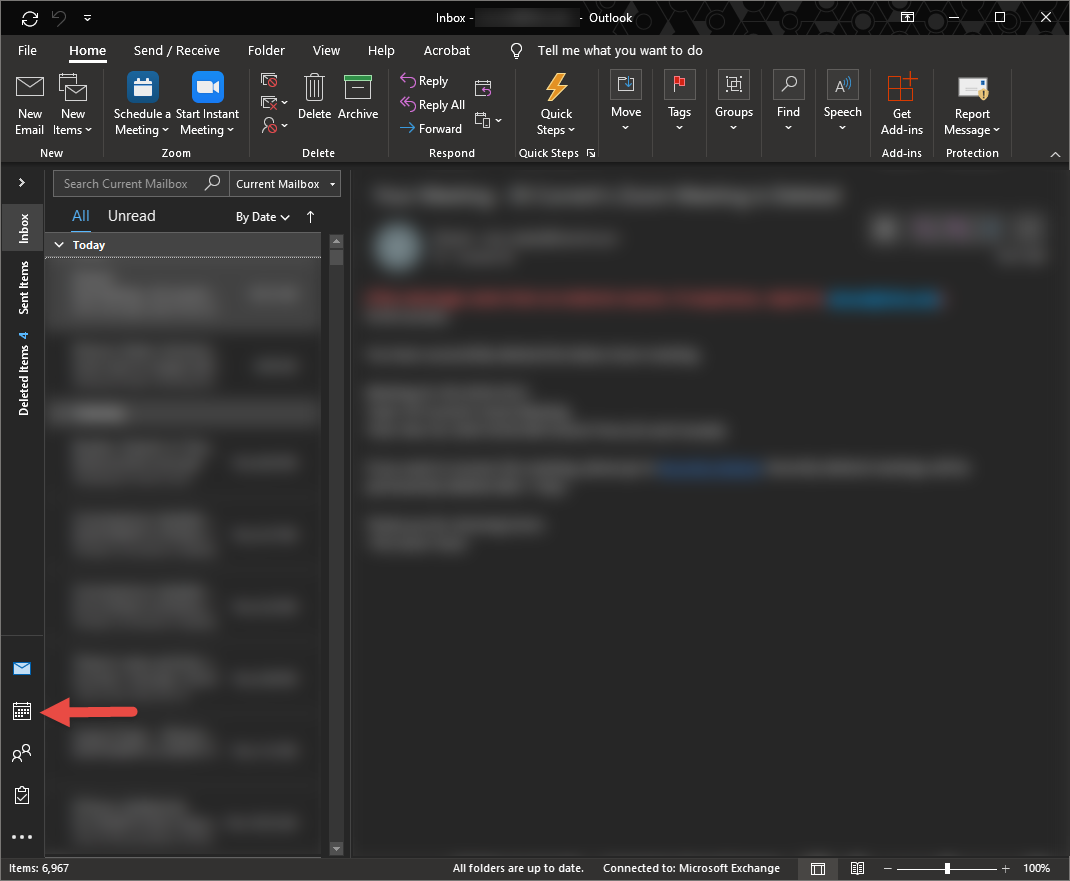
- Open your Outlook Calendar.
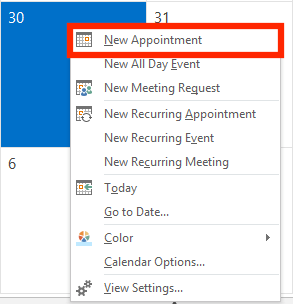
- Right-click the date/time desired and select New Appointment.
- Select the Schedule A Meeting Zoom button.
- If you select Schedule a Meeting, the settings window will appear with additional options. Select your desired settings in the settings window.

- Meeting ID: Meeting IDs are used to classify your meeting. As a Zoom user, you have your own unique Zoom ID. This option allows you to use a randomly generated ID or your unique Personal Meeting ID.
- Security: In this section, you can require a passcode for entry into the meeting, or you can enable a waiting room. By default, hosts are required to either have a waiting room or a passcode enabled to protect the meeting.
- Video: Here, you can enable/disable the camera for either the host or participants.
- Audio: Here, you can set the meeting audio to either telephone audio, computer audio, or both.
- Advanced Options: Here, you can set multiple different meeting options such as allowing participants to join at any time, muting upon entry, and more. We highly recommend you enable the Only authenticated users can join setting within advanced options so you can avoid unwanted guests from entering your meeting.
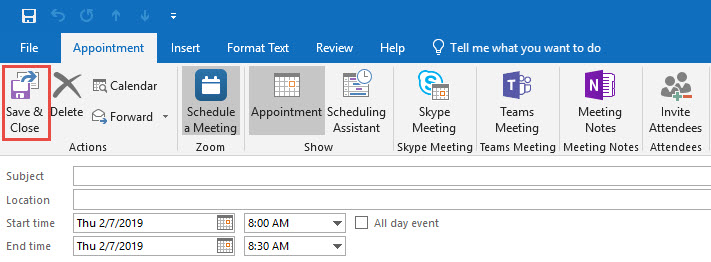
- Click Save when you have your desired meeting settings. You will set the time of the meeting in the Pop-up window in Outlook. Once the desired meeting times are set and the guests are invited, click Save and Close to schedule the meeting.
What If I Am Missing the Plugin Icon?
If you do not see the Schedule a meeting icon in the menu ribbon, open your Outlook options.
- Click File.
- Select Options on the left side
- Click Add-Ins
- Find Zoom Outlook Plugin
- Find the Manage option on the bottom of the window
- Select the option Disabled Items
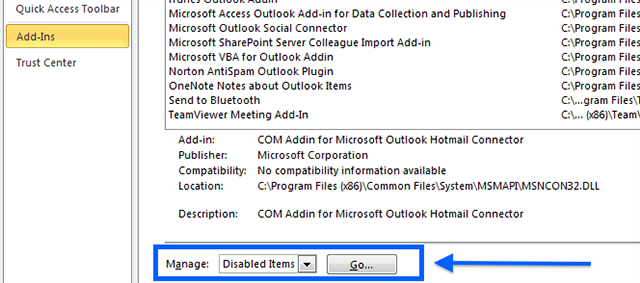
- Click Go and restart Outlook.
Need Technical Assistance?
Technical assistance is available through the Illinois State University Technology Support Center at:
- Phone: (309) 438-4357
- Email: SupportCenter@IllinoisState.edu
- Submit a Request via Web Form: Help.IllinoisState.edu/get-it-help
- Live Chat: Help.IllinoisState.edu/get-it-help
Feedback
To suggest an update to this article, ISU students, faculty, and staff should submit an Update Knowledge/Help Article request and all others should use the Get IT Help form.