Technology
Microsoft-Stream
Last modified 4/21/2026
Microsoft Stream (on SharePoint) is a video service that allows you to access your videos all in one place. Upload videos, camera record, screen record, share videos, and create video playlists.
Note:
If you are a faculty or staff member who used Stream Classic, the videos from there have been migrated into your OneDrive in a folder labeled: Stream Migrated Videos
Who has Access to Stream (on SharePoint)?
All users who hold an active ULID will be able to access Stream (on SharePoint).
How to Use Stream (on SharePoint)
- Access your Stream (on SharePoint) account
To access your Stream (on SharePoint) account
- Log in to the Illinois State Microsoft Portal via Central Login.
- For more information about Central Login at ISU, please refer to: Central Login
- Look for the Stream icon on the left-hand menu.
- If you don’t see the icon, select the Apps icon at the upper-left of the page (this icon looks like three rows of three dots each). This will open the Apps page. On this page, click the All apps hyperlink.
- This will open the All apps page. On this page,click the Streams icon. This will open your Streams page.
- Upload a video
To upload a video
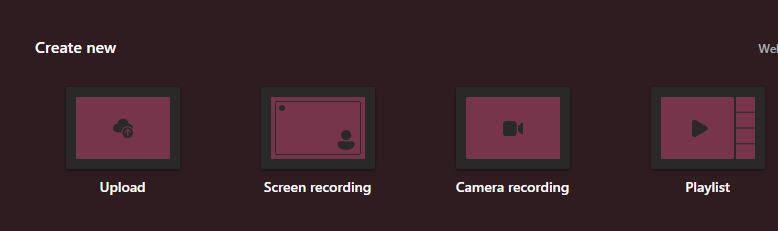
- Select the Upload button under the Create new heading.
- This will open your File Explorer window. Select the file to upload into Streams.
- Select the Open button.
- A pop-up will appear that says Upload to. The default location is OneDrive, but you have the option to change the location by selecting the Change location link.
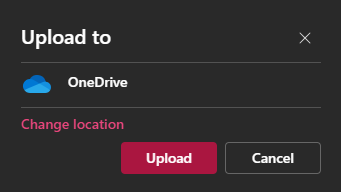
- Select the Upload button.
- A pop-up will appear that says Upload to. The default location is OneDrive, but you have the option to change the location by selecting the Change location link.
- The file will upload. If you stay on the page, you will see an Upload Complete notification in the lower right corner.
- Screen Recording
To screen record a new video
- Select the Screen recording button under the Create new menu.
- A pop-up will appear asking to be able to use your camera. Choose one of the following: Allow this time or Allow on every visit
- Select Start screen recording in the middle of the page when you are ready to begin recording.
- You can choose to record just screen, video, or audio from this screen.
- You can also choose to have a small video recording of yourself with your screen recording.
- Select what you want to screen record: a specific window, browser tab, or the entire screen
- Select Share.
- Select the red square in the middle bottom to stop recording.
- Select Review >
- Select Finish >
- Your video will now be in your video library.
- Camera Recording
To camera record a new video
- Select the Camera recording button under the Create new menu.
- A pop-up will appear asking to be able to use your camera choose one of the following: Allow this time or Allow on every visit
- Select the large circle in the middle bottom of the video box to begin recording. You can choose to record just screen, video, or audio from this screen as well.
- Select the red square to stop recording.
- Select Review >
- Select Finish >
- Your video will now be in your video library.
- Create a Playlist
To create a new playlist
- Select the Playlist button under the Create new menu.
- Type a title for your playlist under Name.
- Write a description for your playlist under Description.
- Choose where to save your playlist through the dropdown under Save to.
- Select the Create button.
- Select the +Add new item button at the upper left of the screen.
- Select the file(s) that you want in the playlist.
- Select the Select button.
- Your playlist has been created and can be viewed under Playlists on your Stream (on SharePoint) video library.
- Embed or Share a Video
To get the options for sharing or embedding a video
- Click on the video to open it.
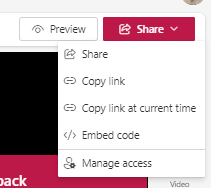
- Click the Share button in the upper right corner. This will open a dropdown menu.
To Share
- Select the Share link.
- Type in the individuals' names, emails, or groups in the Add a name, group, or email textbox.
- (Optional) Write a message in the Add a message textbox.
- Select the Send button.
- Alternatively, select the Copy link button.
- Select Accept from the pop-up window if you need to allow things to be saved to your clipboard.
- Select the Settings icon next to the Copy link button if you want to change who is able to view the link. This will open the Link Settings window. Use this window to select with whom you would like to view the window.
Additionally, use the dropdown menu under More settings to change the users' access. Choose if users will be able to edit videos, view videos, or can't download videos. - Select the Apply button.
To Embed
- Select Embed code.
- This will open the Embed menu. Select the settings for your video.
- Copy the embed code by selecting all of the code in the Embed Code textbox.
- Right click your mouse. In the menu that appears, select Copy. Alternatively, click Ctrl+C on your keyboard.
- Paste the embed code in your Canvas course (or where the video will be displayed).
- Access Video Settings
To access the video settings
- Click on the video to open it.
- Select the Video Settings icon from the right side menu.

- This will open the Video settings menu, which contains various fields that can be used to customize your video settings. The fields include the following:
- Thumbnail image
- About video
- Transcript and captions
- Chapters
- Interactivity
- Comments
- Analytics
- Noise suppression
- Audio files
How to Get Help
Technical assistance is available through the Illinois State University Technology Support Center at:
- Phone: (309) 438-4357
- Email: SupportCenter@IllinoisState.edu
- Submit a Request via Web Form: Get IT Help Form
- Live Chat: IT Help Live Chat
Feedback
To suggest an update to this article, ISU students, faculty, and staff should submit an Update Knowledge/Help Article request and all others should use the Get IT Help form.