Technology
Create Personalized Links in Qualtrics
Last modified 4/16/2026
Personalized links can be created in Qualtrics for each email address in a created directory. These links can be used by each individual in a directory instead of sending out a Qualtrics generated URL that can be accessed by anyone.
Additionally, these links can be used to track the progress of each respondent.
Personalized links can be sent out directly from Qualtrics. Alternatively, you can send each personalized link to each person individually through Outlook or another mail service by copying/pasting each link to each individual email message or using mail merge.
Before You Begin
First, create and publish your Qualtrics survey.
Additionally, create a directory of email addresses of the respondents who will be answering the survey.
Survey Access
If you only want respondents with personalized links to access the survey, follow these steps so that respondents who are not in your directory cannot access your survey: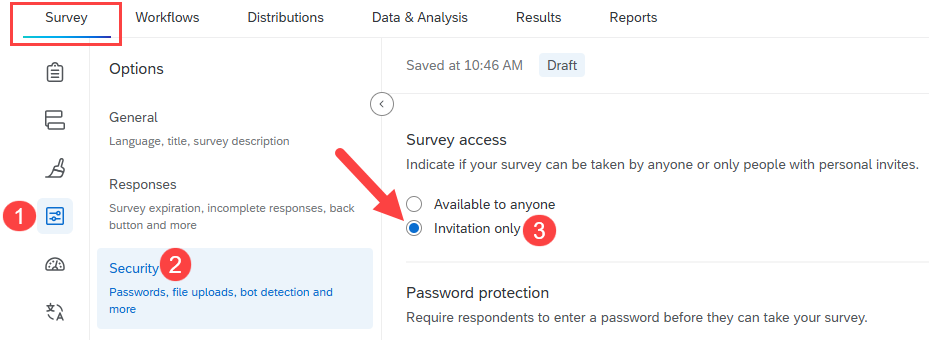
- Open your Qualtrics project and in the "Survey" tab, select the Options icon on the left side of the screen.
- In the "Options" menu that appears, select Security.
- In the "Survey access" field, click the radio button next to Invitation Only.
This step will disable the general Qualtrics generated link, which will prevent respondents without personalized links from accessing your project.
Create a Directory in Qualtrics
Set up a directory that contains the email addresses of respondents that will be receiving the personalized links.
*Note: If a survey will not be sent from Qualtrics, a directory will still need to be created. Qualtrics is required to have an email address to attach the unique URL.
By Spreadsheet
- Open a web browser.
- Navigate to the Qualtrics website.
- Select the Main Menu icon in the upper left corner of the screen.
- In the dropdown menu that appears, select Directories.
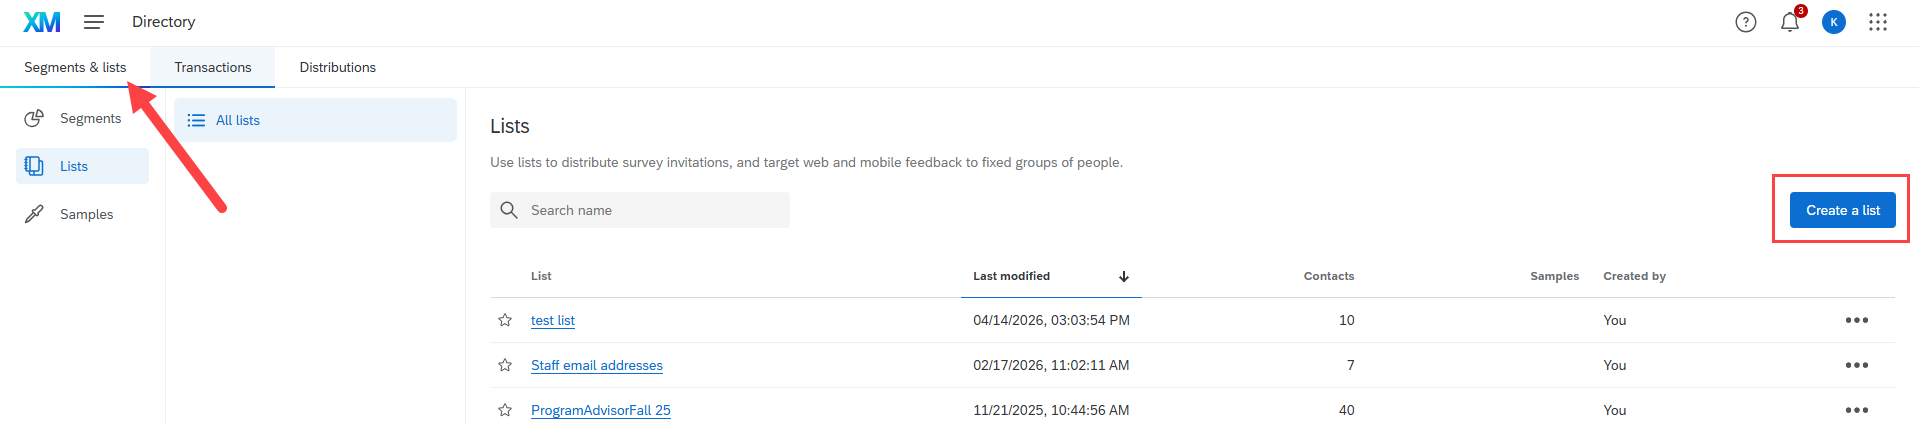
- This will open the "Summary" tab of the "Directories" page. Select the Segments & lists tab at the top of the screen.
- This will open the "Segments & lists" page. Click the Create a list button.
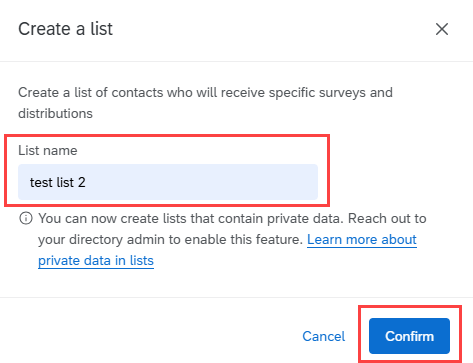
- In the "Create a list" window that appears, enter a name for your directory in the "List name" field.
- Click the Confirm button.
- This will open your newly created directory. Two buttons will be on the screen: "Upload a file" and "Manual input". To create a directory using a spreadsheet, select the Upload a file button.
- If you need to create a spreadsheet, follow steps #11-#15. If you already have a spreadsheet, skip to step #16.
- First, select the Download a sample template link.
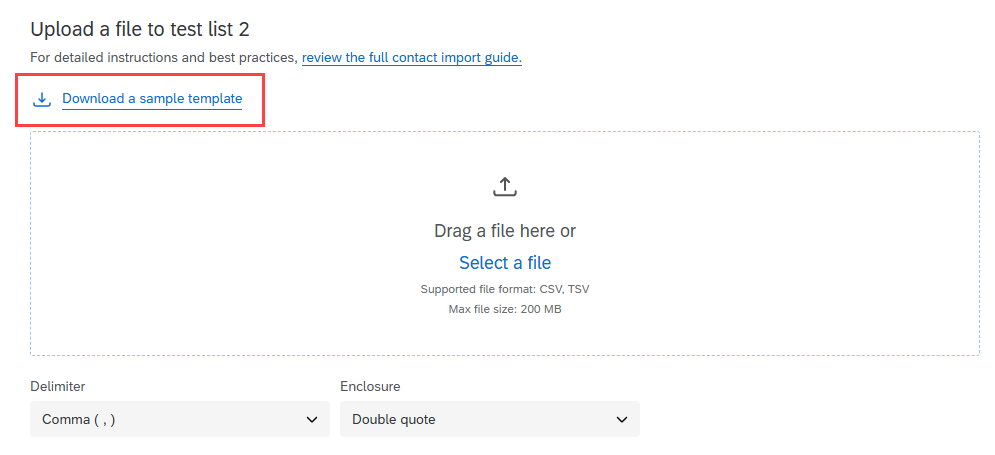
- This will download a sample .csv spreadsheet. Open this spreadsheet.
- The spreadsheet contains the template set by Qualtrics. The only required columns are: "FirstName", "LastName", and "Email". You can use any of the other columns in this sheet.
Remove any columns you do not need. Then, delete the sample names and email addresses. - Fill in the first names of the respondents in the "FirstName" column.
Fill in the last names of the respondents in the "LastName" field.
Fill in the email addresses of the respondents in the "Email" column.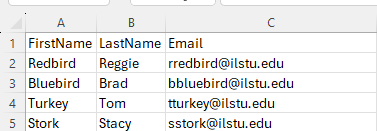
- Save your file.
- In the "Upload" page in Qualtrics, drag and drop your csv file with the email addresses in the "Drag a file here or Select a file" area.
Alternatively, click the Select a file link and use the "File Explorer" window to select the spreadsheet containing the email addresses. - Click the Next button.
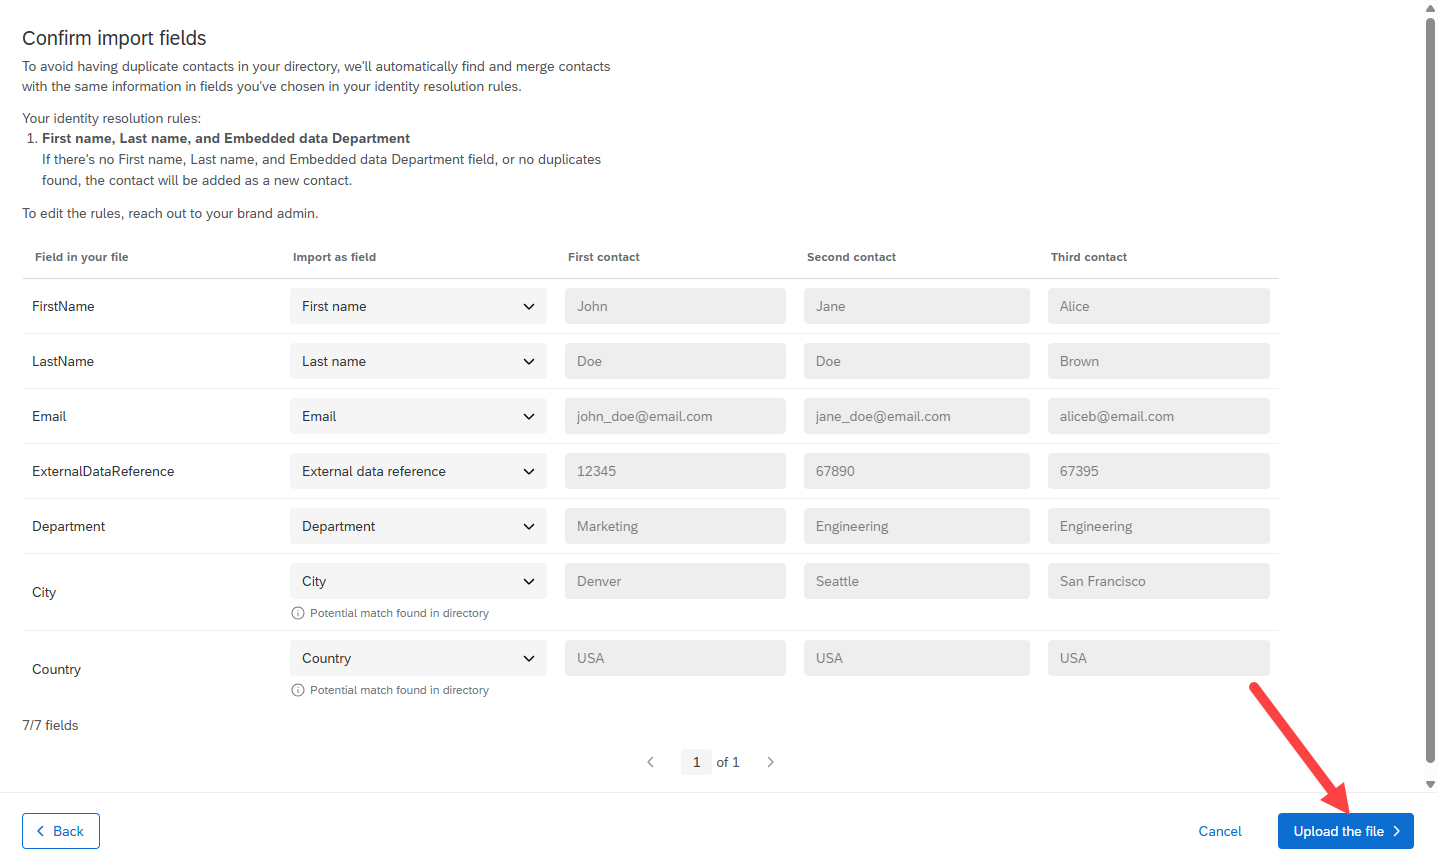
- In the "Confirm import fields" page that displays, click the Upload the file button.
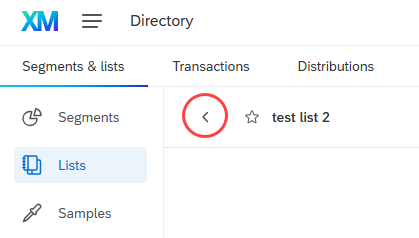
- Once all the email addresses have been uploaded, this will return you to the "Upload" page. Click the back button next to your list name at the upper left of the screen. This will return you to your main "Directories" page.
Manually
- Open a web browser.
- Navigate to the Qualtrics website.
- Select the Main Menu icon in the upper left corner of the screen.
- In the dropdown menu that appears, select Directories.
- This will open the "Summary" tab of the "Directories" page. Select the Segments & lists tab at the top of the screen.
- This will open the "Segments & lists" page. Click the Create a list button.
- In the "Create a list" window that appears, enter a name for your directory in the "List name" field.
- Click the Confirm button.

- This will open your newly created directory. Two buttons will be on the screen: "Upload a file" and "Manual input". To manually enter email addresses into a directory, select the Manual input button.
- In the table that appears, the only required columns are: "First name", "Last name", and "Email". You can record information in any other columns that you would like to fill out.
-Fill in the first names of the respondents in the "First name" column.
-Fill in the last names of the respondents in the "Last name" field.
-Fill in the email addresses of the respondents in the "Email" column.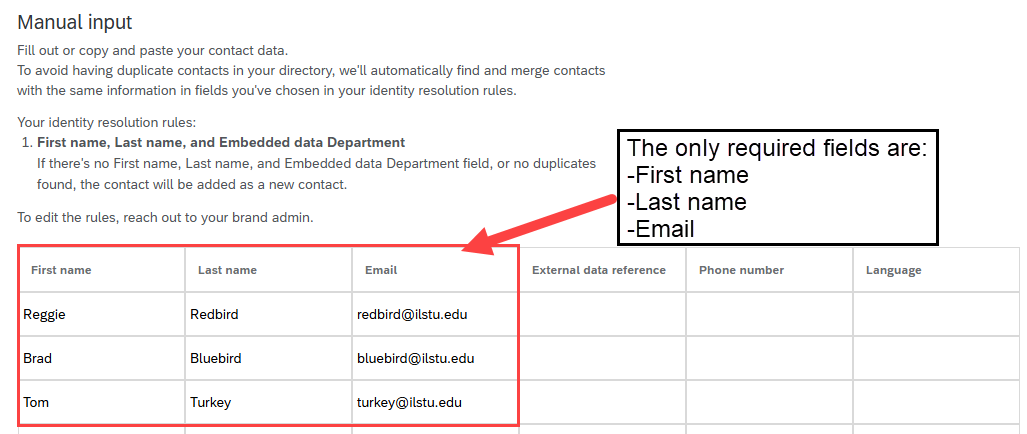
- Click the Next button.
- Once all the email addresses have been uploaded, click the back button next to your list name at the upper left of the screen. This will return you to your main "Directories" page.
Once your directory has been created, you can now send your survey to those in your newly created directory.
Create and Send Personalized Links in Qualtrics
After creating and publishing your Qualtrics project, follow these steps to send out emails from the Qualtrics site to respondents that contain personalized survey links:
- Navigate to the Qualtrics website.
- Open the Qualtrics project for which you would like to send out personalized links.
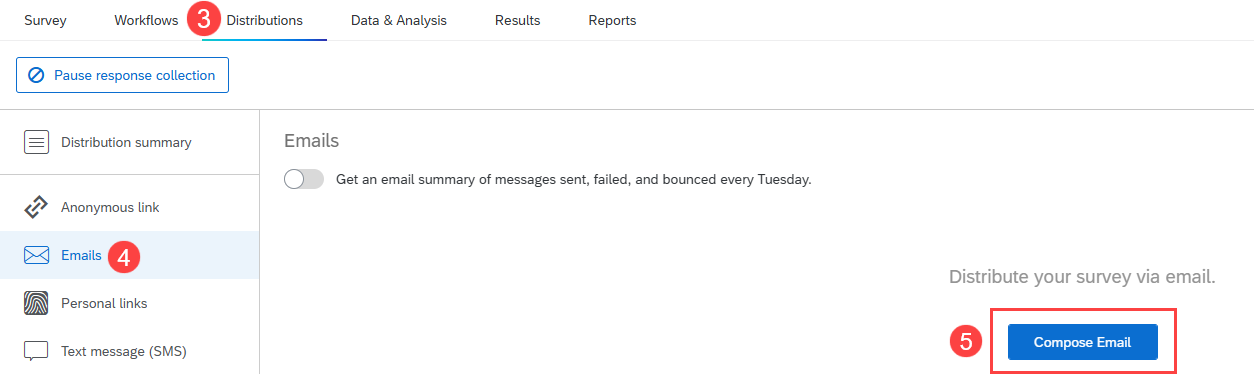
- Select the Distributions tab at the top of the screen.
- On the left side of the screen, select Emails.
- Select the Compose Email button.
- In the "Compose Email" window that appears, fill out the required fields.
In the "To" field, select the name of the directory that contains the email addresses of those who will be filling out the survey.
If needed, change the email address(es) and name in the "From" field.
Select when the email will be sent out in the "When" field. Choose Custom... to specify an exact date and time when the email will be sent out.
Enter a subject for the mail in the "Subject" field.
(Optional) If you have an email message written out already and stored in the library, use the Load Message dropdown menu to select the prewritten message.
The textbox will contain the unique, personalized URL for the respondent. Add any additional information or email message to this message.
- Click the Send button.
Check on Progress of Respondents Via Qualtrics Emails
Once emails with personalized links have been sent out from Qualtrics, you can view the progress of the respondents you have sent this out to.
- Navigate to the Qualtrics website.
- Open the Qualtrics project for which you would like to send out personalized links.
- Select the Distributions tab at the top of the screen.
- On the left side of the screen, select Emails.
- On this page, a row will be displayed containing the name of the directory you used to send out emails containing personalized links. Click on the down arrow at the end of this row.
- In the dropdown menu that displays, select Download history.

- This will download a .csv file. Follow your browser's download directions to download the file.
- This file will contain a list of email addresses, first and last names, and their corresponding personalized survey links.
Additionally, this file contains the "Status" column. This will contain the statuses of the respondents. The choices are:
-Email Sent - Email with the personalized link was successfully sent out.
-Survey Started - Respondent has started the survey, but did not finish.
-Survey Finished - Respondent has submitted their survey results.
Create Personalized Links in Qualtrics Only
After creating and publishing your Qualtrics project, follow these steps to simply create personalized survey links. These links will then need to be sent out to the respondent by the email distribution of your choice (individually in Outlook or sending each link in the group using mail merge).
- Navigate to the Qualtrics website.
- Open the Qualtrics project for which you would like to send out personalized links.
- Select the Distributions tab at the top of the screen.
- On the left side of the screen, select Personal links.
- Click the Generate Links button.

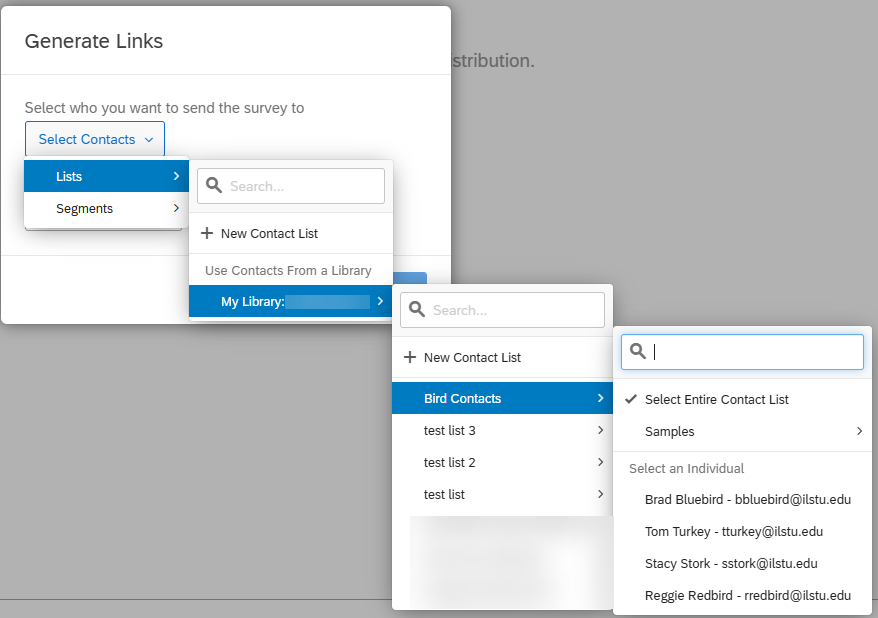
- In the "Generate Links" window that appears, use the Select Contacts dropdown menu to select the directory for which a personalized link will be created for each respondent/email address.
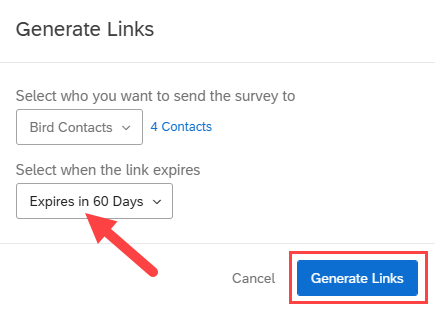
- Use the dropdown menu in the "Select when the link expires" field to indicate when the link will expire.
- Then, click the Generate Links button.
- This will return you to the "Personal Links" screen. A row will be displayed, showing the name of the directory used, along with more information about the survey (created date, number of surveys started, number of surveys finished, etc.).
A .csv spreadsheet will be created containing the created links. Depending on the browser you're using, use the browser's download directions to download the file.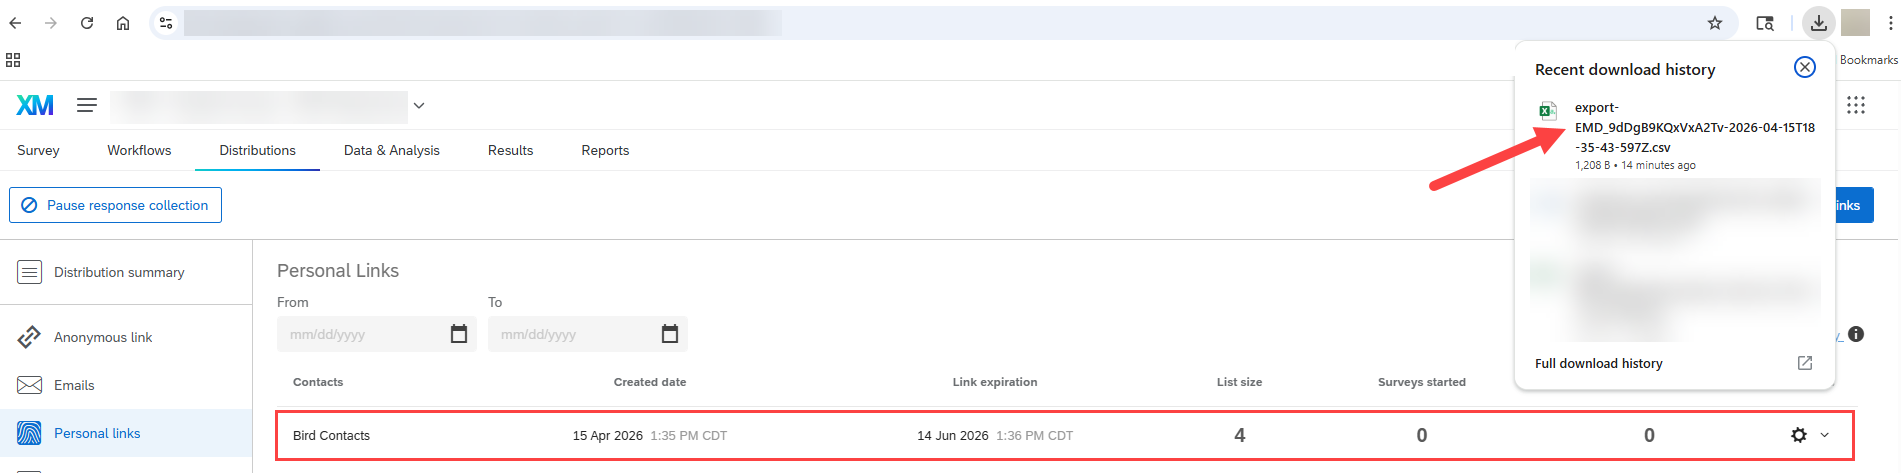
- This will open a spreadsheet containing the name, email address, and the corresponding unique survey link. Additionally, view the "Status" column to determine if the email was successfully sent.

Once completed, these survey links can be sent to each corresponding respondent. Only the respondent with whom the unique link is connected to their email address can open the corresponding link.
Check on Progress of Respondents Via Personalized Links
Once personalized links have been created, view if each respondent has started or finished the survey.
- Navigate to the Qualtrics website.
- Open the Qualtrics project for which you would like to send out personalized links.
- Select the Distributions tab at the top of the screen.
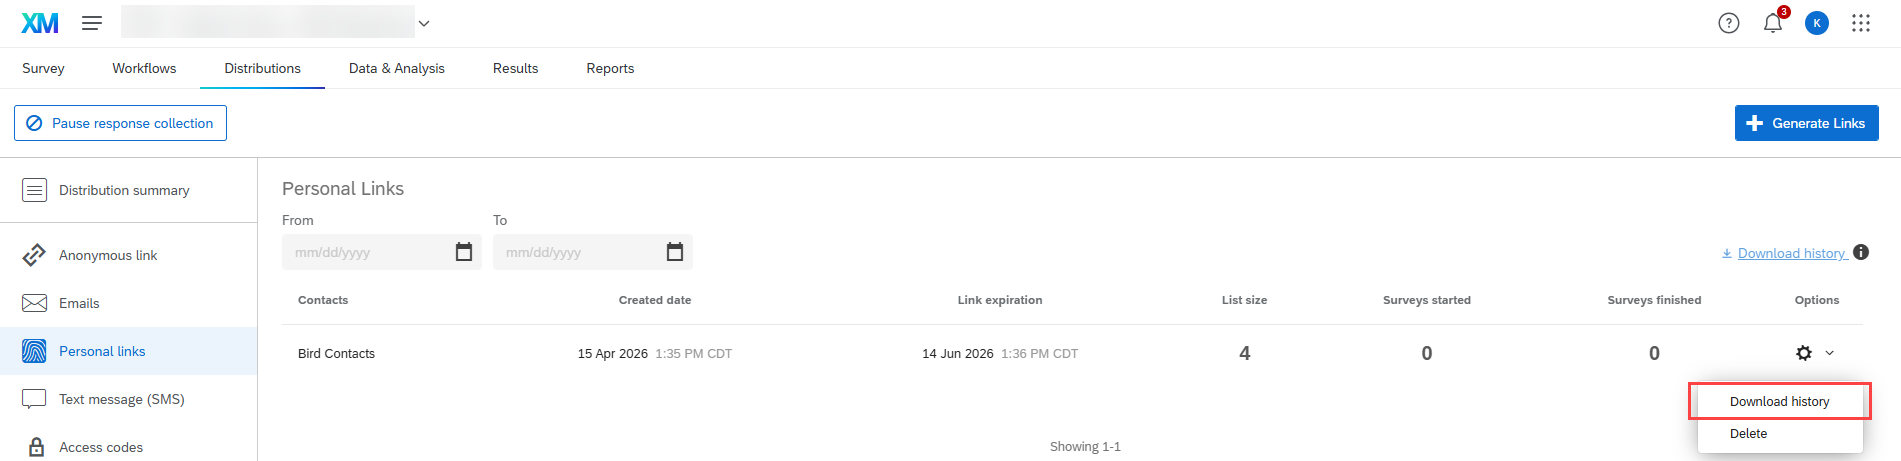
- On the left side of the screen, select Personal links.
- On this page, a row will be displayed containing the name of the directory you used to send out emails containing personalized links. The numbers in the "Surveys started" and "Surveys finished" columns will provide a number indicating how many surveys have been started and finished.
Click the down arrow at the end of this row. - In the dropdown menu that displays, select Download history.
- This will download a .csv file. Depending on the browser you're using, use the browser's download directions to download the file.
- This file will contain a list of email addresses, first and last names, and their corresponding personalized survey links.
- Additionally, this file contains the "Status" column. This will contain the statuses of the respondents. The choices are:
-Email Sent - Email with the personalized link was successfully sent out.
-Survey Started - Respondent has started the survey, but did not finish.
-Survey Finished - Respondent has submitted their survey results.
Once the respondent has started or completed the survey, the progress they've made will be in this spreadsheet.
How to Get Help
Technical assistance is available through the Illinois State University Technology Support Center at:
- Phone: (309) 438-4357
- Email: SupportCenter@IllinoisState.edu
- Submit a Request via Web Form: Get IT Help Form
- Live Chat: IT Help Live Chat
Feedback
To suggest an update to this article, ISU students, faculty, and staff should submit an Update Knowledge/Help Article request and all others should use the Get IT Help form.