Technology
Schedule Builder
Last modified 9/10/2026
HighPoint Schedule Builder helps students plan class schedules by displaying available course sections and generating schedule options based on their selections and preferences Schedule Builder is used to explore possible schedules before registering for classes. You can compare schedule combinations, review meeting times and locations, identify conflicts, and select the option that works best for you and your individual schedule.
HighPoint Schedule Builder
- What can I do in Schedule Builder?
HighPoint Schedule Builder allows you to:
- Search for courses and available sections
- Add courses to your schedule plan
- Generate several possible course schedule combinations
- Filter course schedule results by days, times, locations, or instruction formats
- Block off times when you do not want to take classes
- Compare different course schedule options
- Review course details, prerequisites, and enrollment requirements
- Save or favorite course schedules for later
- Add selected sections to your shopping cart
Some features may only be available during designated registration periods.
- Accessing Schedule Builder
To access Schedule Builder, please follow the below instructions:
- Sign in to Campus Solutions
- Navigate to the Manage Classes tile in your Student Center
- If you don't see the Manage Classes tile, make sure you have Student Center selected in the top left of Campus Solutions.
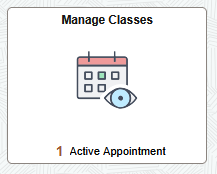
- If you don't see the Manage Classes tile, make sure you have Student Center selected in the top left of Campus Solutions.
- Select Schedule Builder from the list on the left
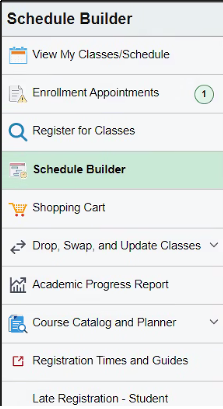
- Choose the academic term you would like to plan for and start building your class schedule!
- Before You Begin
Schedule Builder can help you identify possible schedules, but it does not guarantee enrollment in a course or section. Course availability may change as other students register.
Before using Schedule Builder:
- Review your assigned enrollment appointment or registration date.
- Resolve any registration holds that may prevent enrollment.
- Confirm that you meet the prerequisites and enrollment requirements for your courses.
- Review any recommendations provided by your academic advisor.
- Make sure you are planning for the correct academic term.
- How to use Schedule Builder
1. Select Term and Courses
Use the Term menu to choose the semester or session you would like to plan a schedule for. Make sure the correct term is selected before adding courses or changing filters. Course availability, class status, sessions, and schedule options are based on the selected term. (see Figure 1, below)
2. Review or Adjust filters/preferences
Schedule Builder includes filters that help narrow the courses and sections shown in your schedule results.
You can use the filters before adding courses, or you can adjust them later if you need to broaden or refine your results. Filters include: (Figure 1)
- Personal Availability
- Unavailable Times
- Minimum Break Period
- Global Filters
- Class Status (Open, Wait List, etc)
- Academic Session (Regular, eight week, etc.)
- Instruction Mode (In-person, online, hybrid, etc)
- Career (Undergrad, Graduate, Continuing education, etc.)
- Section Filters
- Course Attributes / Course Values
- Course Filters
- Course Subject
- Course Number
Figure 1: (Schedule Builder Filters)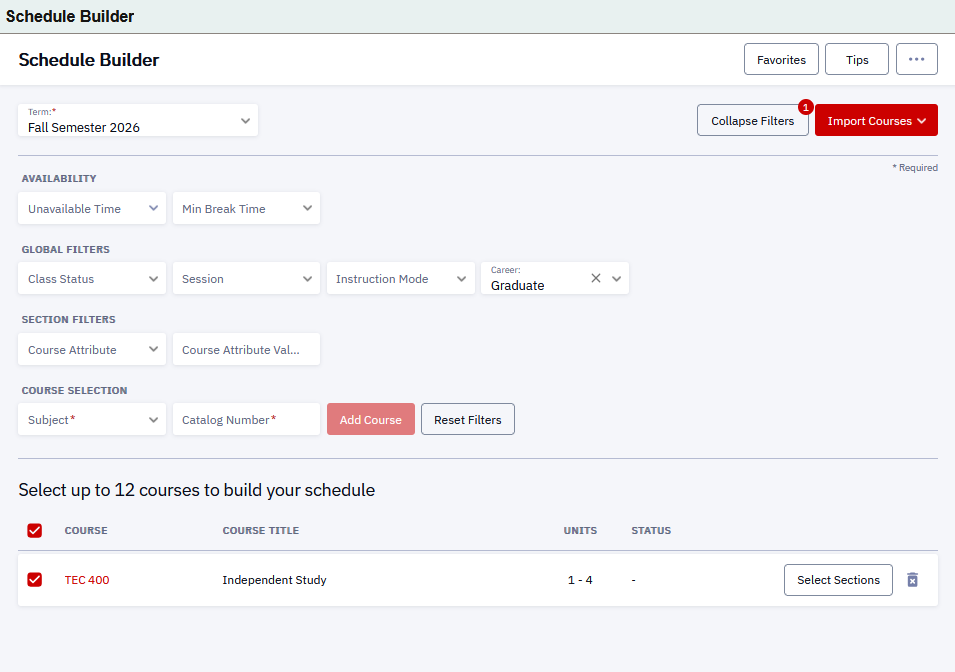
3. Add Courses
Use the Course Selection area to add courses manually.
- Select a Subject
- Enter or select the Catalog Number
- Select Add Course (You may add up to 12 courses to build your schedule)
The course will appear in the course list below the filters.
4. Generate Schedule Options
After selecting your term, filters, and courses, continue to generate schedule options by pressing the red [Build Schedule] button at the bottom of the page. (Figure 2)
Schedule Builder will use the courses selected in your course list (along with any of your filters and unavailable times) to generate schedules that fit your selected parameters.
Review each schedule option carefully before continuing to registration. Please Note, a generated schedule is only a planning tool and does not guarantee course enrollment.
Figure 2: (building a schedule with your selected parameters after pressing the Build Schedule button)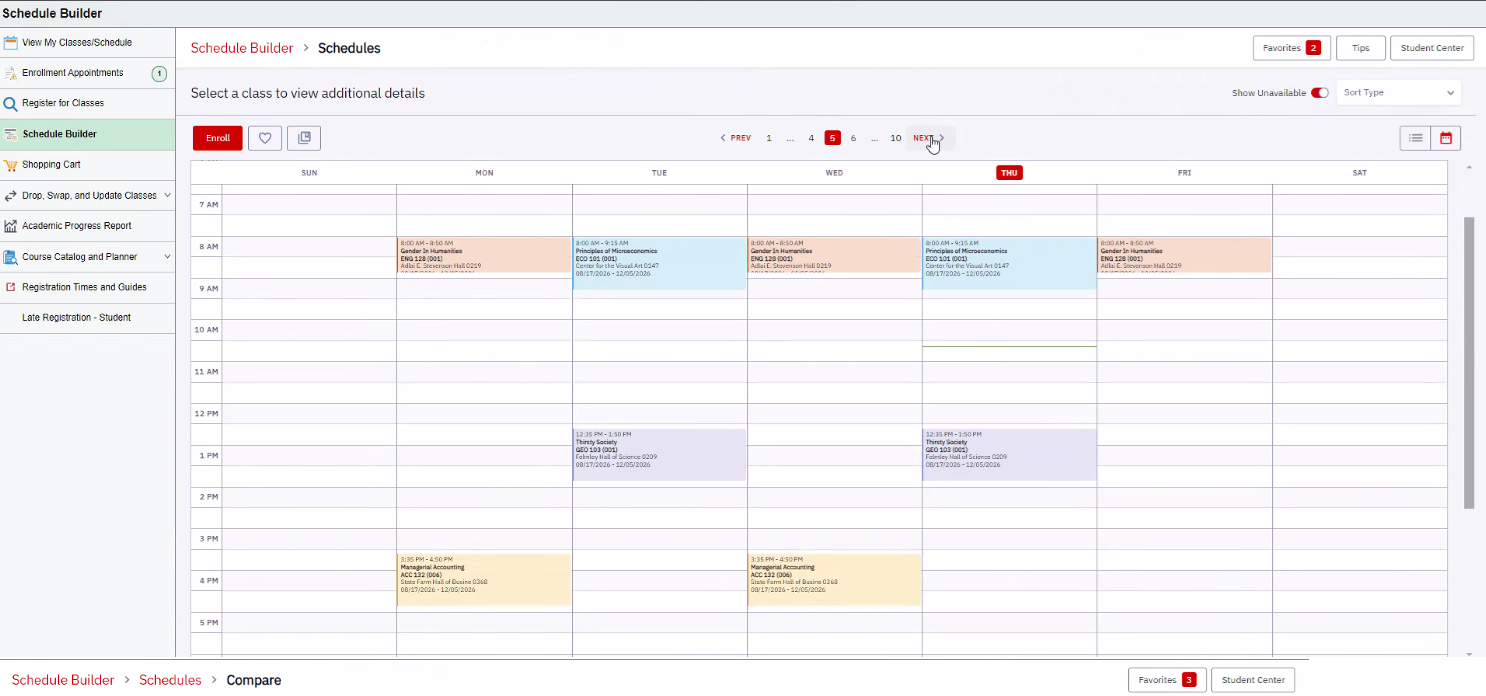
5. Comparing Different Schedule Options
You can also compare different schedules with your selected parameters in Schedule Builder. After Schedule Builder generates schedule options, you can review the available schedules to decide which option works best for you.
Each generated schedule may include the same selected courses arranged in different section combinations. Make sure to review each option carefully before adding a schedule to your shopping cart or continuing to enrollment for your selected courses.
When comparing schedule options, review:
- Class meeting days and times
- Instruction mode, such as in person, online, hybrid, or other available formats
- Class locations or campuses
- Instructor information, when available
- Breaks between classes
- Travel time between class locations
- Course units
- Section availability
- Required related components, such as labs, discussions, or recitations
- Any warnings, restrictions, or enrollment messages
Compare options side by side
If multiple schedule options are available, compare them before making a selection. Consider which schedule best fits your academic needs and personal commitments. For example, one schedule may have fewer gaps between classes, while another may offer preferred instructors, locations, or instruction modes. You can view an example of the comparison below (Figure 3)
Figure 3: (Comparing different schedules in Schedule Builder)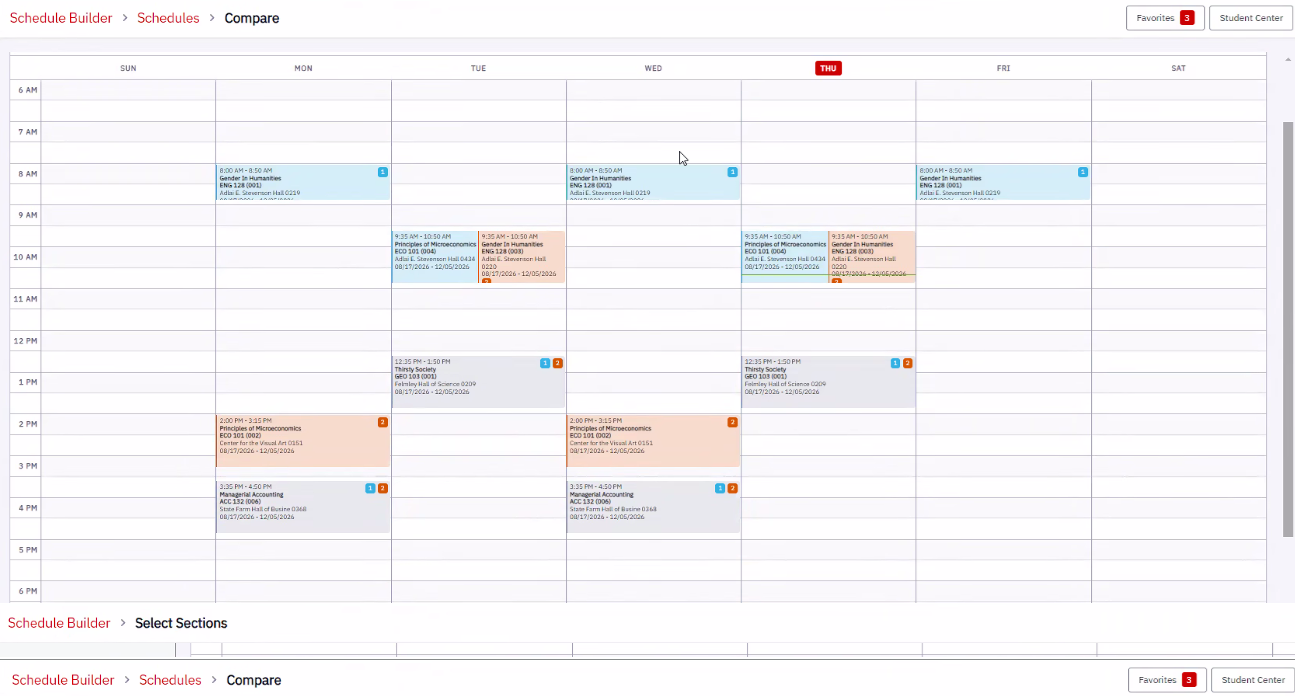
NOTE:
The “best” schedule is not always the one with the shortest day. Check the full schedule before selecting an option, a compact calendar can still hide a cross-campus sprint if you're not careful!
Save or favorite a schedule
You can also use Favorites (Figure 4) or the save option to keep a schedule you like for later review. Saving or favoriting a schedule does not reserve seats and does not enroll you in classes. Course availability can change before you complete registration.
Figure 4: (The favorite button - heart symbol)
Select a schedule
Review all course and section information before continuing. Make sure the schedule includes the correct term, courses, sections, units, and meeting times.
- Schedule Builder Walkthrough Video
Video Demonstration
The video below provides a step-by-step walkthrough of how to use Schedule Builder.
How to Get Help
Technical assistance is available through the Illinois State University Technology Support Center at:
- Phone: (309) 438-4357
- Email: SupportCenter@IllinoisState.edu
- Submit a Request via Web Form: Get IT Help Form
- Live Chat: IT Help Live Chat
Feedback
To suggest an update to this article, ISU students, faculty, and staff should submit an Update Knowledge/Help Article request and all others should use the Get IT Help form.