Technology
Create a Profile in Achieve
Last modified 8/26/2026
To set up appointment hours in Achieve, you are required to first create a profile.
Before You Begin
Achieve is a web-based application that allows you to sync appointments with your Outlook calendar.
Access to Achieve is required before you create a profile in Achieve. You also need to create a profile in Achieve before you can create appointment hours. For more information, see Achieve.
Creating a Profile in Achieve
- Log in to Achieve with your ULID (the first part of your email address before @ilstu.edu) and your ISU password.
- Expand the Staff menu on the left side of the screen using the plus ( + ) sign.
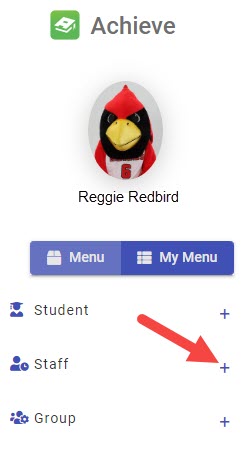
- In the expanded Staff menu, select Edit Staff Profile. This will open the Edit Staff Profile page.
- In the Select Staff (advisor/tutor/counselor/faculty) search bar on this page, search for your name.
- Your name will appear in a dropdown menu below the search bar. Select your name. This will open the form that contains the fields that will be used to create your profile.
- First, click the Edit button at the top of the screen.
- Complete the fields in this form.
- To add a photo to your profile, follow these steps:
- In the User Photo field, click the Select files... button. *Note: Ensure that your photo has a size of 400KB or less.
- In the File Explorer window that appears, navigate to and select the photo you would like to display in your profile.
- Click the Open button.
- The File Explorer window will close and the selected photo is now displayed in the User Photo field.
- Select the checkbox next to Publish photo online to display your photo in your profile.
Not Using "Staff SMS/Text Messages" Feature
Please note that we do not utilize the Staff SMS/Text Messages feature. Do not enter text messages here because they will not be sent out.
Edit the fields on this page to your specifications.
Appointment Type
There are three appointment types in Achieve:
- Face-to-face/in-person
- Virtual
- Phone
For each appointment type, enter information in each applicable field that students need to know in order to attend the meeting. For example, enter the location of a face-to-face meeting in the "Face-to-face/in-person appointment office location" field.
When a client signs up for an appointment, the information in the field will be displayed next to the time slot.

Face-to-face/in-person
In the "Face-to-face/in-person appointment office location" field, enter the location of the meeting (office number, room name, etc.).
Virtual appointment (Zoom/Team/WebEx) location URL
In the "Virtual appointment (Zoom/Team/WebEx) location URL" field, enter the URL the student will need to select in order to attend the virtual meeting.
Phone appointment location
In the "Phone appointment location" field, enter the phone number the client will call to have a phone appointment with you.
Once the field (or fields) have been updated, select the Save button at the bottom of the screen to save your changes. Next, start creating time slots and use these fields to indicate in your created time slots the type of appointment students are signing up for and how they will attend their appointment with you.
Time Slots
Set your time slots to reflect the types of appointments that you can offer clients.
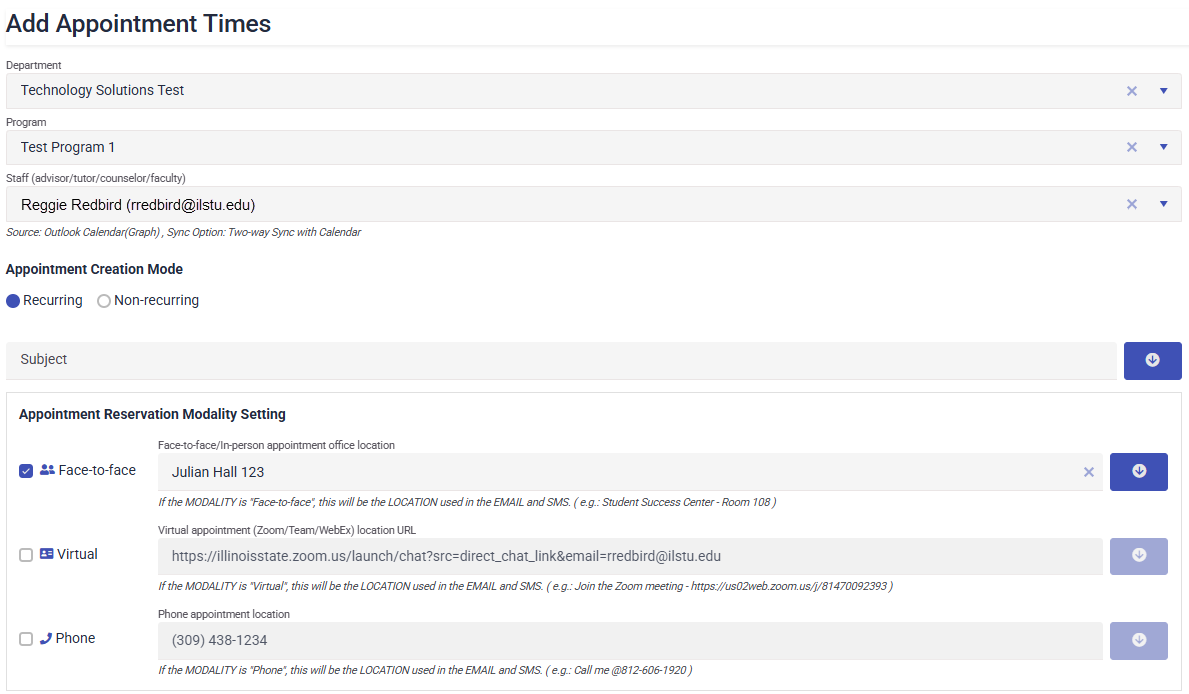
After setting your location fields in your profile, select the appointment type when making time slots using the checkboxes next to "Face-to-face", "Virtual", and "Phone" in the "Appointment Reservation Modality Setting" section.
This information is displayed when students select a time slot on your public facing Achieve page. For example, if a person selects a virtual meeting, your virtual appointment link will be displayed.
Public-Facing Achieve Page
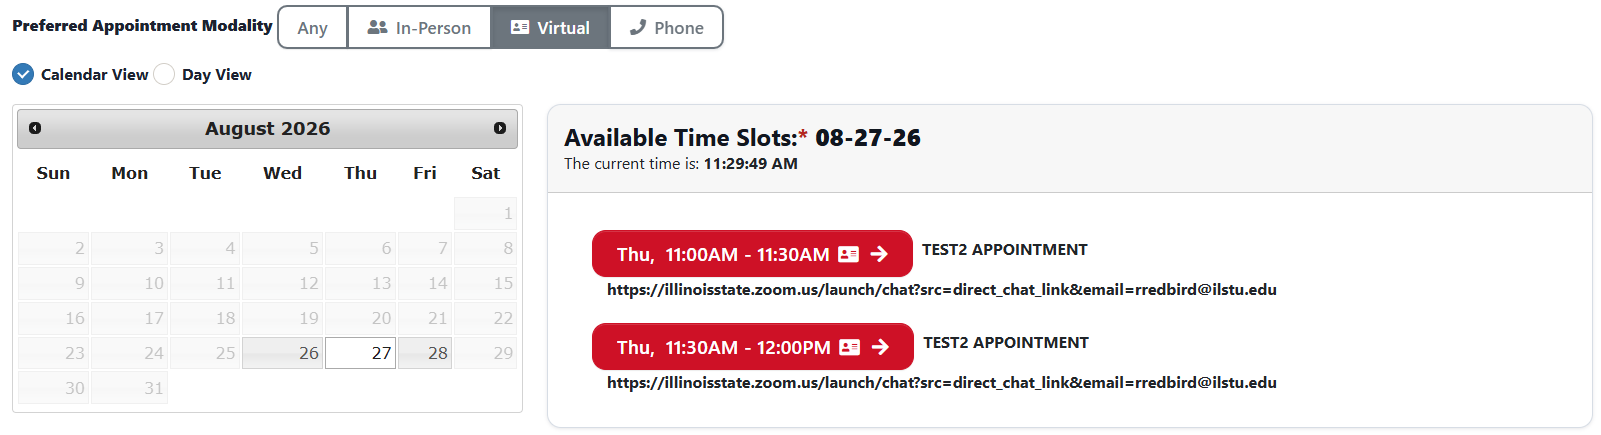
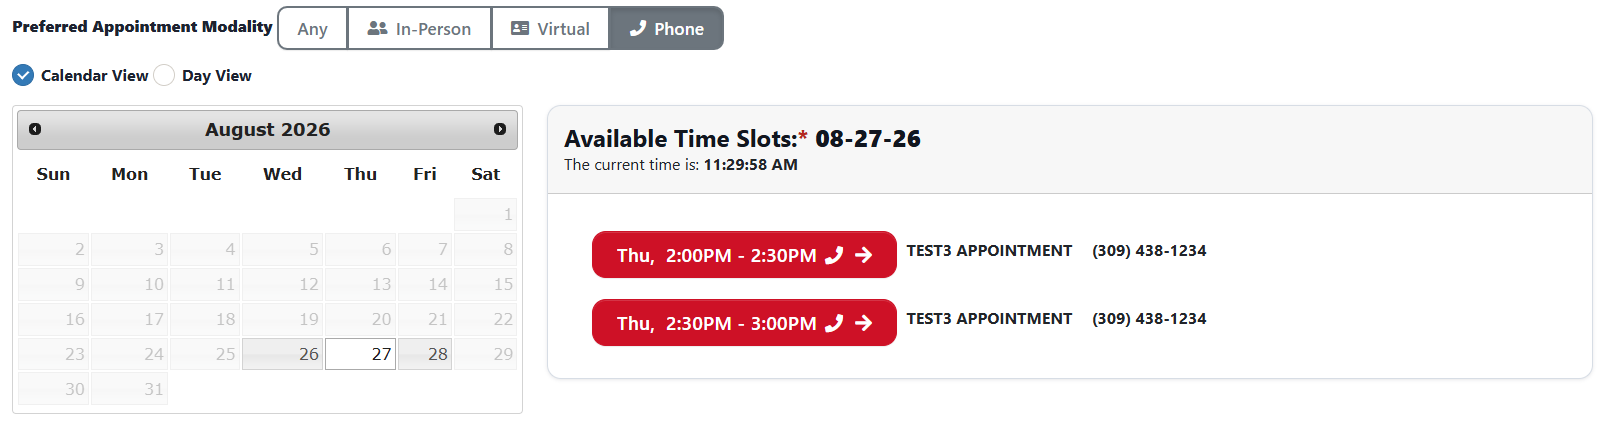
Once your time slots have been completed, this is what students will see on your public-facing Achieve page:
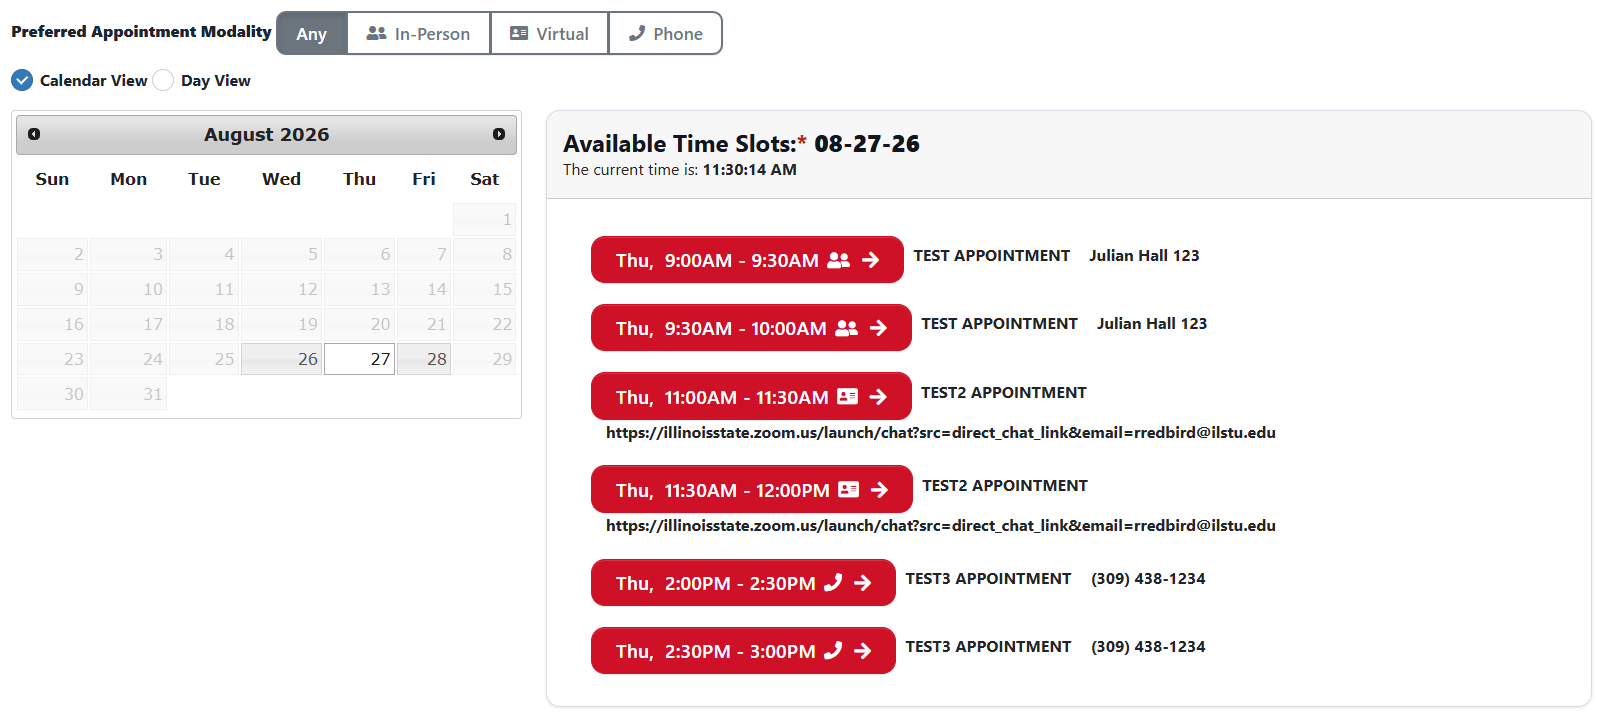
Student will use the buttons above the calendar to choose the type of appointment they would like: Any, In-Person, Virtual, or Phone.
Note how next to the appointment time slot, specific location information is displayed, such as the virtual meeting URL and phone number.
Any
Choose Any to display any type of appointment during the selected day.
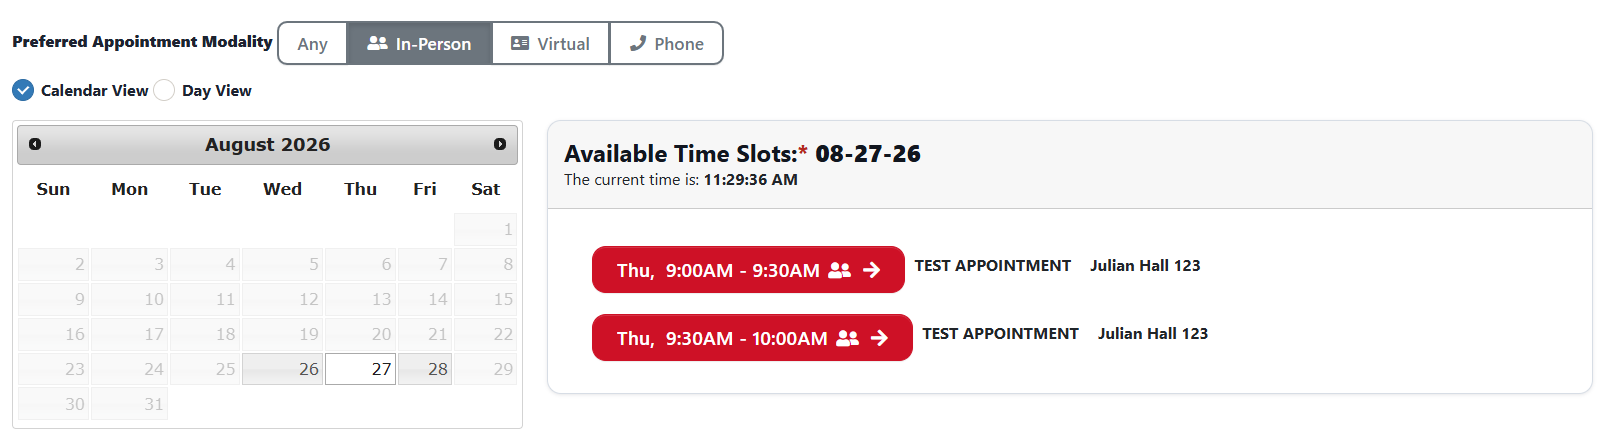
In-Person
Choose In-Person to only display appointments during which you meet face-to-face during the selected day.
Virtual
Choose Virtual to only display virtual appointments during which you meet using a webcam during the selected day.
Phone
Choose Phone to only display appointments during which you chat over the phone during the selected day.
How to Get Help
Technical assistance is available through the Illinois State University Technology Support Center at:
- Phone: (309) 438-4357
- Email: SupportCenter@IllinoisState.edu
- Submit a Request via Web Form: Get IT Help Form
- Live Chat: IT Help Live Chat
Feedback
To suggest an update to this article, ISU students, faculty, and staff should submit an Update Knowledge/Help Article request and all others should use the Get IT Help form.