Technology
How to use Azure Virtual Desktop
Last modified 5/4/2026
OneDrive & SPSS Warning
If you are using Azure Virtual Desktop (AVD) to access SPSS, please be aware that this application has some limitations when paired with OneDrive. SPSS will by default save files to the AVD desktop, but as these VM's are cleared at the end of every semester - if you wish to avoid data loss, please ensure that when you choose where to save files, you are selecting OneDrive from within SPSS as your file save location. This will allow you to retain the files even after the semesterly wipe.
Azure Virtual Desktop has replaced Remote.illinoisstate.edu as the virtual application and virtual computer lab service at Illinois State University available to students, faculty, and staff. This article will walk you through the different methods of accessing virtual applications and desktops in Azure.
See Also
Accessing AVD: A Guide to Different Clients
Instructions
- Windows App for Windows (Recommended)
- Download and install Windows App from the Microsoft Store. When Windows App is installed, open it.
- Select Sign in and sign in with your ULID for Azure Virtual Desktop. If you're signed in to your Windows device with your ULID, you will be signed in automatically.
- After you sign in, select the Apps tab to show your remote resources from Azure Virtual Desktop.

- Windows App for macOS (Recommended)
- Download and install Windows App from the Mac App Store. When Windows App is installed, open it from your launchpad.
- When the Windows App opens, select the plus (+) icon, then select Add Work or School Account.
Sign in with your ULID. After you sign in, the Apps tab shows your remote resources from Azure Virtual Desktop.
- Web Browser (HTML Client)
Enable Pop-Ups
Ensure you have pop-ups enabled for this site. Further instructions can be found here.
- Open a web browser of your choice and navigate to Remote Desktop Web Client
- Enter your ULID and password at the Central Login screen
- Enter your MFA code when prompted. NOTE: You may be prompted with two MFA requests, approve both as you normally would.

- You will land at the Microsoft landing page for Azure Virtual Desktop, configured for Illinois State University
Using a different Device?
While we recommend the desktop or HTML apps above, the Windows App supports a wider range of environments. You can find a full list of compatible devices and more information, Found here.
Opening Applications and Desktops
Important
Application availability in AVD is subject to change.
This screenshot is a visual guide to the interface and should not be used as a current software catalog. Available apps depend on your specific affiliations and active software lifecycle policies.
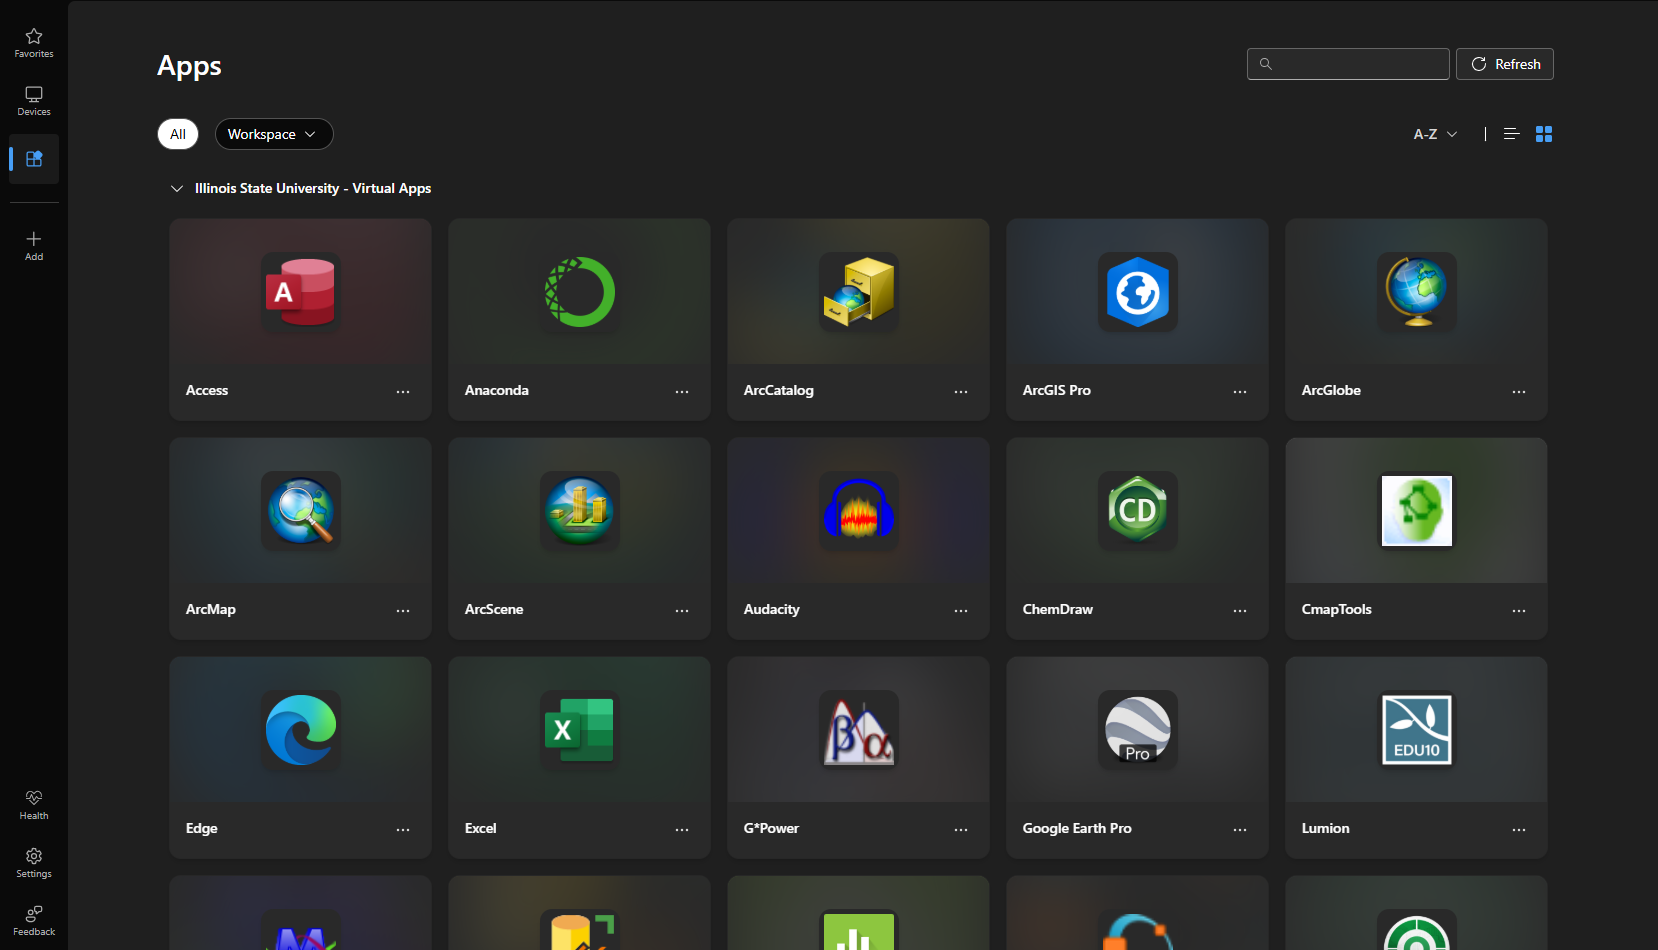
- Double-click one of the icons to launch a session
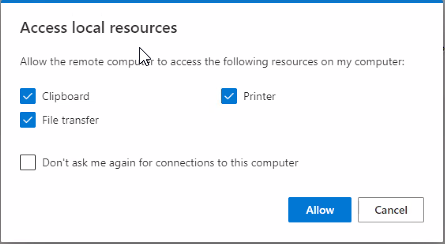
- It is recommended to allow the remote computer to access the Clipboard, Printer, and File transfer on the local computer
- The virtual session will begin to launch

- If this is your first time connecting to an Azure virtual machine, you will need to approve the login

- Your virtual application will now launch
How to Get Help
Technical assistance is available through the Illinois State University Technology Support Center at:
- Phone: (309) 438-4357
- Email: SupportCenter@IllinoisState.edu
- Submit a Request via Web Form: Get IT Help Form
- Live Chat: IT Help Live Chat
Feedback
To suggest an update to this article, ISU students, faculty, and staff should submit an Update Knowledge/Help Article request and all others should use the Get IT Help form.