Technology
Send from a Distribution Group in Outlook
Last modified 4/24/2026
Users who are part of a distribution group (a shared or group email address, such as departmentname@ilstu.edu) are able to send mail on behalf of the group in Outlook. The email message will be sent from the group, rather than from the individual.
These instructions are for sending mail on behalf of distribution group in both Outlook and using the Microsoft 365 Outlook Web App.
Attention!
If you follow the instructions below, and receive an error stating “You don’t have permission to send messages from this mailbox”, please contact the Technology Support Center at (309) 438-4357, or by email at SupportCenter@IllinoisState.edu to submit a request for the permission to send messages from the mailbox.
To Send as a Distribution Group in the (Old) Outlook App for Windows
- Open Outlook and click New Email to start a new email message.
- If you do not have the “From” field available, click on From under the Options tab (Figure 1).
Figure 1: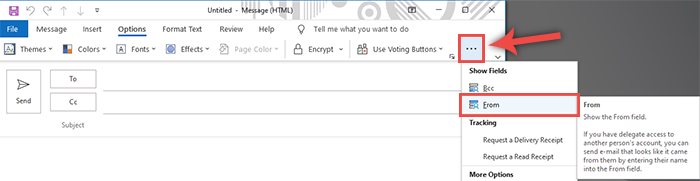
- Click on From, and then click the Other Email Address... link (Figure 2).
Figure 2:
- Enter the email address of your Distribution Group in the From... field (Figure 3).
Figure 3: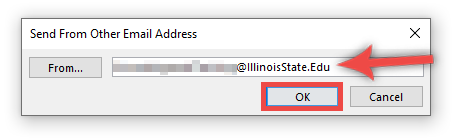
- You can now send from this address anytime by simply changing the 'From...' field to your Distribution Group's address for any future emails (Figure 4).
Figure 4: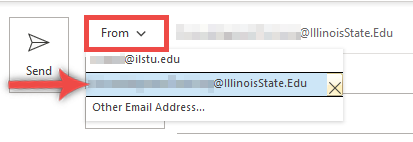
To Send as a Distribution Group Using the Office 365 Website or the (New) Outlook App for Windows
- Log into Office365.illinoisstate.edu or open the Outlook App and click on the Outlook icon to navigate to your inbox.
- Open a new email message.
- Click on the Options tab in the top bar and then click Show From. Show From must be checked in order for you to choose a Distribution list (Figure 5).
Figure 5:
- Click on your email address in the address bar and choose Other email address...The GAL (Global Address List) will then pull up with a list of emails, choose the one you wish to send from. (Figure 6).
Figure 6: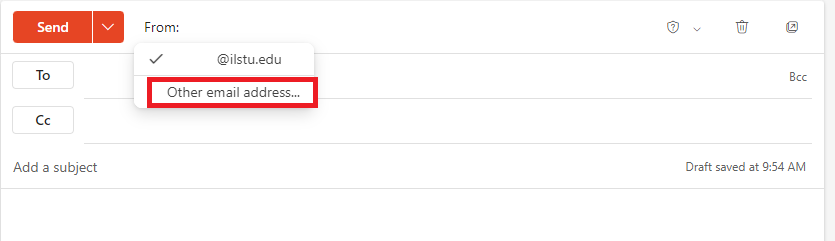
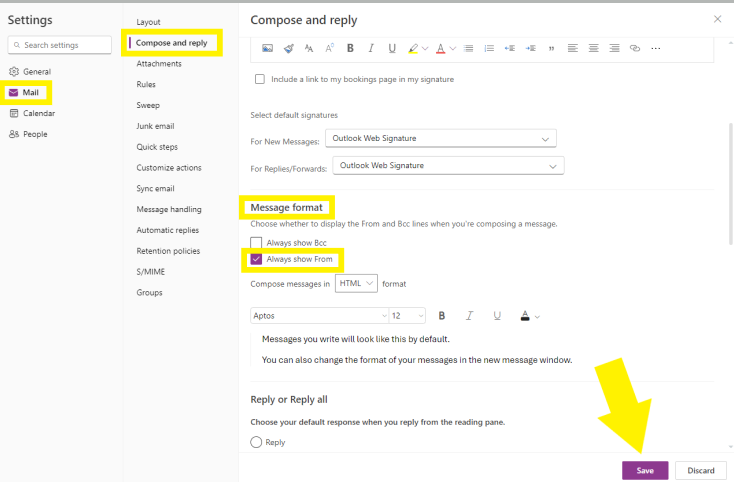
- If you would like the Show From option to always be checked follow the steps below. (Figure 7).
Figure 7:
To Send as a Distribution Group in Outlook for Mac
- Open Outlook and click New Mail to start a new email message.
- Navigate to the From: field and select the arrow next to the populated email. In here choose Other email address... In the search bar that pops up type the name of the Distribution Group you wish to send from and click OK. (Figure 8).
Figure 8: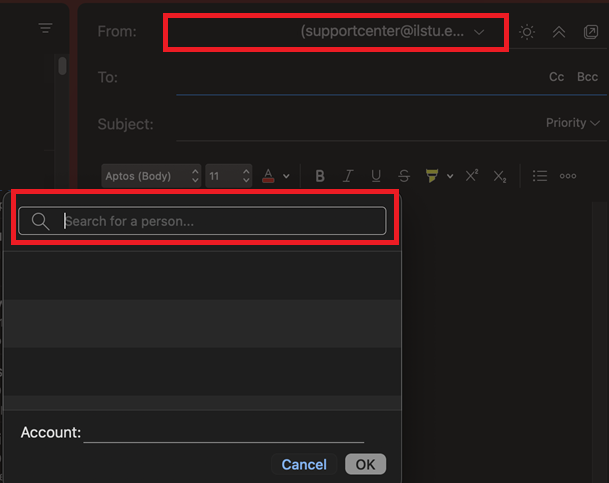
- You are now ready to send from your desired Distribution Group.
How to Get Help
Technical assistance is available through the Illinois State University Technology Support Center at:
- Phone: (309) 438-4357
- Email: SupportCenter@IllinoisState.edu
- Submit a Request via Web Form: Get IT Help Form
- Live Chat: IT Help Live Chat
Feedback
To suggest an update to this article, ISU students, faculty, and staff should submit an Update Knowledge/Help Article request and all others should use the Get IT Help form.