Technology
Create a Shared Channel in Microsoft Teams
Last modified 4/20/2026
Create a shared channel if you want to work with people inside and outside your team or organization. People from outside of Illinois State University can only be members of a shared channel.
Note
Adding users from other organizations will require admin work to set up a connection between the two organizations. A ticket is required to be submitted to the Unified Communications Team to begin the setup process.
Additionally, shared channel creation is not available for Students, Guests, Annuitants, and Grace status users.
Only team owners can create shared channels. The team owner who creates the shared channel becomes the channel owner and the channel inherits labels from the host team.
Create a shared channel
Note
You cannot change a shared channel into a standard or private channel and vice versa. Once you create a shared channel, you cannot change the host team.
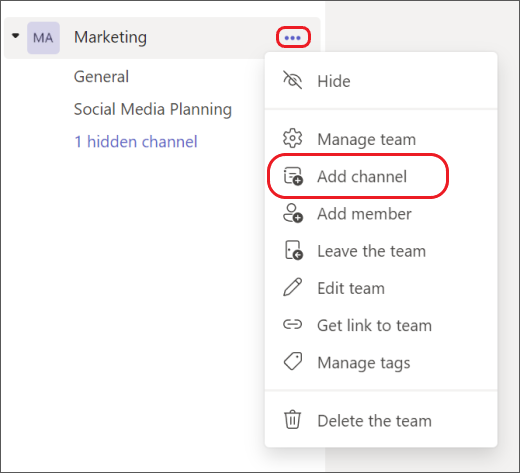
- Go to the team for which you want to create the shared channel and select More options ... > Add channel.
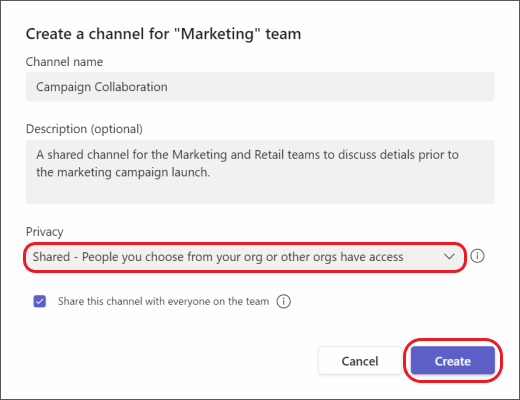
Enter a name and description for your channel.
Under Privacy, select the down arrow on the right, then choose Shared - People or teams in your org or outside your org can have access. Then, select the Create button.
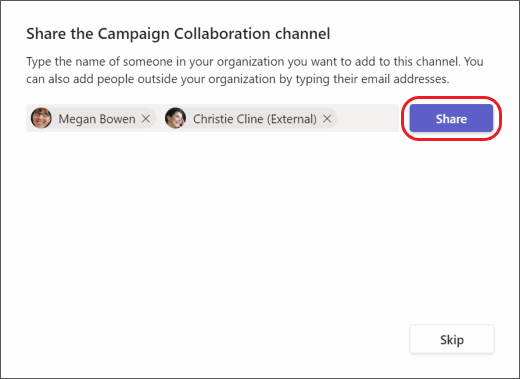
- Type the names of the people in your org you want to add to the channel and select from the list. To add people outside of Illinois State University, type their email addresses and select from the list. Then, select the Share button.
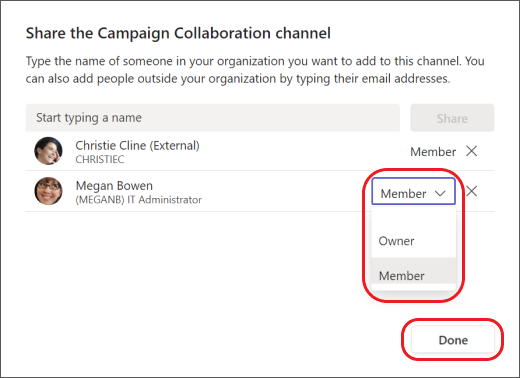
- To change a Member to an Owner, select the down arrow to the right of Member and choose Owner. Then, select the Done button.
Additional Assistance
- Vendor reource (this link will take you outside of Illinois State University): Create a shared channel in Microsoft Teams
How to Get Help
Technical assistance is available through the Illinois State University Technology Support Center at:
- Phone: (309) 438-4357
- Email: SupportCenter@IllinoisState.edu
- Submit a Request via Web Form: Get IT Help Form
- Live Chat: IT Help Live Chat
Feedback
To suggest an update to this article, ISU students, faculty, and staff should submit an Update Knowledge/Help Article request and all others should use the Get IT Help form.