Technology
Microsoft Planner
Last modified 4/17/2026
The Planner app is available to Illinois State University members via their Microsoft 365 subscription. Planner enables users and teams to create plans, create and assign tasks, share files, communicate and collaborate with other users, and receive progress updates via various means.
As each new plan created in Planner automatically creates a new Microsoft 365 group, the ability to create new plans is restricted by the University. If you would like to create a new plan for your team or group, submit a request to have one created for you.
- Use Planner to Manage your Group or Team Plan
Utilize Planner to manage your Team or Group plan by creating and assigning tasks to group members, sharing files, and communicating with group members via the app.
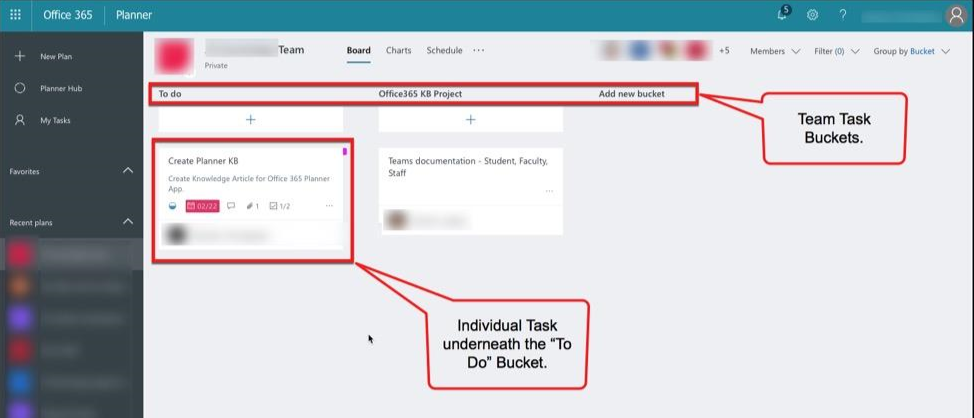
When you launch the Planner app in Microsoft 365, you will see links to your recent plans on the left sidebar. When you select one of your existing plans, the plan will appear in the main window (Figure 1). The plan will include any buckets currently contained within the plan. Displayed underneath the buckets are any tasks associated with each bucket. In the example below, the plan contains buckets titled "To Do" and "Microsoft 365 KB Project". The "To Do" bucket contains one task, titled "Create Planner KB". Additional buckets may be created by clicking Add new bucket. Additional tasks may be added to each bucket by clicking on the plus sign + under each bucket.
Figure 1:
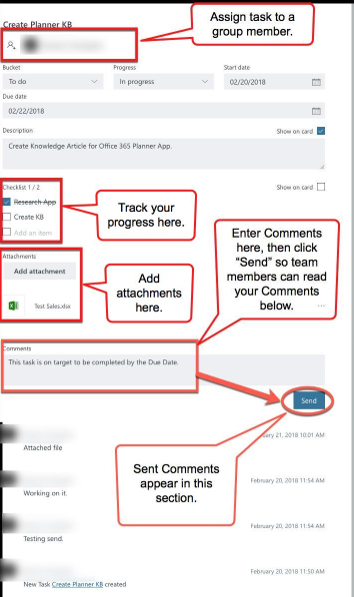
You may click on an existing Task to view/edit the Task details (Figure 2). You may Assign the Task to a team member, Add or change the Start or Due date, Edit the Task description, or Update the progress of the Task by utilizing a checklist or posting updates for other team members to view. You may also attach files to share with your team.
Figure 2:
- Mobile App
The Planner mobile app is also available for iOS and Android, with the navigation for each being virtually identical. You may download the mobile app to your device in order to be able to manage your plans/tasks from anywhere. The layout of the mobile apps may be viewed below (Figures 3, 4, and 5):
Figure 3 (Dashboard):
Figure 4 (Tasks):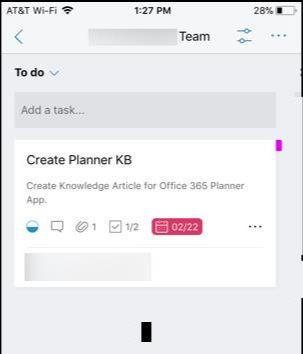
Figure 5 (Task Detail):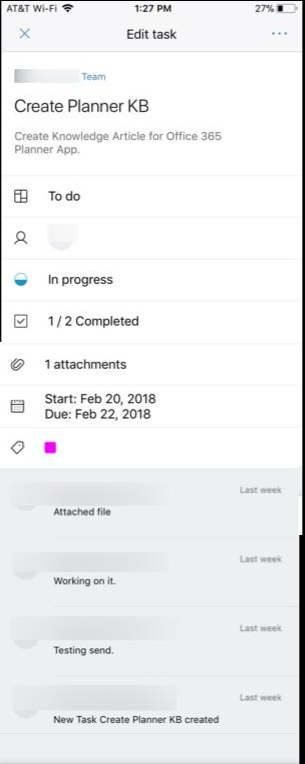
- More Information
For more information regarding the use and navigation of Planner, you may visit the Microsoft Support Website.
How to Get Help
Technical assistance is available through the Illinois State University Technology Support Center at:
- Phone: (309) 438-4357
- Email: SupportCenter@IllinoisState.edu
- Submit a Request via Web Form: Get IT Help Form
- Live Chat: IT Help Live Chat
Feedback
To suggest an update to this article, ISU students, faculty, and staff should submit an Update Knowledge/Help Article request and all others should use the Get IT Help form.