Technology
Using the Scheduling Tool in Outlook
Last modified 4/15/2026
The Scheduling tool allows you to reserve rooms and compare the status of the room (occupied or free) to the status of your attendees (showing if they are already scheduled for a meeting). This article details how to use the Scheduling Tool in Microsoft 365. To use the Scheduling Tool, you must have an appointment created and at least one attendee to your appointment.
Using the Scheduling Tool in Microsoft 365 Web
With an appointment created and at least 1 attendee, click on the button for the Scheduling tool located at the top right of the People pane (Figure 1).
Figure 1: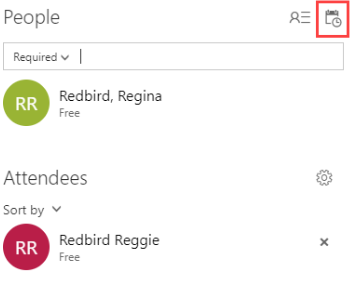
You can set a start and end time for your event by typing it into the left, or clicking on the schedule.
If you cannot select a time, ensure that ‘All Day’ is unchecked.
Microsoft 365 will automatically suggest times to meet based on availability of the attendees and the room.
You can add attendees to the event on the left hand side of the page, below time scheduling.
Finally, you can click Add Room to select a room for your event. The Scheduling tool will automatically pull up available rooms from the last building. There are a few advanced options available:
- Show all Rooms in… will show you all rooms, available or otherwise in the building you currently have selected. This is most useful if you want to select a certain room, and then find a time that works for that room.
- Any available room in… will select a room for you from the list of those available.
- Choose new room list will allow you to pick a different building to see the room list for. Once you have selected a different building, the system will default to showing you rooms for that building until you choose another building again.
When you are finished, you can click OK to add the schedule information to your event, or Discard to remove it.
Scheduling Tool in Outlook Client
You can access the Scheduling Tool in any appointment by navigating to Appointment → Show and clicking on Scheduling Assistant (Figure 2).
Figure 2: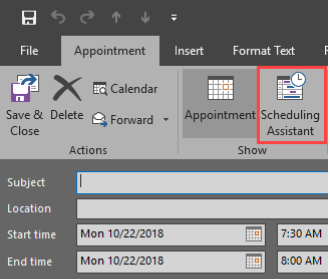
- At the left side, you can add and remove attendees. You can also click the check box to enter the person as an attendee, but not take their schedule into account.
- You can select a time for your Meeting by clicking on the schedule in the center of the screen, or manually selecting a time and date at the bottom.
- The easiest way to find a room is to use the Room Finder Tool, located under the Meeting tab. (Figure 3)
Figure 3:
The Room Finder tool gives you several options for selecting an available room:
- Show a room list: This drop down menu allows you to change the building you are looking for a room in.
- Choose an available room: This menu lists all of the rooms that are available for the time and date you have selected, in the building that you chose in the Show a room list menu.
- Suggested times: This list shows suggested times for your meeting based on room availability. If you cannot find a room, consider changing to one of these times instead.
How to Get Help
Technical assistance is available through the Illinois State University Technology Support Center at:
- Phone: (309) 438-4357
- Email: SupportCenter@IllinoisState.edu
- Submit a Request via Web Form: Get IT Help Form
- Live Chat: IT Help Live Chat
Feedback
To suggest an update to this article, ISU students, faculty, and staff should submit an Update Knowledge/Help Article request and all others should use the Get IT Help form.