Technology
Remove Automatic Breaks in TimeClock Plus
Last modified 5/17/2024
The automatic break after a certain number of hours is a default option that is set for every employee. The break that gets applied depends on the length of the shift:
- If the shift is 5.5 hours or more, an automatic 30-minute break is applied (making it a 5-hour shift).
- If the shift is 6 hours or more, an automatic 1-hour break is applied (making it a 5-hour shift).
If you do not want automatic breaks for an employee, they can be removed manually by the manager by following these steps:
- How to Remove Automatic Breaks in TimeClock Plus
- In your TimeClock Plus dashboard, select the Employee tab.
- In the menu that appears below, select Employee Profile.
- Search and select the employee from whom the automatic break will be removed.
- Hover your mouse over the Hours tab and click on the Automatic Breaks option in the dropdown list (Figure 1).
Figure 1:
- You will see the automatic breaks that are enabled on the employee. To remove it, click the checkbox next to Override role settings (Figure 2).
Figure 2:
- Click the Unassign button to remove it.
- Click Save at the top right.
- How to Remove Automatic Breaks in TimeClock Plus: Employees with Dual Jobs/Roles
Some employees have dual jobs/roles. For example, if you have an employee that works for both you and EMDH or Housing, they rely heavily on that automatic break and thus, it should not be removed.
In this case, the automatic break will have to be removed from each segment (that they work for you) individually. This can be completed by following these steps:
- Open your TimeClock Plus dashboard.
- Select Hours at the top of the screen.
- In the menu that appears below, select Individual Hours.
- Select an employee from the left side of the screen where the employees are listed.
- Scroll to the segment from which the automatic break will be removed.
- Right click on the segment.
- In the menu that appears, click the Edit link (Figure 3).
Figure 3: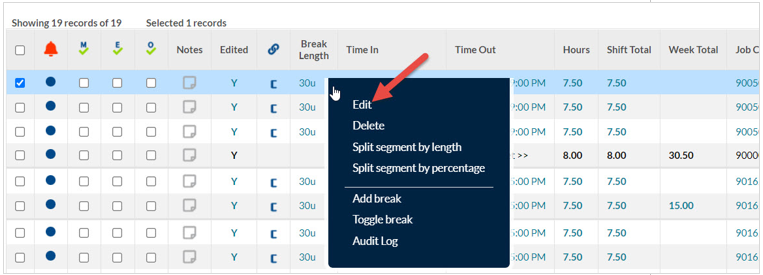
- This will open a pop-up window labelled "Edit Segment". Click the Extra button (Figure 4).
Figure 4:
- Click the checkbox next to Disable automatic deduction for this segment (Figure 5).
Figure 5: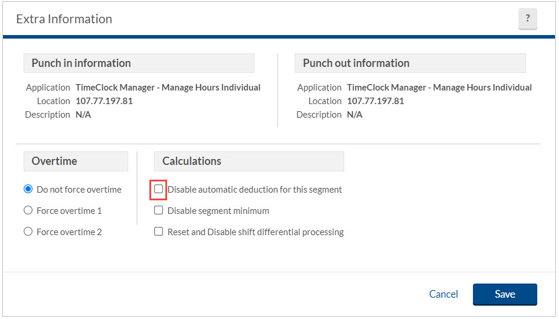
- Click the Save button.
- This will return you to the Edit Segment window.
- Click the Save button.
Once automatic breaks are removed, the manager can discuss with their employees how breaks will be handled.
How to Get Help
Technical assistance is available through the Illinois State University Technology Support Center at:
- Phone: (309) 438-4357
- Email: SupportCenter@IllinoisState.edu
- Submit a Request via Web Form: Help.IllinoisState.edu/get-it-help
- Live Chat: Help.IllinoisState.edu/get-it-help
Feedback
To suggest an update to this article, ISU students, faculty, and staff should submit an Update Knowledge/Help Article request and all others should use the Get IT Help form.