Technology
ServiceNow Strategic Portfolio Management
Last modified 10/23/2026
Technology Solutions employees use ServiceNow Strategic Portfolio Management (SPM) to report time worked on projects. Project time sheets are completed weekly and are due at the beginning of the following week.
The SPM Time Sheet Portal is scheduled to go live Monday, October 5, 2026. Beginning that morning, employees will report the previous week's project time in ServiceNow.
Currently in Testing
The SPM Time Sheet Portal is available in the Test environment. Employees are encouraged to test these timesheet instructions and provide feedback on their experience to "PMO Mailbox" <AT_MBX_ATPMOMBX@ilstu.edu>.
Your feedback will help identify any issues or areas that may need clarification before submitting timesheets becomes required in the production portal.
Know when and How to Report Your Time
Project time sheets run Monday through Sunday and are due by 9 a.m. at the beginning of the following week.
- You may enter time each day or complete your time sheet at one time.
- Report time in increments of 0.25 hour or greater.
- Report the time you actually worked, even if it differs from the amount originally planned.
- If you complete your time sheet after the week ends instead of daily, consider using your Outlook calendar to help recall how you spent your time.
- If an employee is absent and has fallen behind multiple weeks, a supervisor may submit time on the employee's behalf.
Reporting Project Time in SPM
- Access the SPM Time Sheet Portal
- Sign in to ServiceNow.
- Search for Time Sheet Portal in the All Menu.
- When searching in ServiceNow, be sure to use spaces and type Time Sheet Portal exactly as shown. ServiceNow is sensitive to spaces and may not return the correct result if entered differently.
- Select Time Sheet Portal.
- Select and Navigate to the Correct Week
The Time Sheet Portal displays your current time sheet week when you open it.

You can use the week navigation options to move to the week you need:
- Select the Left Arrow to move to the previous week.
- Select the Right Arrow to move to the following week.
- Select the Drop-down Arrow next to the displayed week to open a calendar view and select a specific week.
Always verify that the correct week is displayed before adding or reviewing time.
- Add Project Work to Your Time Sheet
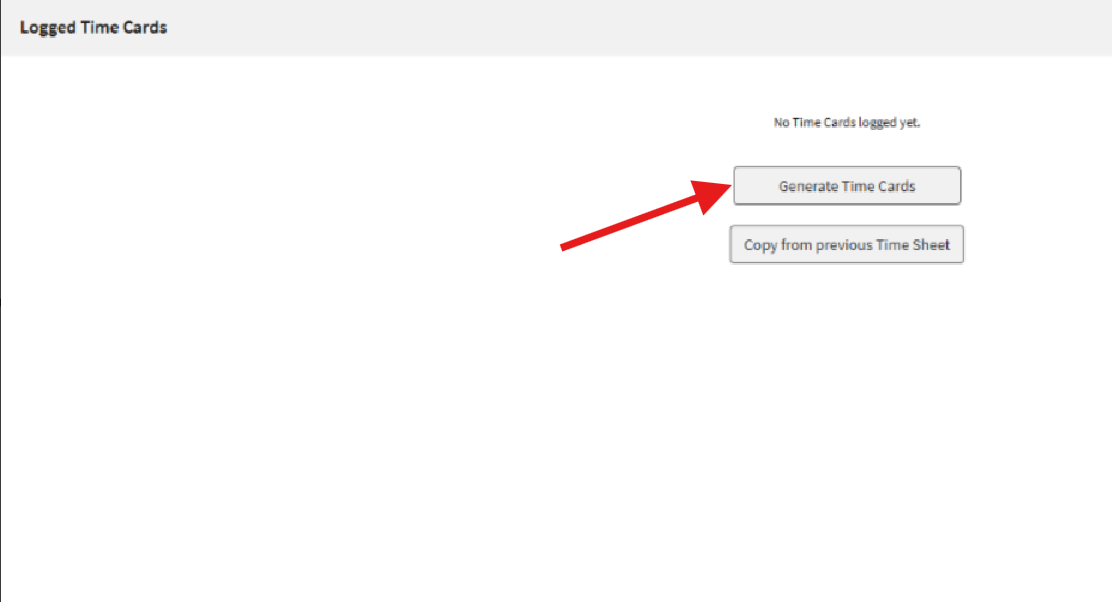
Generate Time Cards
When you first open your time sheet, you may need to generate the time cards before you can enter time. Use the Generate Time Cards or Copy from previous Time Sheet option to create time cards for your projects.
- Optional - Add non-project work to your time sheet
SPM provides several ways to add work to your time sheet. The Tasks, Group Tasks, and Other sections contain the items available for you to add.

Tasks
The Tasks section displays projects and tasks that are currently assigned to you.
Group Tasks
The Group Tasks section displays tickets and other tasks available through your assigned group.
Hover over the ticket or task you worked on and select Add to Timesheet.
Other
The Other section provides options for recording time that is not associated with a specific project or ticket. This is not a requirement of the Project Management Office, but a tool you and your supervisor have available to you, should you wish to record time against them.
Available options include:
- Admin
- KTLO
- Training
- Time Off
Hover over the appropriate option and select Add to Timesheet.
- Enter Project Time
After adding an item to your time sheet, you can enter the time worked for each day.When you hover over the project, you may see a three-dot indicator to the left of the project name. This indicates that the time card is pending.
Each Project includes fields for Project Time Category and Resource Plan.
- Double-click the time entry area for the day you want to enter time. This activates the field so you can enter your hours.
- Enter the number of hours worked for that project and day.
Enter time in increments of 0.25 hour or greater and report the time you actually worked, even if it differs from the amount originally planned.
Optional:
- Select a Project Time Category from the drop-down menu. Available categories include:
- Management and Supervision
- Testing
- Meeting, Training, and Readiness
- Configuration
- Analysis
- Requirement Gathering
- Development
- Select the appropriate Resource Plan, if applicable.
- Continue entering time for each project and day as needed.
More Actions
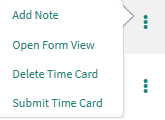
A three-dot menu appears on the right side of each project when you hover over it. The menu is labeled More actions for [PROJECT NAME] and provides the following options:
- Add Note - add a note related to the time card. Note: these notes are not reviewed. Communicate important information through other channels.
- Open Form View - Open the time card in form view.
- Delete Time Card - Delete the time card.
- Submit Time Card - Submit the time card. This only submits an individual line and that can occasionally be helpful, but generally you should submit your entire timesheet, not individual time cards (rows). See the next section for instructions on submitting your timesheet.
- Review and Submit Your Time Sheet
Before submitting your time sheet, review your entries for accuracy.
- Confirm that you selected the correct week.
- Verify that all projects you worked on are included.
- Review the hours entered for each project and day.
- Make any necessary corrections.
When your time sheet is complete, select the Green Submit button.
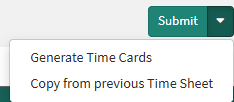
The Submit button includes a drop-down arrow with additional options:
- Generate Time Cards - Generate time cards based on your time sheet entries.
- Copy from Previous Time Sheet - Copy entries from your previous time sheet.
Select Submit when you are ready to submit your time sheet.
Your time sheet is due by 9 a.m. at the beginning of the following week.
When you successfully submit your timesheet, several things will display:
- A notification that you have "# time card(s) submitted"
- The status for the week in the ribbon will change from Pending to Processed.
- Your time cards (rows) will have green checkmark

- Recalling a Submitted Time Sheet
If you need to make changes to a time sheet after submitting it, select Recall in the top-right corner of the time sheet.
- Open the submitted time sheet.
- Select Recall in the top-right corner.
- Make any necessary changes to the recalled time sheet.
- Resubmit the time sheet when your changes are completed.

- Supervisor submission of an employee's time sheet
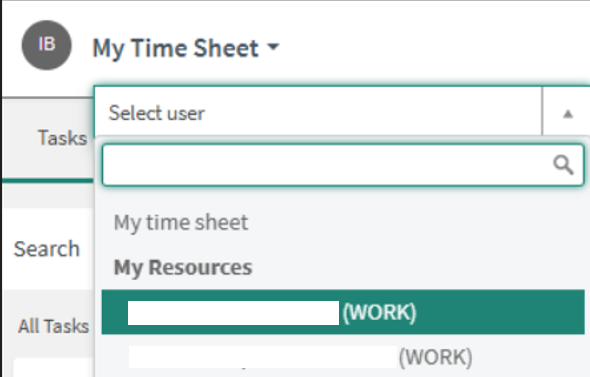
Supervisors can view, edit, submit, and recall the timesheets of their direct reports by from their own Time Sheet Portal and selecting My Time Sheet at the top left and choosing an employee and continuing as above.
Supervisor's responsibility
Supervisors should submit on an employee's behalf if the employee is absent and has fallen behind multiple weeks.
Employee information source
The employee relationship comes from Human Resources (HR) data that feeds into the ServiceNow Platform.
How to Get Help
If a project is missing and you cannot add it following the above instructions, please contact the Project Manager for that project.
Technical assistance is available through the Illinois State University Technology Support Center at:
- Phone: (309) 438-4357
- Email: SupportCenter@IllinoisState.edu
- Submit a Request via Web Form: Get IT Help Form
- Live Chat: IT Help Live Chat
Feedback
To suggest an update to this article, ISU students, faculty, and staff should submit an Update Knowledge/Help Article request and all others should use the Get IT Help form.