Technology
Viewing Appointments in Achieve
Last modified 11/13/2024
There are several different ways to view appointments (both open and reserved) in Achieve and your Outlook calendar.
Before You Begin
Achieve is a web-based application that allows you to sync appointments with your Outlook calendar.
Access to Achieve is required before you can schedule appointments. For more information, see Achieve.
View Time Slots in Achieve
- Open a web browser and navigate to appointments.illinoisstate.edu/achieveadmin.
- Log in with your ULID and password.
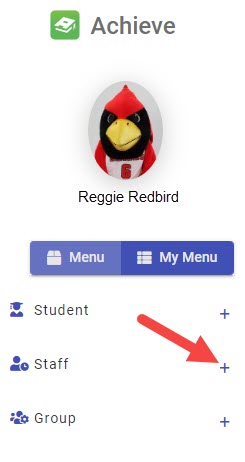
- Expand the Staff menu on the left side of the screen using the plus ( + ) sign.
- In the expanded Staff menu, select Appointments.
- This will open the Appointments page. At the top of the page are four tabs: Appointments By Day, Appointments By Staff, Appointments by Month, and Squeeze In An Appointment. Use each tab to view appointments by each category.
Appointments By Day
Use the Appointments By Day tab to view all time slots that are reserved and unreserved for a single day.
- In the Appointments By Day tab, select the Department and Program using the dropdown menus.
- Enter the date in Date field using the mm/dd/yyyy format. Alternatively, use the calendar icon to select the date. Then, click the Show button.
- A table will display with the time slots at the top of the table and both reserved and unreserved appointments. Unreserved appointments will display your department tag. Reserved appointments will display the name of the student who signed up.
Appointments By Staff
Use the Appointments By Day tab to view all time slots that are reserved and unreserved during one week.
- Click the Appointments By Staff tab.
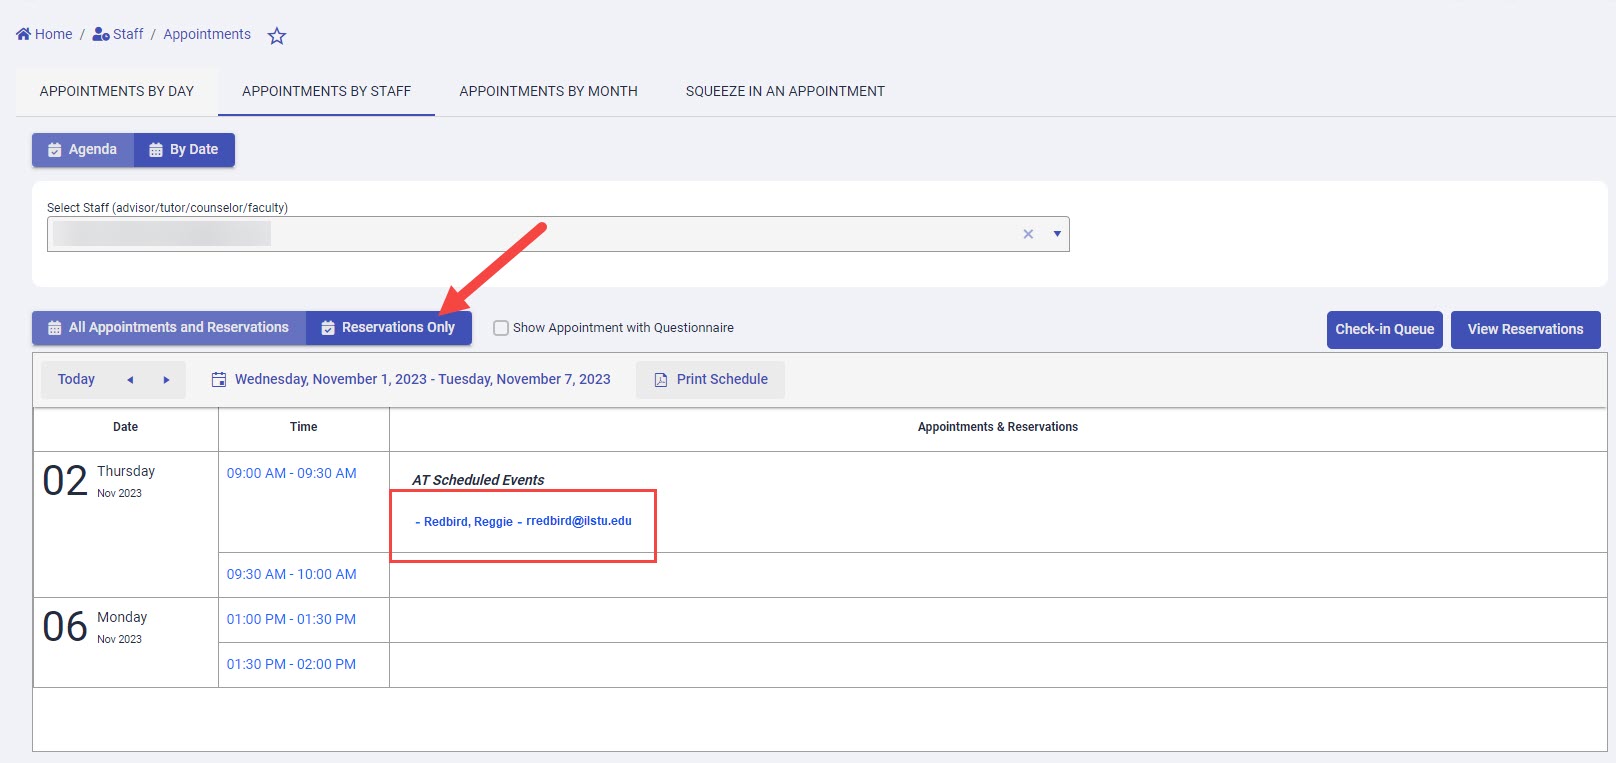
- By default, the page will display the appointments of the next seven days. Any appointments that are reserved will display the name of the student in the time slot.
- Click the Reservations Only button to show only the time slots that are reserved by a student.
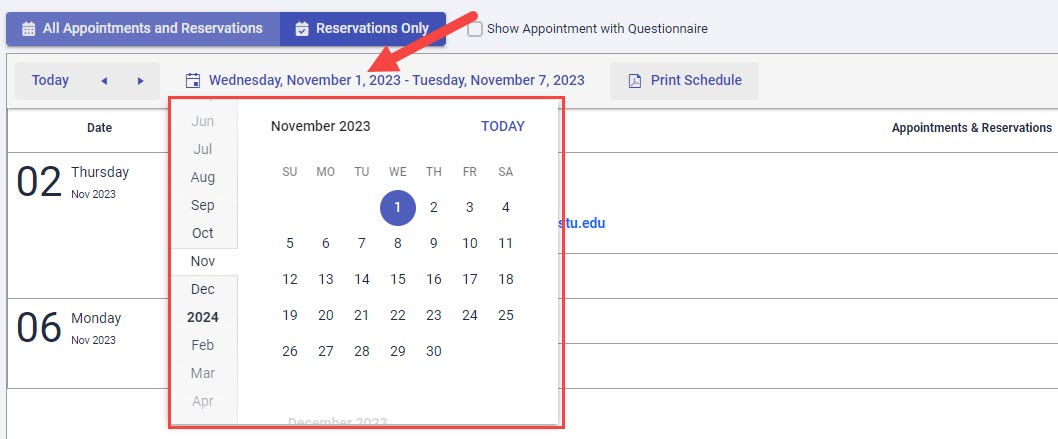
- Click the date range to open a calendar. Click on a date in the calendar that appears, and Achieve will automatically display appointments for the selected day and the following seven days.
- Click the View Reservations button to open a window that displays the reservations during a custom date range.
- In this window, use the From Date and To Date fields to custom select the date range using the mm/dd/yyyy format. Alternatively, use the calendar icon to select the date. Then, click the Show Reservations button to view the reserved time slots during this date range.
Appointments By Month
Use the Appointments By Month tab to view all time slots that are reserved and unreserved during one month.
- Select the Appointments By Month tab.
- Choose Department and Program using the dropdown menus.
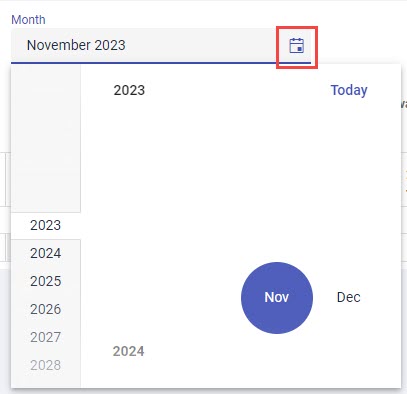
- Select the month and year by using the calendar icon.
- In the table on this page, the days of the selected month will be displayed. In the columns for each day, a number will display indicating the number of available time slots.
Squeeze In An Appointment
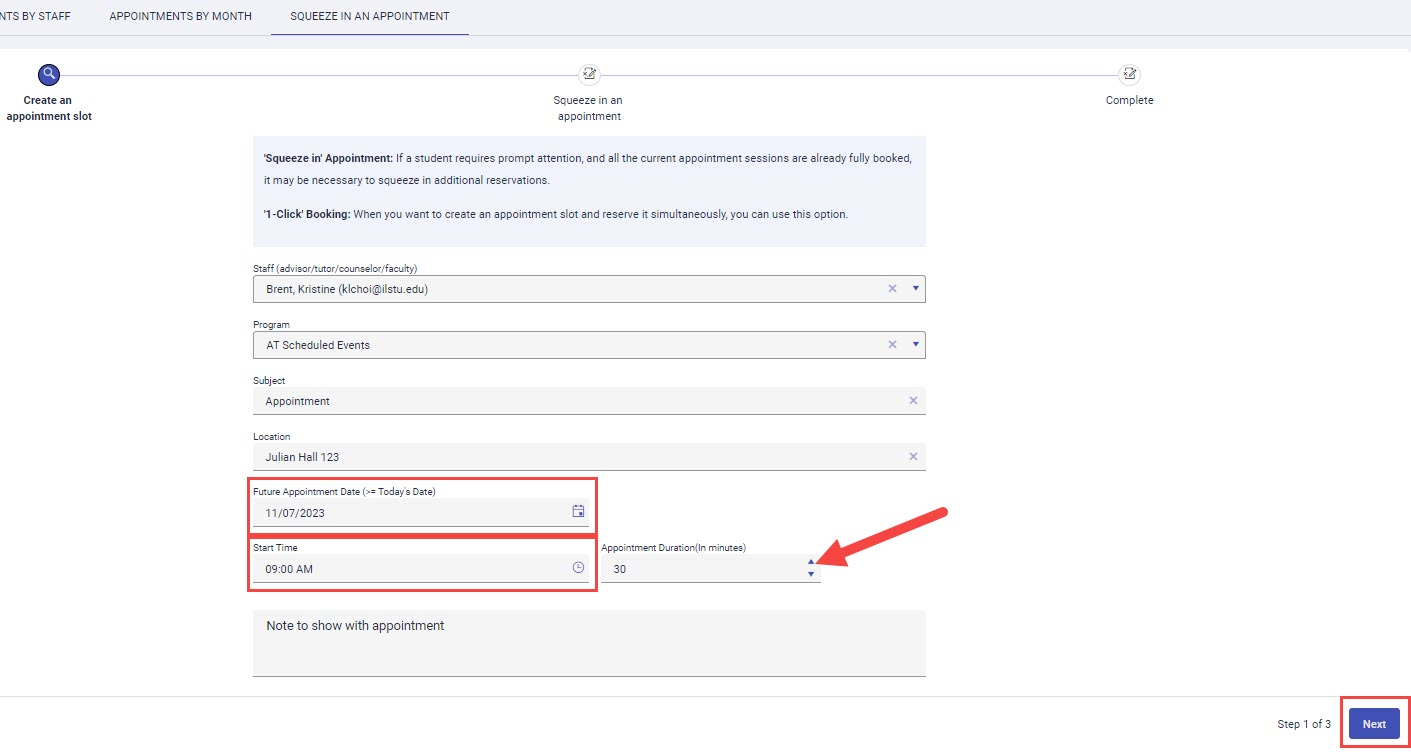
Use the Squeeze In An Appointment tab to book an appointment for a student if they require prompt attention and all the current appointment sessions are already fully booked. Any time slot can be selected to squeeze the student in; it does not need to be a time slot that had been regularly scheduled for that day.
- Select the Squeeze In An Appointment tab.
- In the Create an appointment slot page that appears, most of the fields will be entered by default. Enter the Future Appointment Date using the mm/dd/yyyy format or selecting the date using the calendar icon.
- Enter the start time of the appointment in the Start Time field using the HH:MM AM/PM format.
- Use the arrows in the Appointment Duration(In Minutes) field to designate the time frame for this appointment.
- Then, click the Next button.
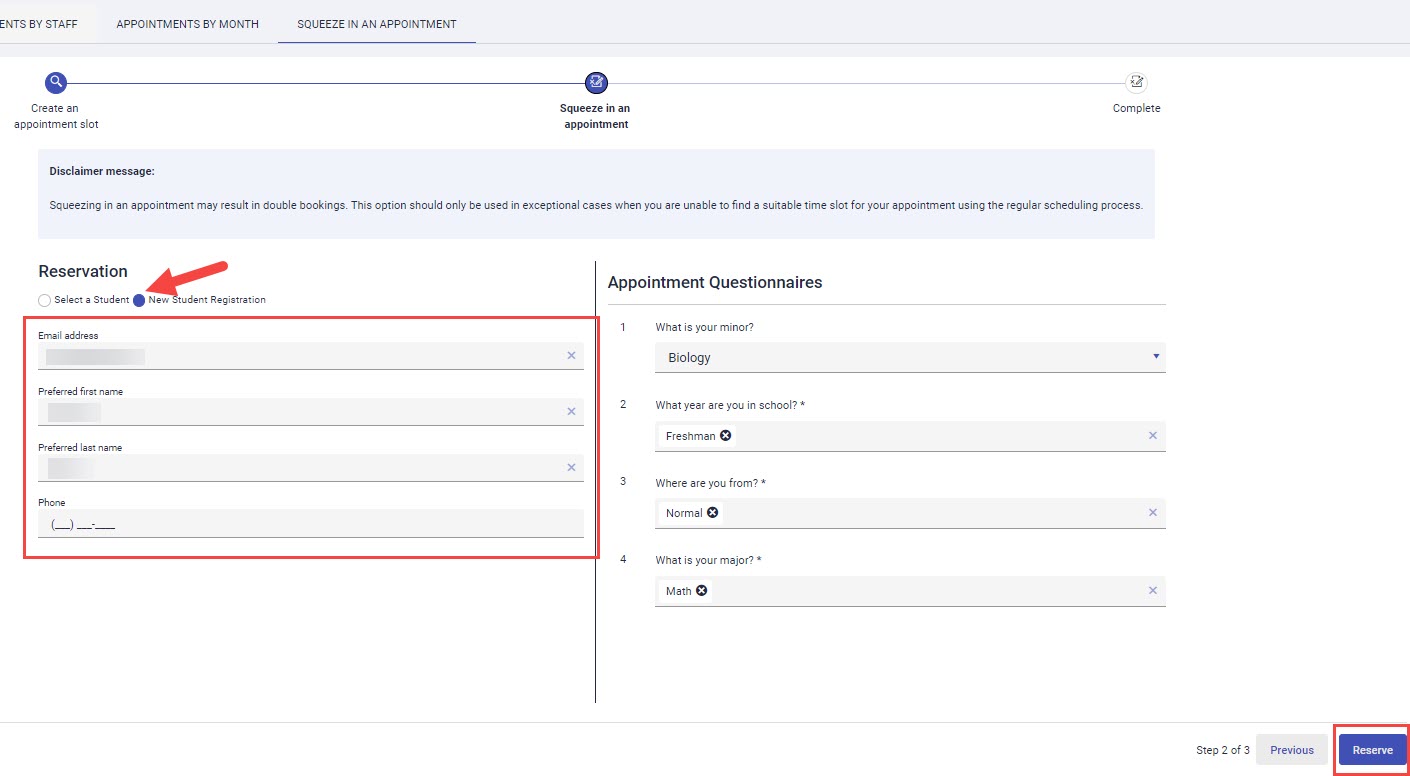
- This will open the Squeeze in an appointment window. Click the New Student Registration radio button. Enter the Email address, first name, and last name of the student. (Optional) If a required questionnaire is attached to the time slot, answer the questions in the questionnaire.
- Click the Reserve button.
- This will open the Complete window. A message stating "The squeeze in appointment completed successfully" will appear.
How to Get Help
Technical assistance is available through the Illinois State University Technology Support Center at:
- Phone: (309) 438-4357
- Email: SupportCenter@IllinoisState.edu
- Submit a Request via Web Form: Help.IllinoisState.edu/get-it-help
- Live Chat: Help.IllinoisState.edu/get-it-help
Feedback
To suggest an update to this article, ISU students, faculty, and staff should submit an Update Knowledge/Help Article request and all others should use the Get IT Help form.
