Accessibility
Tagging Images as Figures in Adobe Acrobat
Last modified 6/22/2023
PDFs often contain images that can present significant accessibility challenges for individuals with visual impairments or other disabilities. To ensure inclusivity and equal access to information, it is essential to prioritize image accessibility in PDF documents. Sometimes images may be missing or mis-tagged in the Accessibility Tags Tree. You can use the Reading Order Tool to associated the Images to a tag in the tags tree.
Step 1: Open Tags Tree
Open the Accessibility Tags Tree.
Step 2: Open Reading Order Tool
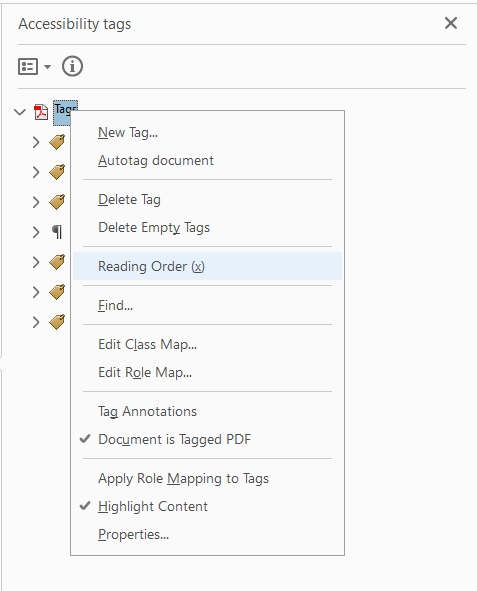
Right click on the Tags tag. From the menu, choose Reading Order. The Reading Order Tool dialog will open.
Step 3: Set Image as Figure
With your mouse, draw a box around the image. Return to the Reading Order Tool and select the Figure button.

A new <Figure> Tag will be added to the tags tree. Select the Close button to close the dialog.
What if the <Figure> tag does not appear in the Tags Tree?
The Reading Order Tool can be fickle. On some documents the <Figure> tag just doesn't get added to to the tags tree. In this case, as a last resort, add a new <Figure> tag to the tags tree in the place where the Figure should logically go. In the Object Properties dialog, add the alt text for the image. With this method, the content and tag are not associated but the image description will be read to screen reader.
Feedback
To suggest an update to this article, ISU students, faculty, and staff should submit an Update Knowledge/Help Article request and all others should use the Get IT Help form.