Technology
Sharing Files in OneDrive
You can share your files and folders in your Illinois State University (ISU) OneDrive library so that others can view and edit the documents.
Note: If you are sharing OneDrive content within a Canvas course, it is strongly recommended you use the built-in Canvas Learning Tool Integration (LTI) in Canvas for the best experience. Information on how to do so may be found at:
The documents and folders you store in your OneDrive library are private until you decide to share them. When you share documents and folders, you can decide whether to let people edit them or just view them. Files can be shared to users within Illinois State University, or they can be shared to external users who are outside of Illinois State University.
When sharing files with others, you have two options:
- You can invite people to view or edit the document via email
- You can create a direct link to the document and share the link yourself.
The people with whom you share your files are not required to have a Microsoft 365 account, but if they would like to edit them or collaborate, they will need a Microsoft 365 license to do so.
Share Files and/or Folders
- Sharing from OneDrive
To share a file or folder, follow the instructions below:
Navigate to the Illinois State University Microsoft 365 website and log in with your Illinois State email address and password.
- Click the OneDrive icon on the left sidebar (Figure 1):
Figure 1: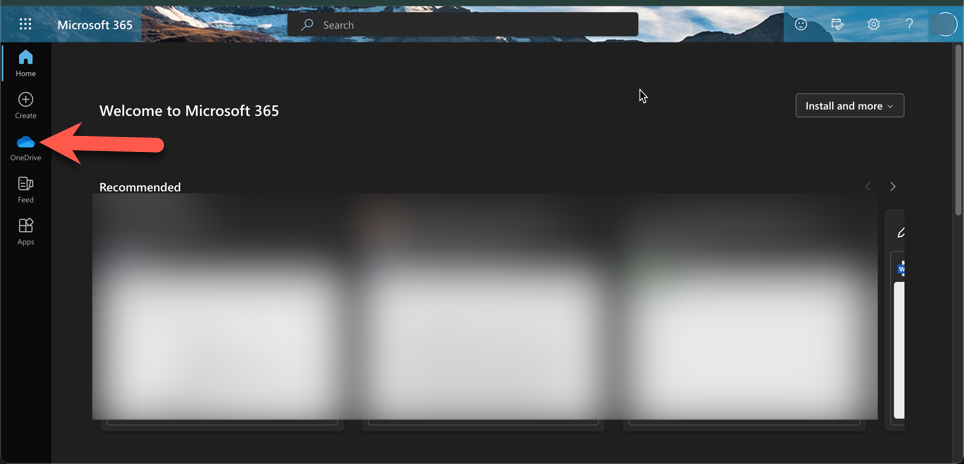
- In OneDrive, select My Files from the left sidebar (Figure 2):
Figure 2: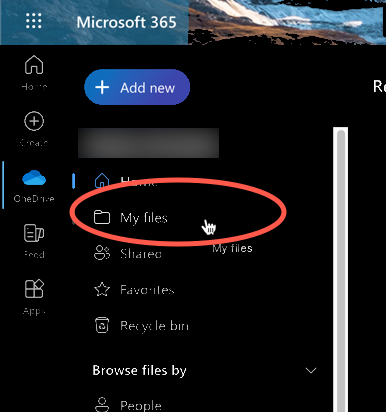
- On the My Files page, you will see your folders, and individual files (those not contained within a folder). The Sharing column indicates the current sharing status of each item (Private or Shared). The Activity column will show recent activity taken on the item. Click the circle to the left of the item you wish to share and then click Share near the top-left of the page to view sharing options (Figure 3):
Figure 3: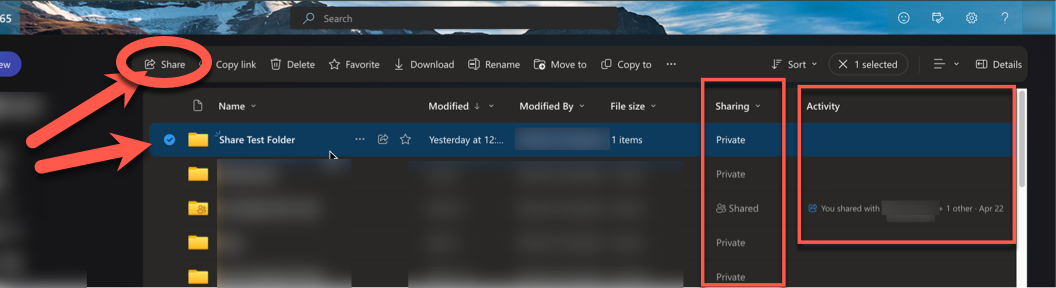
- You will see the sharing pane. Enter the name of a person (or multiple people), or ISU Microsoft Group(s) with whom you would like to share the resource. Then click the arrow next to the eye icon and select the level of access you with to grant the person(s) or group(s) you are sharing with (Figure 4).
Figure 4: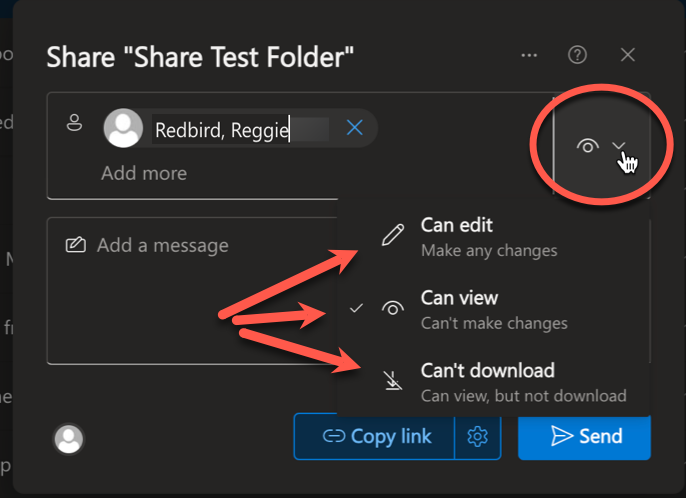
- After you have added all of the individuals or groups with whom you wish to share the item, you may notify them by sending an email notification, or by copying a link to the shared resource which you may then send to the recipients via any method you choose (email, Teams message etc.). If you do not wish to notify the sharing recipients at this time, you may simply click on the X at the upper-right of the Share pane and your sharing settings will have saved. If however, you would like to notify your recipients of the shared resource, see below for instructions for either sharing method.
- Sharing with Outlook (Client & Web)
Sharing a OneDrive File with Outlook
Important: By default, when you share a OneDrive file through Outlook, you must choose the people you want to share with. The link is not automatically available to everyone. Always confirm the audience before sending.
Sharing a OneDrive Link
Best for collaboration:
Recipients can always access the latest version of the file.
Steps:
- In a new Outlook message, click Attach File.
- Choose a file from your OneDrive.
- Outlook will insert a share link into your message.
- Adjust permissions (view or edit) before sending.
Tip: This option avoids sending large attachments and is recommended when you want ongoing collaboration.
Attaching a Copy of the File
Best for static versions:
Use when recipients don’t need ongoing access or may not have ISU accounts.
Steps:
- In a new Outlook message, click Attach File.
- Choose the file from your computer or select from OneDrive, then choose Attach as Copy.
- This sends a standalone version of the file.
Tip: Attach a copy when you want to make sure the recipient can always open the file without needing OneDrive permissions or when you need to preserve the version exactly as it is.
Key Difference: Link vs. Attachment
Link = Always current, collaboration-friendly, permissions required.
Attachment = Frozen copy, no collaboration, no extra permissions needed.
- Share Via Shareable Link
To share via a shareable link, click Copy link from the Share pane once you have added all individuals and/or groups with whom you would like to share (Figure 7):
You can generate a shareable link directly from OneDrive or from an Office app.
- Select Share from the application you are using
- Under Copy Link, configure who should be able to access the file (e.g., “Specific People” or “People in Illinois State University with the link”)
- Copy the link and send it in your preferred communication tool.
Important: Sharing with a link is still a two-step process. First, specify the people or groups who should be able to use the link. Then, send the link itself.
Figure 7:

The link will be copied to your clipboard and you may paste the link anywhere you would like to share with the people with whom you have chosen to share.
Note: Only those individuals/groups with whom you have shared the resource will be able to access the shared resources. If you would like to change the default sharing settings, follow the instructions in the following section.
- Sharing from Teams
The way files are shared in Microsoft Teams depends on where the file lives.
Files stored in a Team's Files tab (backed by SharePoint)
- These are automatically accessible to all members of that Team
- When you upload or share a file directly into a Team's channel, everyone in the Team can access it
Files stored in your Personal OneDrive
- If you share a file in a Team chat or channel, but it lives in your OneDrive, it will NOT be automatically available to all Team members
- You must explicitly grant access (through OneDrive's Share settings) to those individuals or groups
Important: Always confirm that the people you want to collaborate with have been given permission before pasting or attaching a OneDrive file link in Teams.
- Sharing from an Office App
Important: Sharing in OneDrive is always a two-step process. First, select the people you want to share with; files are not shared automatically. Then complete the share action (send the link, attach in Outlook/Teams, etc.).
You can share files directly from Office applications (Word, Excel, PowerPoint, etc.) without leaving the app:
- Open your document in the Office app
- Click File > Share (or use the Share button in the top-right corner).
- Choose whether to create a OneDrive share link or enter specific people’s names or email addresses.
- Important: Always confirm that the people you want to collaborate with have been given permission before pasting or attaching a OneDrive file link in Teams.
- Adjust the permissions (view or edit).
- Send the link directly from the app.
This is especially useful when you’re already editing a file and want to quickly bring others in.
For more details on sharing, see the Sharing Files in OneDrive section above.
Edit Existing Sharing Settings
You may change the sharing settings when creating a shareable link for a file or folder in OneDrive.
- Change the Sharing Settings for a File or Folder
- From your OneDrive My Files page, click the circle to the left of the item you wish to share and then click Share near the top-left of the page to view sharing options (Figure 8):
Figure 8: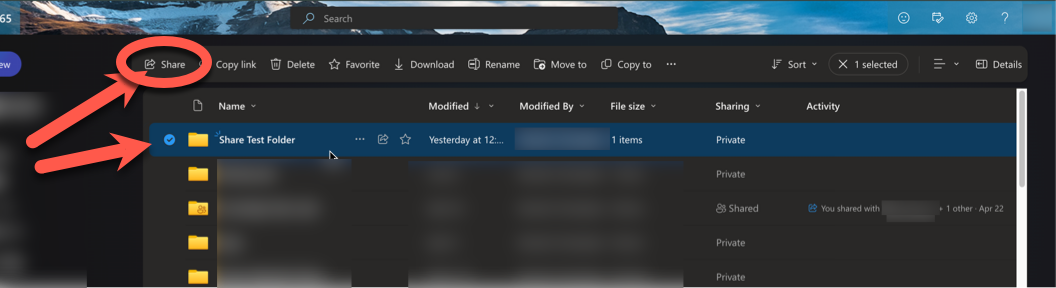
- In the Share pane, click the gear icon next to Copy link to access the Link settings (Figure 9):
Figure 9: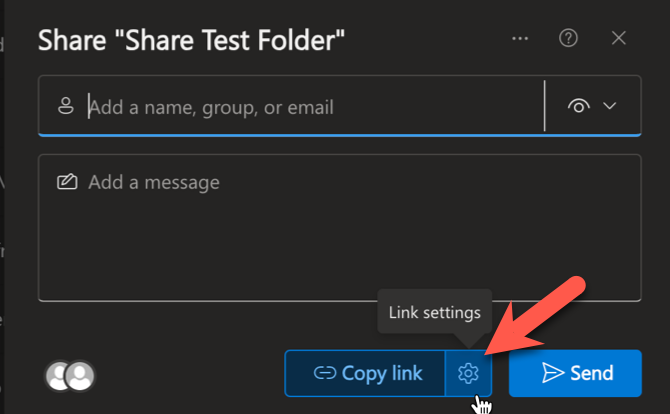
- In the Link Settings pane, select the sharing setting you wish for the file/folder (Figure 10):
- Anyone: The option to make the link accessible by anyone is blocked by Illinois State University.
- People in IL State University: This option will allow any Illinois State University member to access the file/folder from the link.
- People with existing access: This option will allow anyone with whom the file/folder has already been shared to access it from the link.
- People you choose: This option will allow you to specific individuals and/or groups whom you wish to be able to access the file/folder from the link. This is the recommended choice to safeguard university data.
Default Sharing Reminder:
By default, OneDrive links are set to only be accessible to people you choose. If you want to share a file or folder more broadly (such as with "Anyone with the link"), be sure to change this setting during the sharing process. Otherwise, recipients may not be able to access the content.
Figure 10: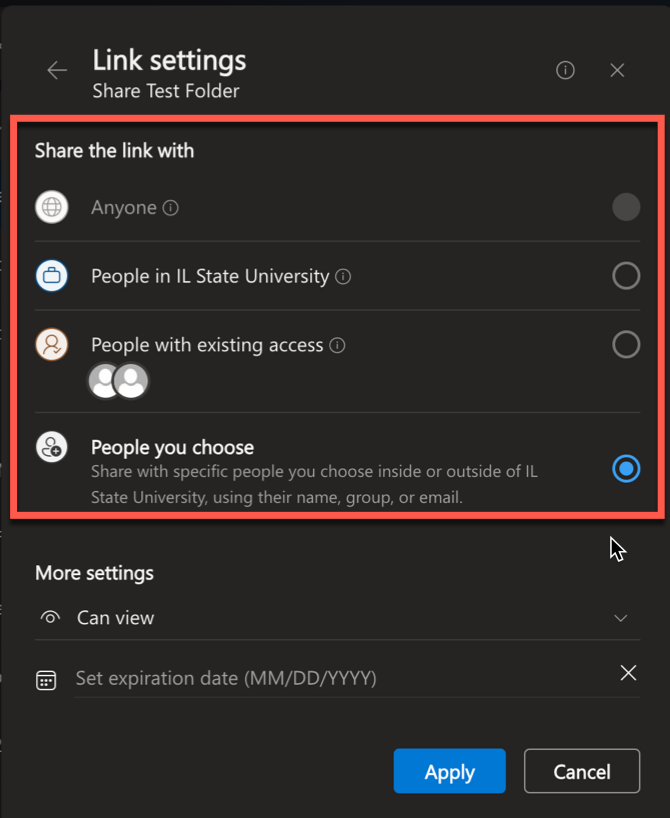
- After you have selected the sharing option, you may click the drop-down arrow under More Settings to select the level of access you wish to grant to those with whom the resource is being shared (Figure 11):
Figure 11: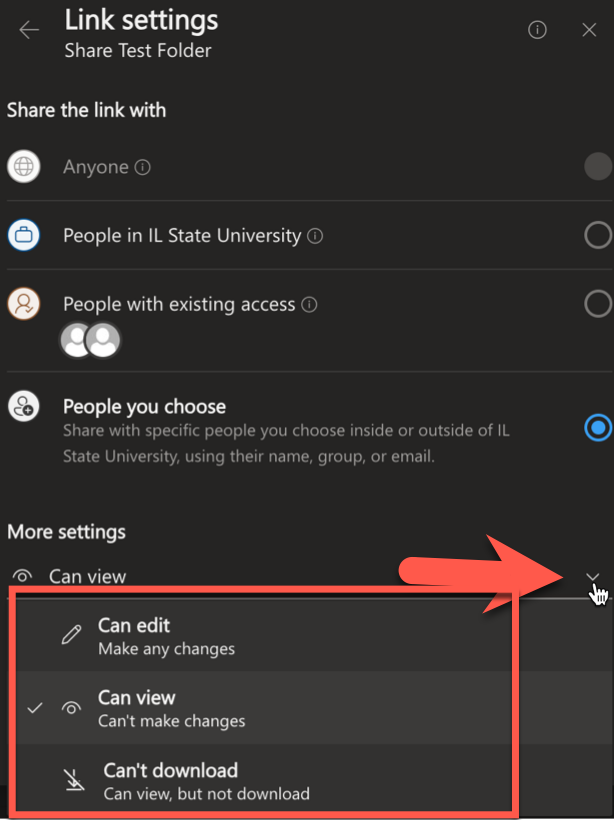
- After you have specified the desired level of access, you may select an expiration date for the settings. If you choose to do so, the population with whom you have shared the link will no longer be able to access the resource via the link after the expiration date. If you wish to allow the resource to remain accessible to the shared population indefinitely, you may skip the option to specify an expiration date. Once you have completed your sharing selections, you may click Apply to save the shared link to your clipboard (Figure 12):
Figure 12: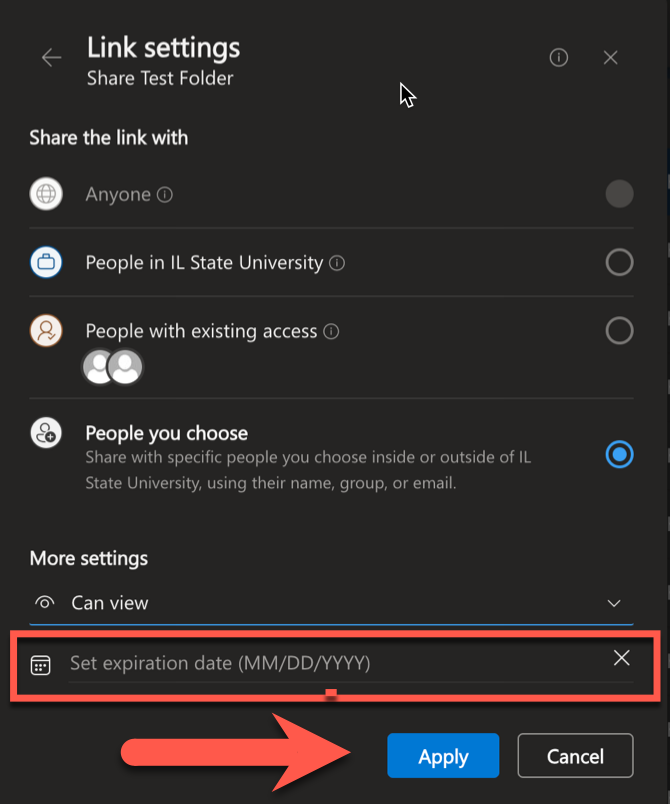
You may know share the shareable link by the method of your choice (email, Teams, website, Canvas course, etc.). The resource will be accessible via the link to the population you specified in the link settings.
How to Get Help
Technical assistance is available through the Illinois State University Technology Support Center at:
- Phone: (309) 438-4357
- Email: SupportCenter@IllinoisState.edu
- Submit a Request via Web Form: Help.IllinoisState.edu/get-it-help
- Live Chat: Help.IllinoisState.edu/get-it-help