Accessibility
Adding Interactive Form Controls to a Tagged Document in Adobe Acrobat Pro
Last modified 6/11/2024
Acrobat 2023 Update
In October 2023, Adobe released an update to Acrobat on desktop. The Acrobat interface has changed. Tools that were found on the right side of the screen are now typically located on the left side of the screen and those on the left have been moved to the right (including the Accessibility Tags Tree). We are working to update content of tutorials.
If the auto detection tool missed a form control or you want to add form controls manually to your PDF document, open the Prepare a Form tool.
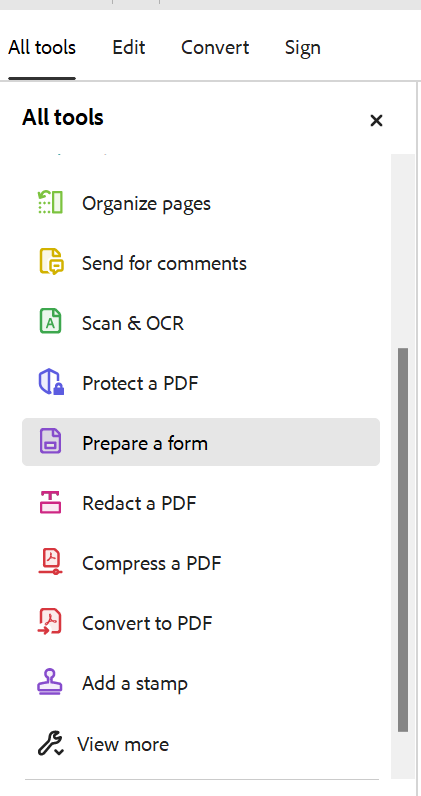
The Prepare a Form tool will open on the left side of the screen. Here you can select to add text content or form components. In versions older than Acrobat 2023, the Form Components may be located at the top of the screen.
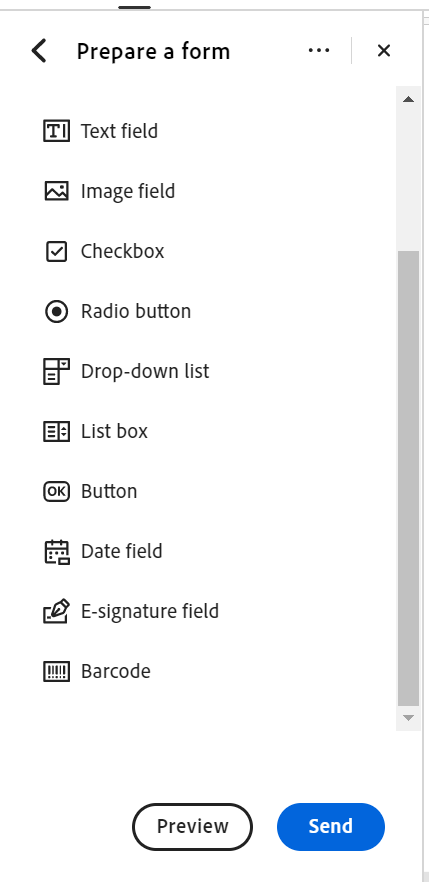
Form Component options:
- Text Field: enables people to type their own answer into field
- Check Box: enables selection of one or more items
- Radio Button: enables selection of one item from mutually exclusive items
- List Box: enables selection from list of choices
- Drop-down list: enables selection from a drop down list of choices.
- Button: adds a button which can be used to set an action like "Print" or "Clear Form"
- Image Field: Enables user to browse to select an image to add to the form
- Date Field: Adds a calendar picker to form field
- E-Signature: Adds a field allowing people to electronically sign.
- Barcode: Adds a barcode allowing people to scan and retrieve data.
Manually Adding Form Fields
Step 1. Select and Place Form Component
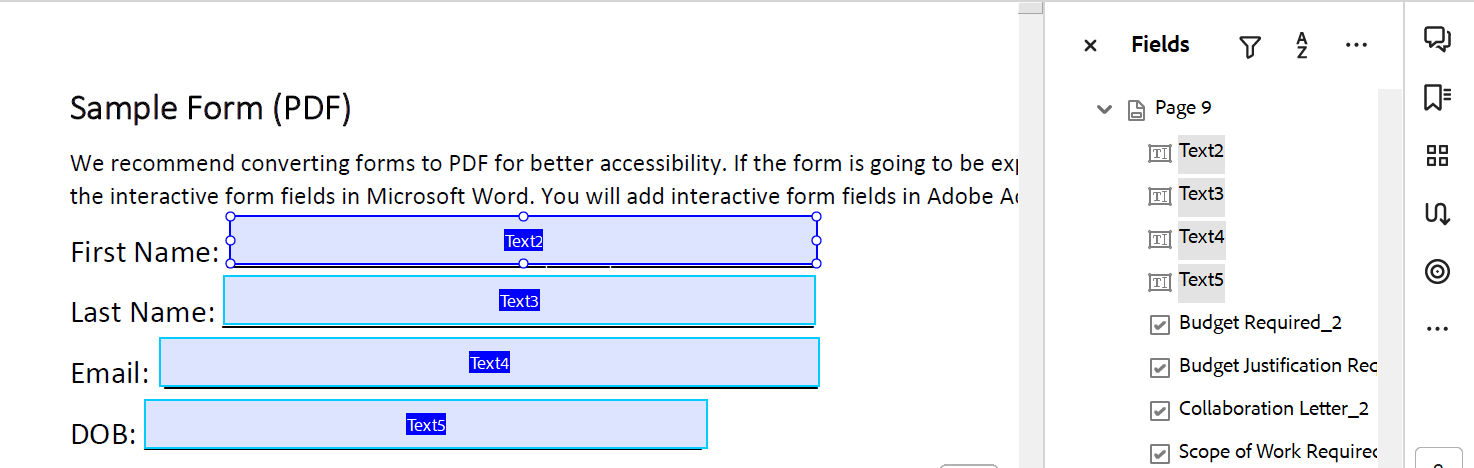
Select the form component then drag and drop it over its corresponding space. This will add the new form field to the document and to the Fields list on the right side of the screen. Remember, in the fields list new form controls will be added after the last item in the list and you may need to move the form field to its proper tab order.
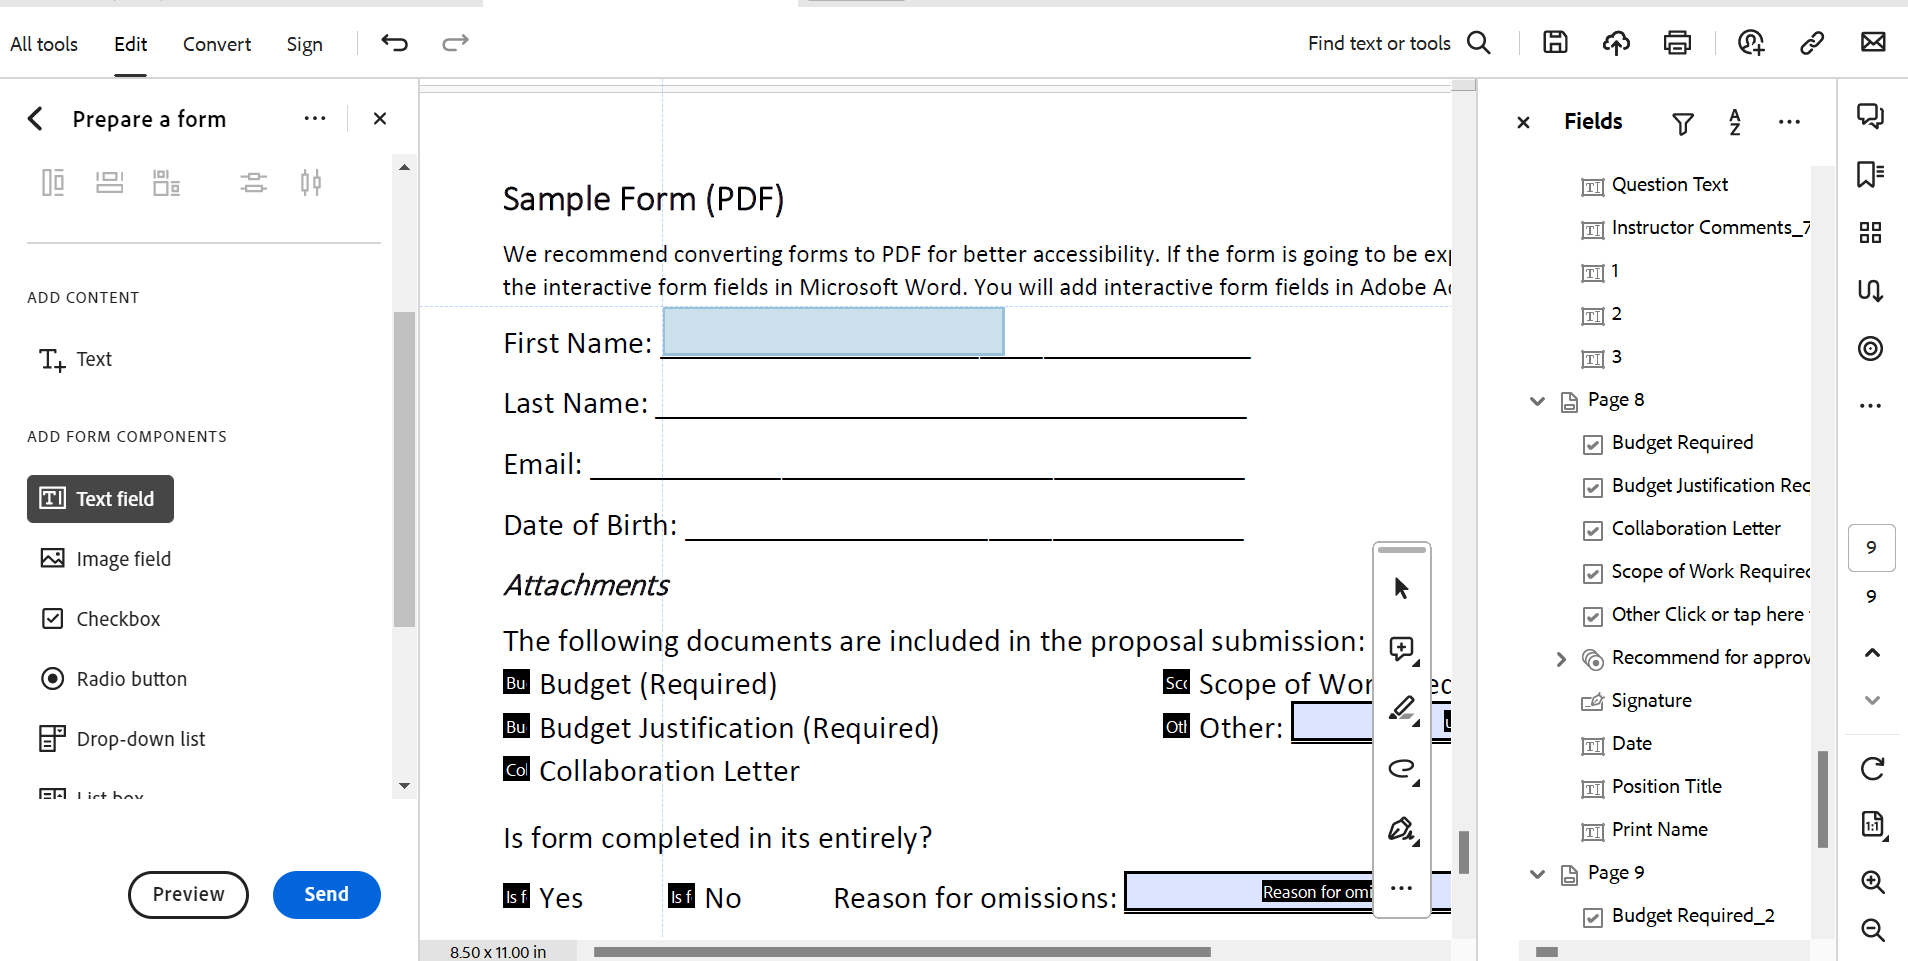
Make sure all your form controls are re-sized to match the visual space for the form field. Also, check to make sure the tab order in the Fields list is logical before moving on to the next steps.
Step 2. Update the Form Component Properties
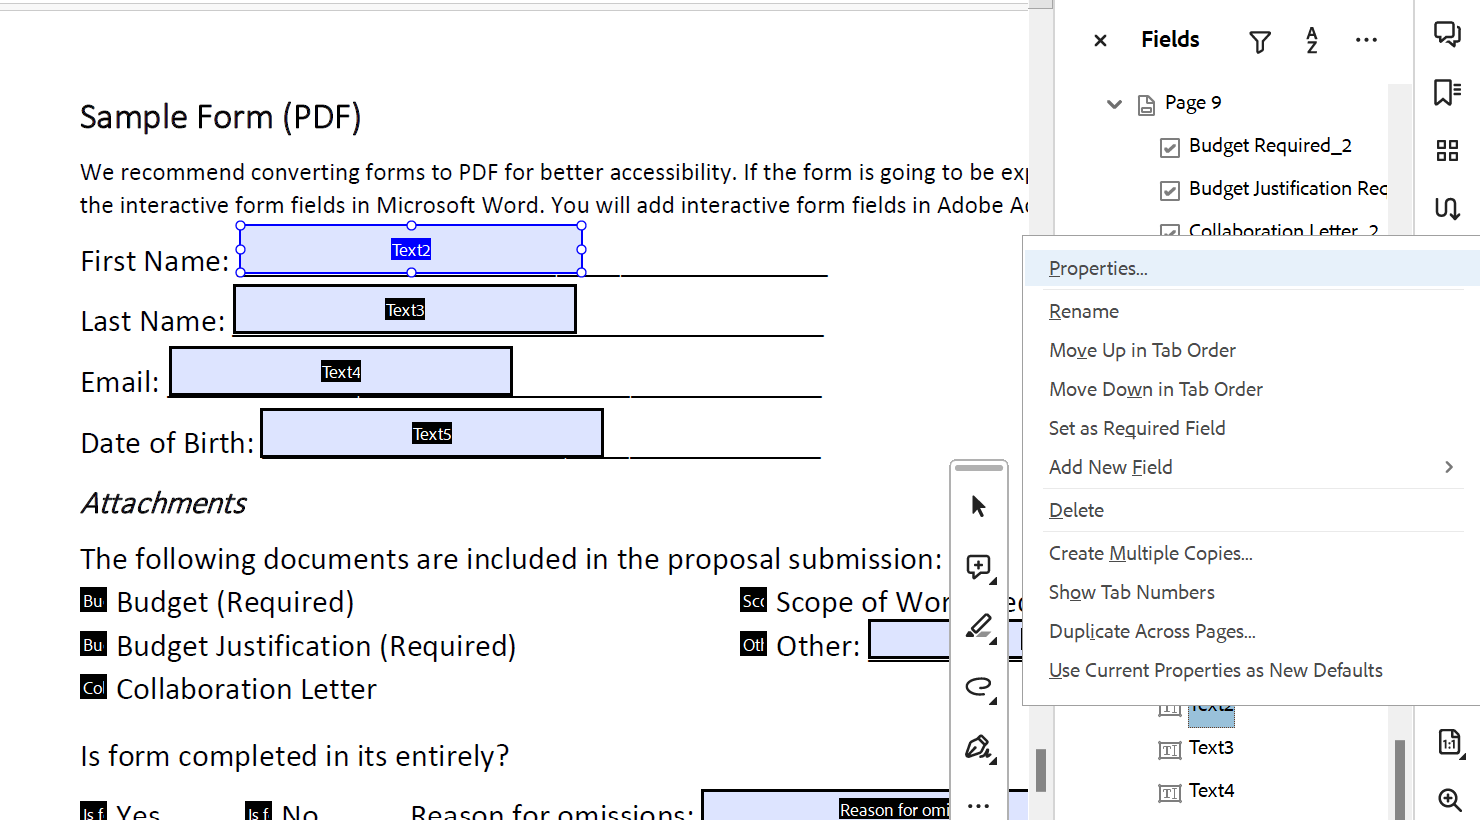
After placing the Form Component, you will need to update its properties. Open the Properties dialog for the form component.
Note: You can access a form control's Properties dialog box in multiple ways:
- Double click on the form component
- Right click on the form component in the document then select Properties from the list of options.
- Right click on the form component in the Prepare Form Pane then select Properties from the list of options.
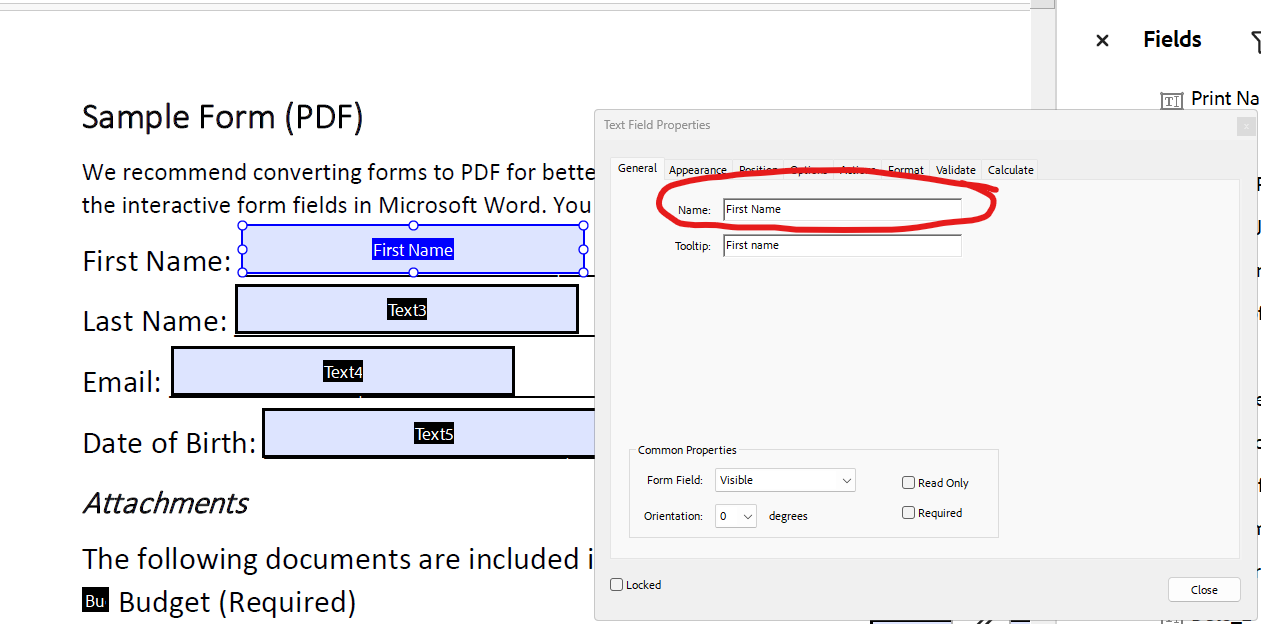
Name
Each form field must have a unique name to identify it and differentiate it from other form fields. If two or more form fields have the same name then anything that happens to one form field will happen to all other form fields of the same name. The name can be anything to help identify the form field, but remember information in the Name text box is not shared with assistive technologies.
Type the unique form field name into the Name text box.
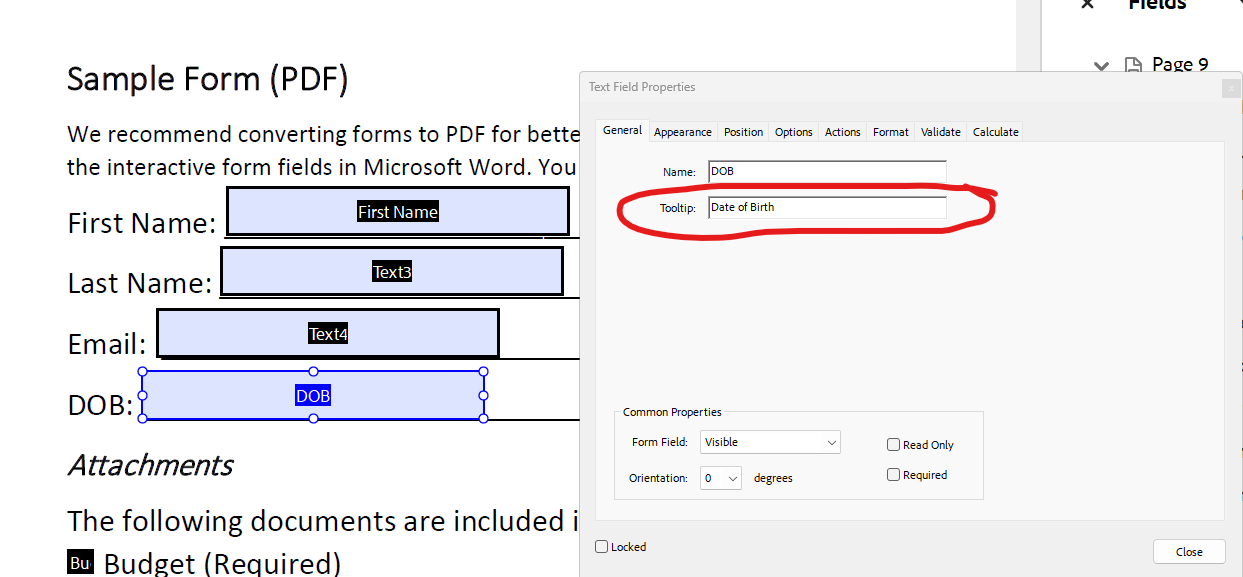
Tooltip
After adding a unique name, you must add a tooltip. The tooltip is what is presented to assistive technology users so they know how to fill out the form field. Make sure to avoid using acronyms in tooltips (e.g. a "DOB" form field has a tooltip of "Date of Birth"). If multiple form fields have the same visual field label, make sure the tooltip clearly identifies each form field's purpose. For example, if multiple form fields have the label of "first name" tooltips can include who's first name should be entered into the field such as "student's first name," "professor's first name," or "parent's first name" to help separate the form fields from each other.
Tagging Form Fields in the Accessibility Tags Tree
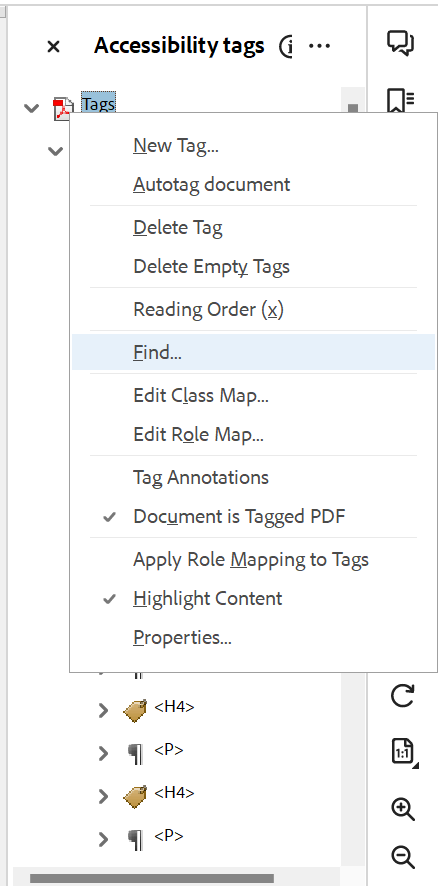
Step 1. Find Element
When placing a form field into a tagged document the form field is not present in the Tags Pane this can cause an issue with assistive technology announcing the form fields' tooltips incorrectly or not at all. To place the form field with all its information in the Tags Pane, open the Tag Pane and place your cursor on the word "Tags" and right click to open the list of options. From the list of options, select "Find" to open Find Element dialog box.
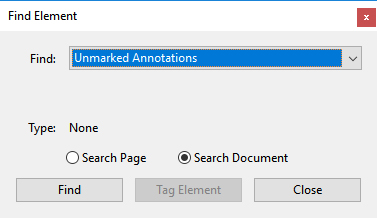
Step 2. Find Unmarked Annotations
In the Find Element dialog box, choose Unmarked Annotations from the Find list of options. Select the Search Document radio button then choose the Find button.
Step 3. Tag Element
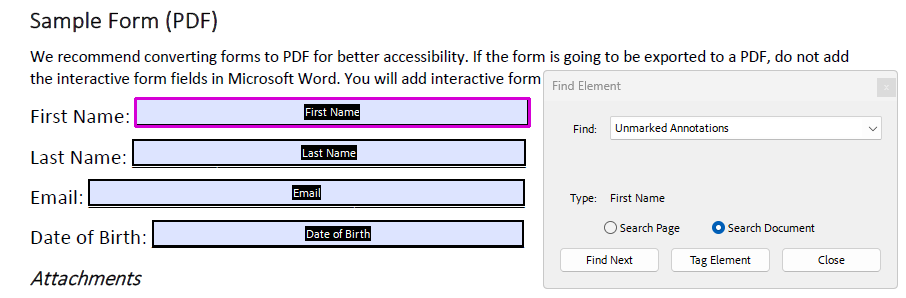
Notice the Type section has changed from "None" to the field name of a form control you added to your document. The form control will have a blue visual focus indicator around it. Other unmarked annotations may be in your document, too. Choose Tag Element button.
Step 4. Add New Tag
In the New Tag dialog box, select "Form" from the Type list of options. Capitalization is important, Form needs a capital F in this case. It is optional to add a title. Adding a title can help tell the form controls apart in the Tags Pane. Select Find Next Button. Tag each form control so it appears in the Tags Pane (typically the bottom).
Step 5. Cut and Paste Form Fields
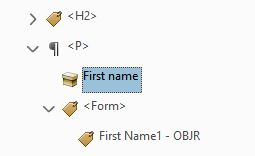
Order is important when adding the form field to the Tags Pane. Select the parent form control (i.e. <Form>), right click then choose Cut option. This will gray out the <Form> field scroll up to the <P> tag in the Tags Pane with the associated form label text. Select the chevron symbol to the left of the <P> tag to open its child element. This should have a box icon with the Form Control Label Text. Select the child element, right click, then choose Paste from list of options. Move all the <Form> tags to the appropriate <P> tags.
Make sure each <Form> tag has an OBJR tag as a child. The OBJR contains all the reference information and tooltip. If the form control is moved after this step the OBJR will disappear and the whole form control must be replaced with a new one and a new unmarked annotation tagged.
If your form field is in a table layout, we recommend removing the table tags and working only with the form tags and paragraph tags. Screen readers sometimes will have trouble reading forms controls when they are inside table tags.
Step 6. Save
Once all the form control are in place. Save your form.
More Resources
Feedback
To suggest an update to this article, ISU students, faculty, and staff should submit an Update Knowledge/Help Article request and all others should use the Get IT Help form.