Accessibility
Format Headings in CampusPress
Last modified 2/16/2022
In CampusPress, your web page's Heading 1 comes from the title of the page. If your instinct is to make the text larger and bolder, the text may need to be formatted as a heading. Use Heading 2, 3, or 4 as subheadings on your page.
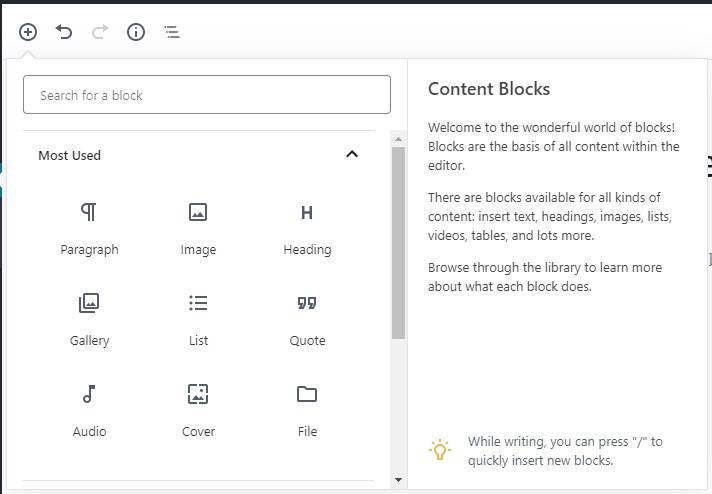
Step 1. Select the Add Block Icon
Select the Add Block Icon to view the content block options. The Add Block Icon is located in the top left corner of the screen or to the left of the page content block. Content block are available for all types of content.
- paragraph text
- headings
- images
- lists
- videos
- table
- and more...
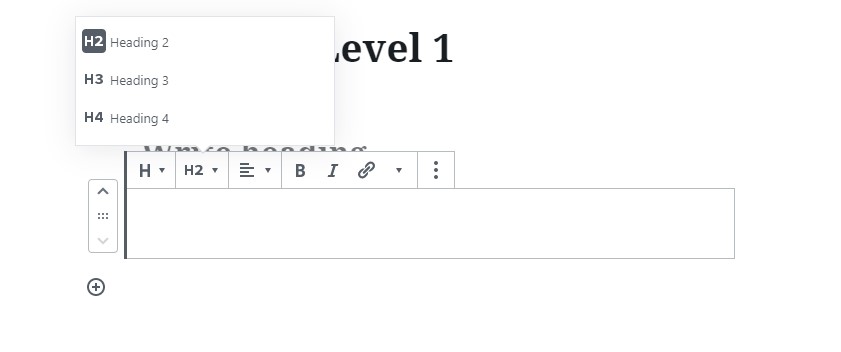
Step 2. Select the Heading Option
From the list of content blocks select the heading option.

Step 3. Choose a Heading Level
Choose a heading level. Remember to avoid skipping heading levels.
Feedback
To suggest an update to this article, ISU students, faculty, and staff should submit an Update Knowledge/Help Article request and all others should use the Get IT Help form.