Accessibility
Create Accessible Data Table in Microsoft Word
Last modified 1/3/2022
Having accessible documents is an important resource for our campus community. Individuals who are blind or have low vision will be able to follow and understand your data more clearly if you begin each document with accessibility in mind. The recent versions of Microsoft Office products have accessibility features built into the program to help you design and create accessible documents. Use the following steps to create accessible tables for just about anyone, including those who actively use assistive technologies such as screen readers.
Remember
- Add descriptive alt text to all images and graphics
- Use descriptive hyperlink language
- Color is not used to convey meaning alone
- Foreground (text) and background colors must have sufficient contrast
- Use tables for presenting data, not for changing the visual layout of the page.
- Include a heading row. Don’t start with data in the first row
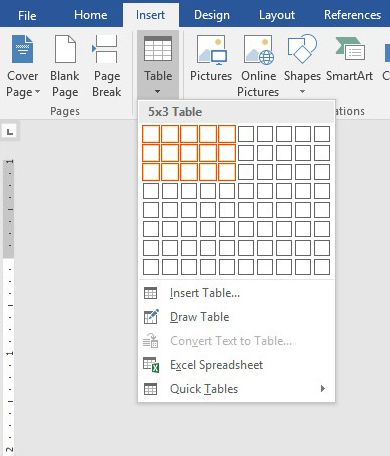
Step 1. Create a Table.
To create a simple table in Microsoft Word, chose the Table button under the Insert Tab. Select the number of columns and rows needed for your table.
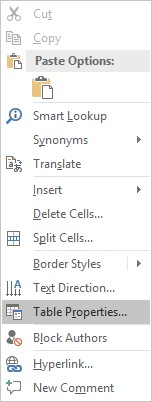
Step 2. Right click on the table.
You can also use Keyboard command SHIFT + F10 on selected table as a short cut. Click Table Properties.
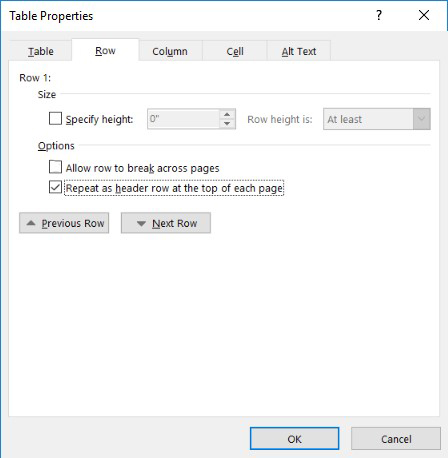
Step 3. Select the Row Tab.
Check the check box for “Repeat as header row at the top of each page.” Make sure the check box for "Allow row to break across pages" is unchecked. This will repeat the first row at the top of each new page and label that row as the header row for assistive technology and screen reader users.
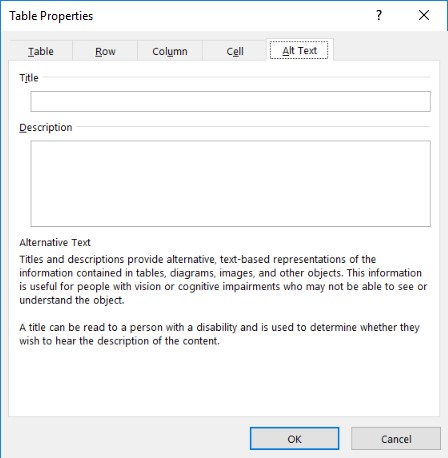
Step 4. Select the Alt Text tab.
Enter a Title and Description of the Table in the text fields provided.