Accessibility
Linking Text in Adobe Acrobat Pro
Last modified 9/26/2025
Link text (i.e. www.IllinoisState.edu) should be hyperlinked to open its respective web page or document. You can add links in Adobe Acrobat Pro, but if you have access to the original source document, it may be easier to update the link there before exporting or saving as a PDF. If you do not have access to the source document and need to hyperlink text in a PDF, use the following instructions.
Step 1. Open Edit a PDF Tool
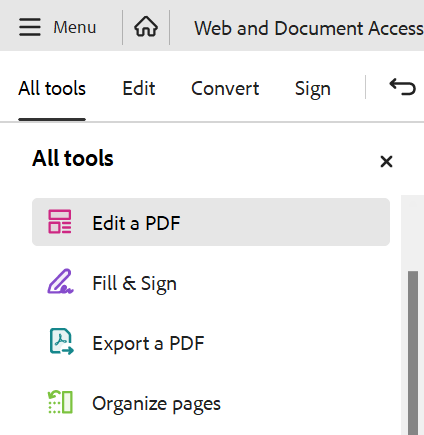
From the All Tools List, select Edit a PDF tool.
The Edit a PDF toolbar will open on the left side of the screen. Versions prior to Acrobat 2023 may open at the top of the screen.
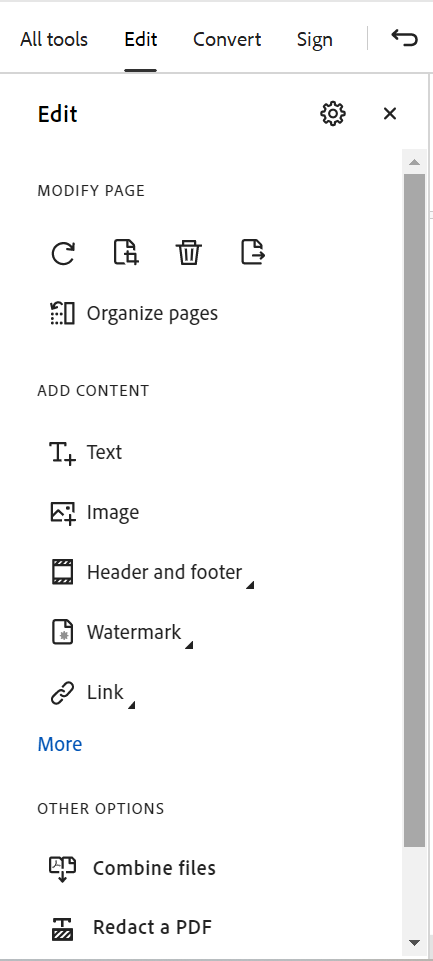
Edit a PDF options:
- Rotate Page Right
- Crop Page
- Delete Page
- Extract Page
- Order pages
- Add Text
- Add an Image
- Add Header/Footer
- Add a Watermark
- Add a link
- Add Bates numbering
- Add a button
- Add a video
- Add Sound
- Add 3D media
- Attach a file
- change background
- add and article box
- Combine Files
- Redact a PDF
- Open Prepare a Form tool
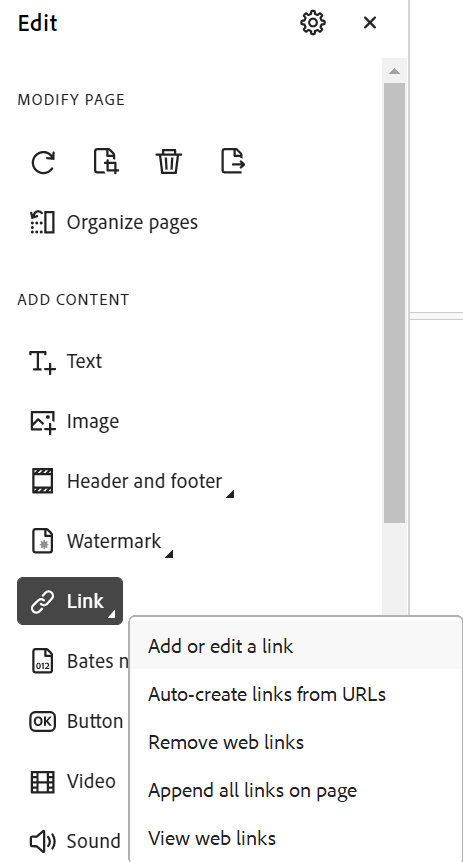
Step 2. Add or Edit Links
Select the Link option from the Edit a PDF options. From the menu, choose Add or Edit a link or auto-create links from URLs.
Step 3. Select link text.
If your links were auto-created then skip this step. If you are manually adding or editing a link, use the cursor to select the Link text by creating a box around all of the text.

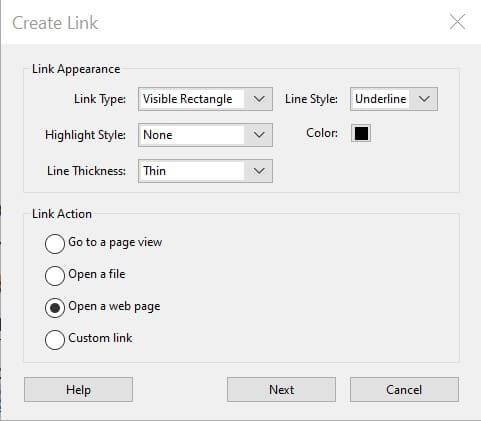
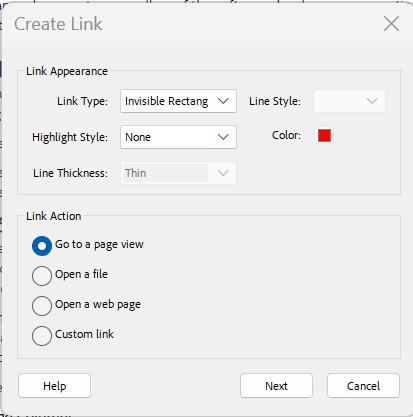
Step 4. Link Properties
In the Create Link dialog box, select the following options listed below. Then choose Next button.
Link Appearance
- Link type: Visible Rectangle
- Line Style: Underline
- Highlight: None
- Line Thickness: Thin (depends on size of font)
- Color: Match your font color
Link Action
Web links
Select Open a web page radio button.
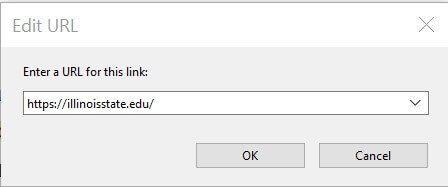
Type URL
In the Edit URL dialog box, type (or copy and paste) full URL into the edit box. Choose OK button.
Document links
For linking to pages inside the same PDF, choose the option for "Go to page view."
Choose a page
Use the scrollbars, a mouse, or arrow key, and zoom tools to select the target view inside the PDF. Select the Set Link button to create the link destination.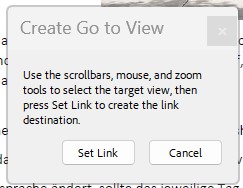
Step 6. Adjust underline
Use cursor to move and resize the underline the underline, if necessary. Make sure the underline is only under the corresponding linked text.

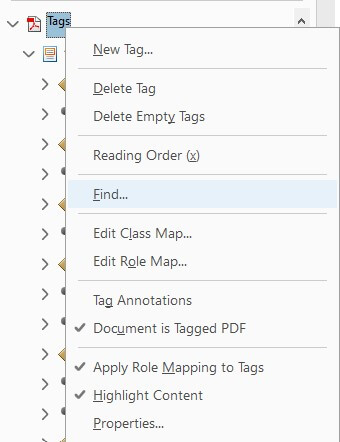
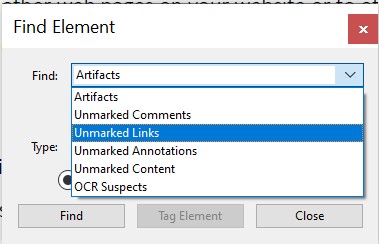
Step 7. Find
In the tags pane, right click on the Tags tag then select the Find option from the menu.
Step 8. Unmarked Links
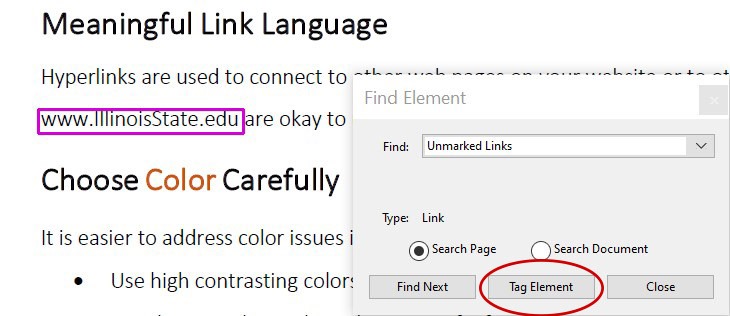
In the Find Element dialog, choose Unmarked Links option from the Find select box. Choose Find button.
For each unmarked links, select Tag Element button.
Each new <Link> tag will appear in the tags tree as a child of the Tags Tag.
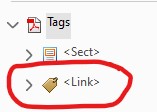
Inside the <Link> tag is a Link - OBJR. This is the link Object Reference which contains the hyperlink information (style and URL target, etc.). When finished, choose the Close button.

Note
Links cannot be opened from the tags tree. They are only opened from the main document.
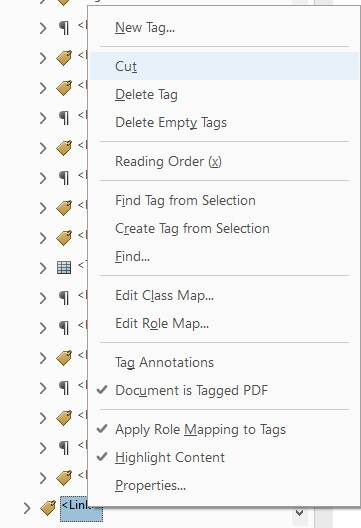
Step 9. Move the <Link>
To move the newly added <Link> tag, right click the tag. From the menu, choose the Cut option.
Navigate to and open the tag containing the linked text content. Right click on the link text content box. From the menu, choose Paste option.
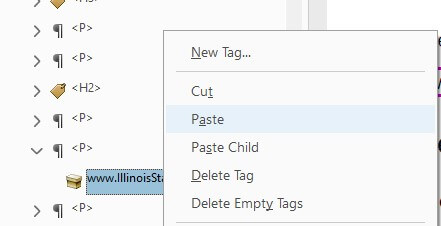
The <Link> tag should appear on the same level as the text content box inside an outer tag (i.e. <P>).

Feedback
To suggest an update to this article, ISU students, faculty, and staff should submit an Update Knowledge/Help Article request and all others should use the Get IT Help form.