Accessibility
Convert an Image-only PDF with Text Recognition in Adobe Acrobat Pro
Last modified 6/4/2024
Adobe Acrobat Pro DC has a built-in Optical Character Recognition (OCR) feature that will recognize most text and allow you to convert image-only PDFs into readable ones. You can recognize text in a couple of ways. Remember to use the highest quality scan possible.
Open Scan and OCR Tool
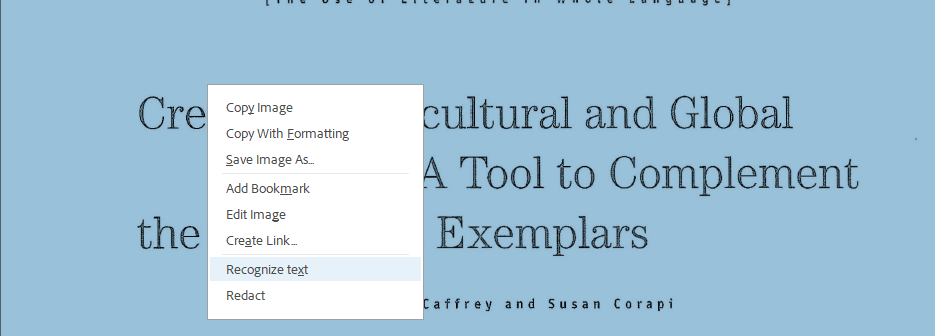
If you open a PDF with un-recognized text, click the main document of the PDF. From the menu, choose Recognize Text. This will open the Scan and OCR tool.

You can also right click the main document and choose Recognize Text from the menu.
If either of these do not work, open the Scan and OCR tool from the Tools menu.
Once the OCR tool has completed, save your file by selecting Menu>Save or Menu>Save As.
Versions after October 2023
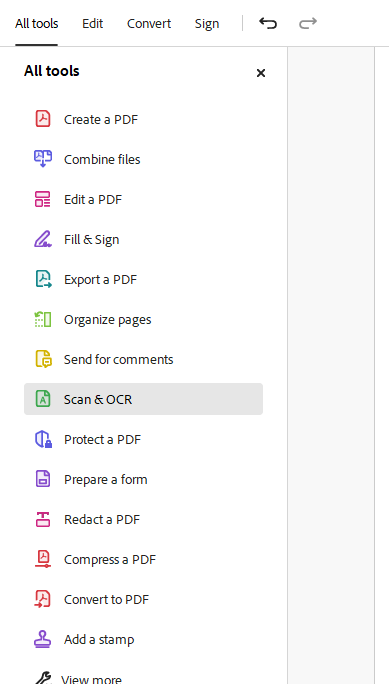
In Acrobat versions after October 2023, the Scan and OCR Tool is located under the All Tools menu.
Versions Prior to October 2023
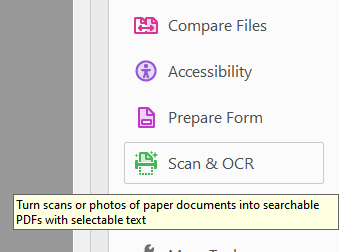
Select the "Scan and OCR" tool from the Tools Pane on the right side of the screen. This will open a toolbar at the top of the screen. The rest of the tutorial follows the post October 2023 interface.
Recognize Text
The Scan and OCR Tool will open on the left side of the screen. To run the recognize text feature, choose either the recognize text In this File option or In multiple Files option.
Running the In this File option will recognize the text in the file currently open. Choose the primary document language and then select the Recognize Text button.
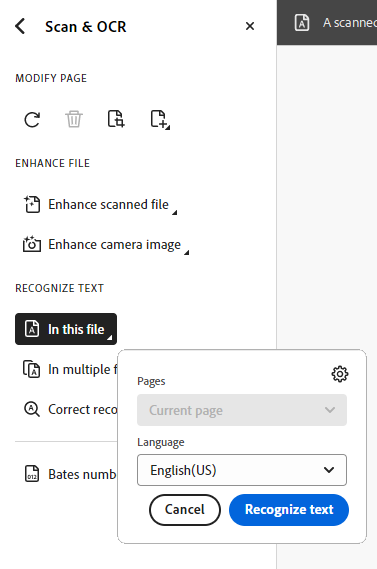
Running the In Multiple Files option will recognize the text in many files. Use the dialog to navigate to and select your files to scan then choose the OK button.
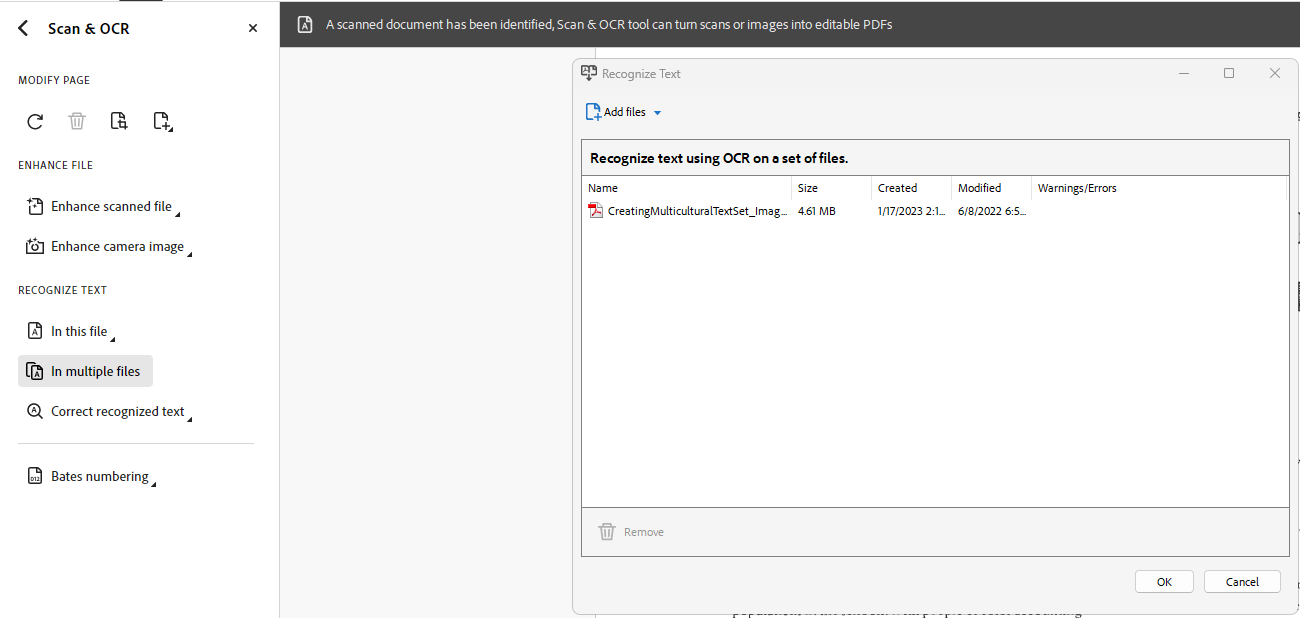
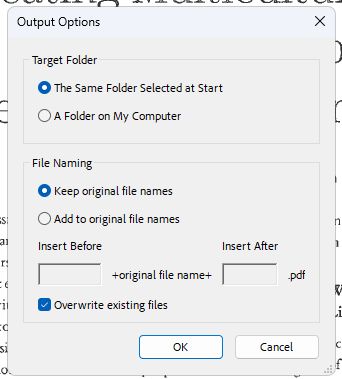
Choose your Output Options. You can save the scanned files to the same folder or a new folder and you can rename files if you choose.
Enhance Options
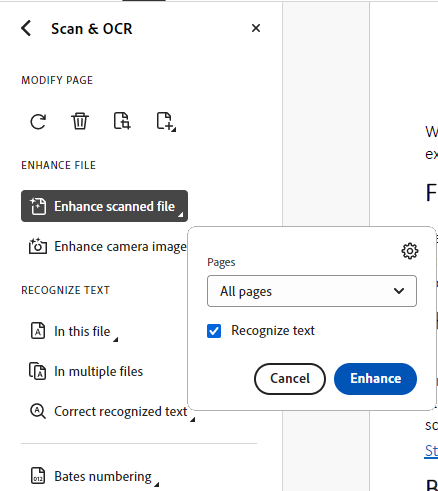
To get a better quality scan you can try using the Enhance File options. In the Scan and OCR tool, the Enhance File options will try to turn scans or photos of paper documents into PDFs with selectable text. This tool will also clean the page's contrast and flatten pages where text may curve from book bindings.
Scanned File
To clean up a scanned file's quality, select the "Enhance scanned file" option from the Enhance File options. From the menu, you can choose to scan all pages, the current page or a page range. Ensure the Recognize Text check box is checked then choose the Enhance button.
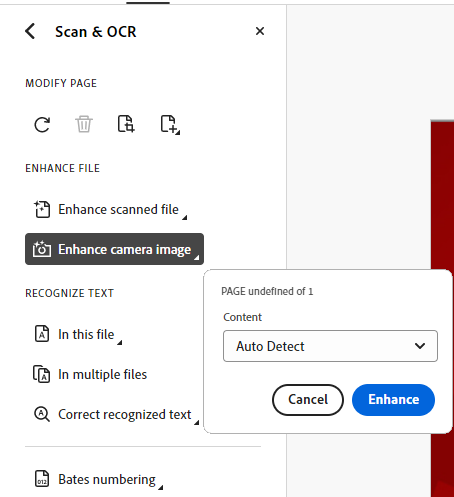
Camera Image
To clean up a image file's quality, select the "Enhance camera image" option from the Enhance File options. From the Content menu, choose the option that best describes your file or have Adobe auto detect. You can choose from document or whiteboard options. Choose the Enhance button. Note: cleaning an image file does not automatically recognize text in the image. It just cleans the images to try to get a better OCR scan. You will need to run the Recognize Text: In this File option.
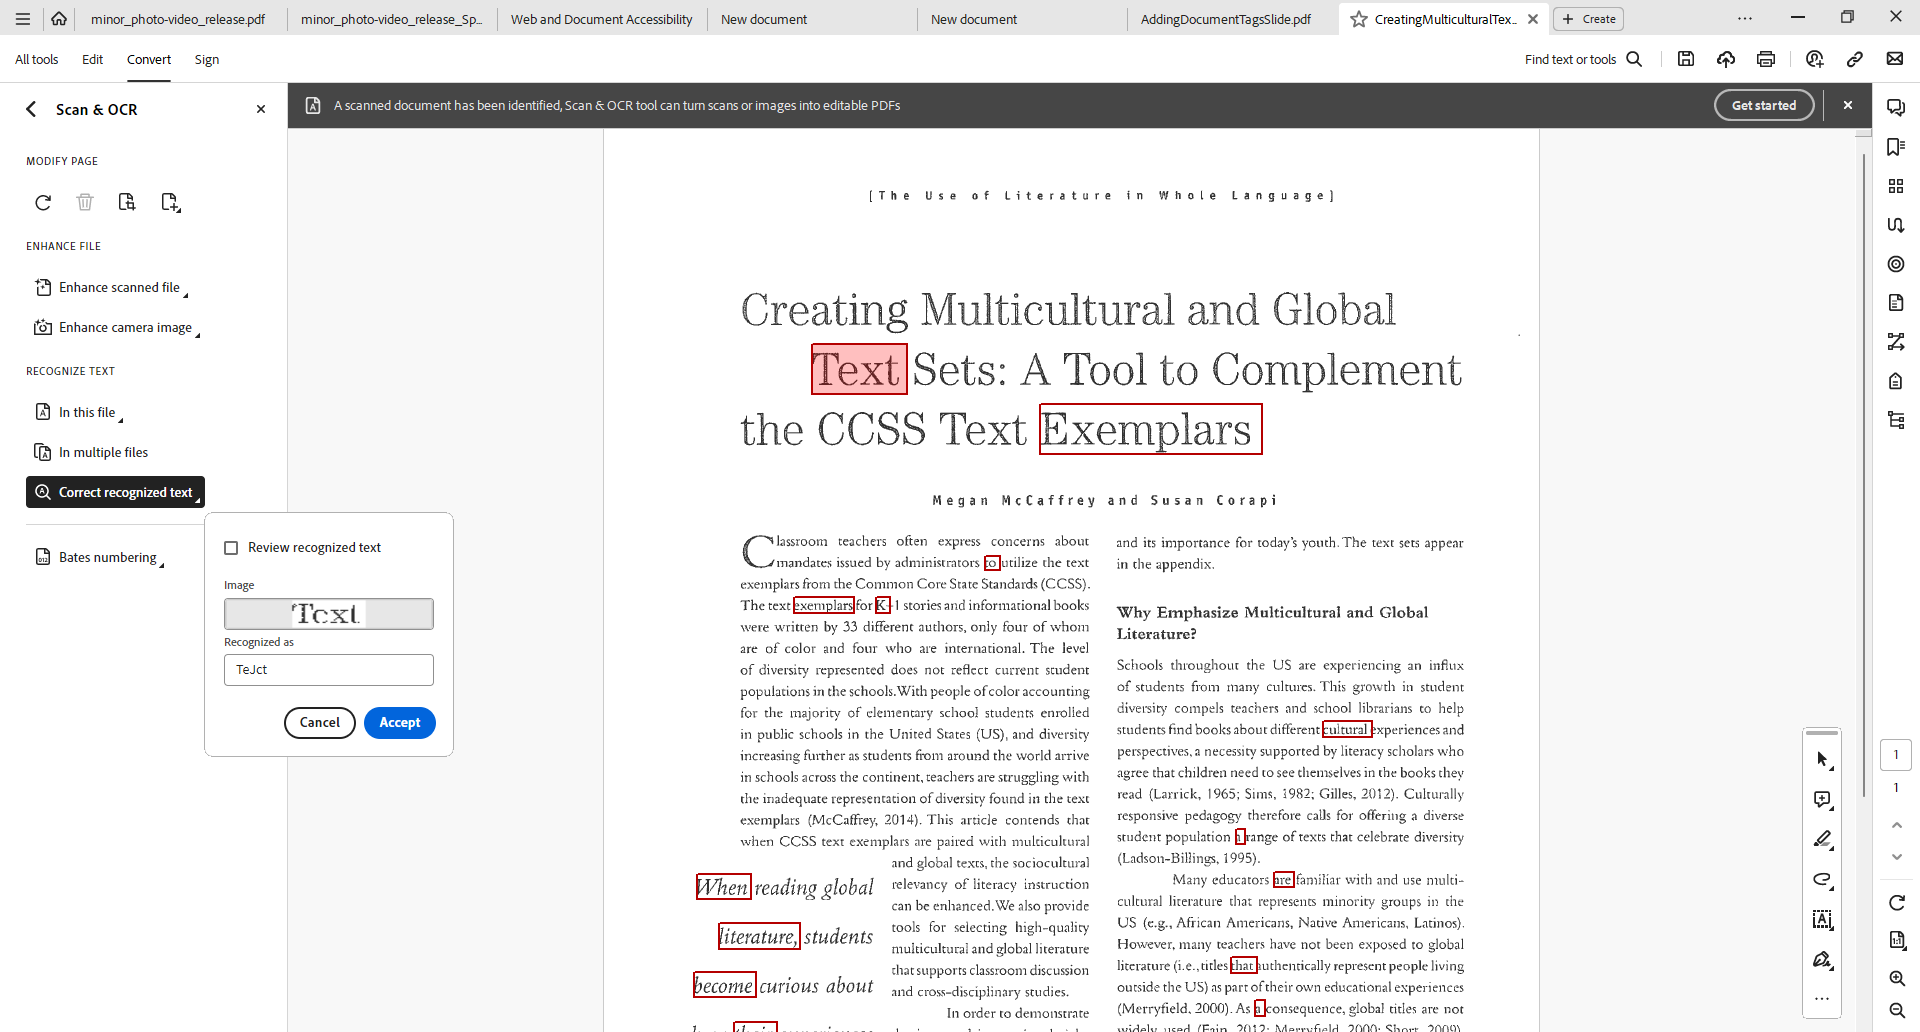
Correct Recognize Text
Once Text is recognized, choose the Correct Recognized Text option. Check the Review recognized text check box and navigate through the suspect text found by the tool, correct as necessary, and click accept. Save your document.
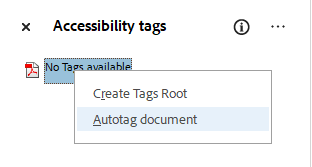
Auto Tag document
Once all the text has been recognized go to the Tags Pane, right click on No Tags Available. Select Add Tags to Document option. The Auto-Tag function will try to interpret your document based on the size and style of the fonts you have used. Larger and bolder text will typically be recognized as Heading 1 and Heading 2, even if they are not supposed to be headings.
Check and Update Document Tags
The auto tagging option will not be 100% correct. Check and update the document tags as necessary. Save your document.
Still Not Working?
Is your document still not recognizing the text? Get help troubleshooting your document by Submitting a Help Ticket. Be sure to add the word "accessibility" in the description.
Feedback
To suggest an update to this article, ISU students, faculty, and staff should submit an Update Knowledge/Help Article request and all others should use the Get IT Help form.