Accessibility
Adding Data Tables in Omni Campus CMS
Last modified 6/4/2024
Tables are found throughout our digital spaces. A table is an arrangement of information or data, typically in rows and columns, though tables can have a more complex structure. We need to pay extra attention to tables because if they are not properly structured, they can be a barrier to many people including those who rely on assistive technologies to navigate them. Remember the more complex your table is the more you will need to work to make it accessible. Avoid using tables for layout purposes only, doing so will make it difficult and frustrating for people using assistive technology to navigate your content.
Follow the steps to add a table to your webpage in the Omni Campus CMS text editor.
Step 1. Open webpage in Omni Campus CMS editor.
Log in to Omni Campus CMS at the bottom of the page. Select the green Edit button for the area you want to add a table to open the WYSIWIG editor.

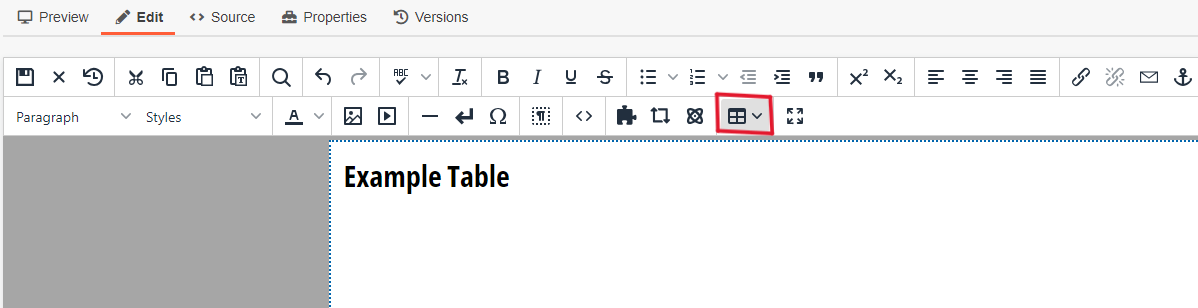
Step 2. Insert/Edit Table.
Place the cursor at the location you want to add a table. Select the Insert/Edit Button from the editor tool bar.
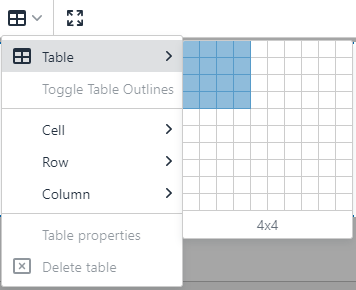
Step 3. Choose the number of columns and rows.
Under the Table option, use a mouse or keyboard to navigate to and choose the number of cells for your table.
A table will appear in the body of the Editable field.
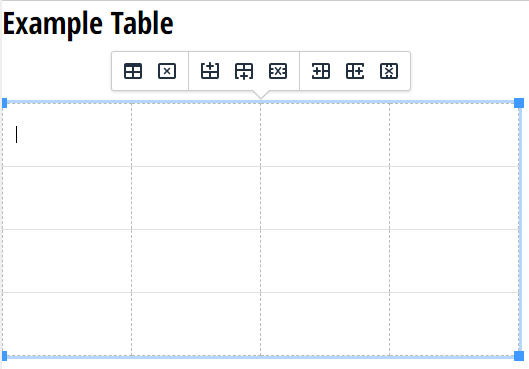
Table Options
Above the table will be icons indicating table options.
From left to right the table options are:
- Table Properties

- Delete Table

- Insert Row Before

- Insert Row After

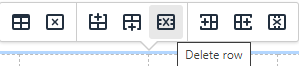
- Delete Row
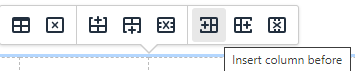
- Insert Column Before
- Insert Column After

- Delete Column

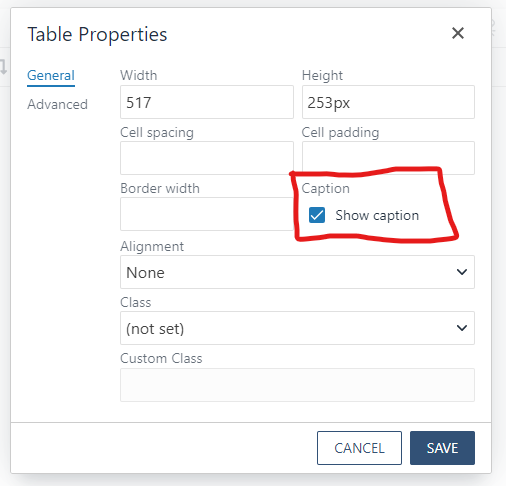
Step 4. Add a caption in the first row.
The Table Caption provides context for the table and helps assistive technology users find the table, understand what it’s about, and decide if they are interested in the data provided.
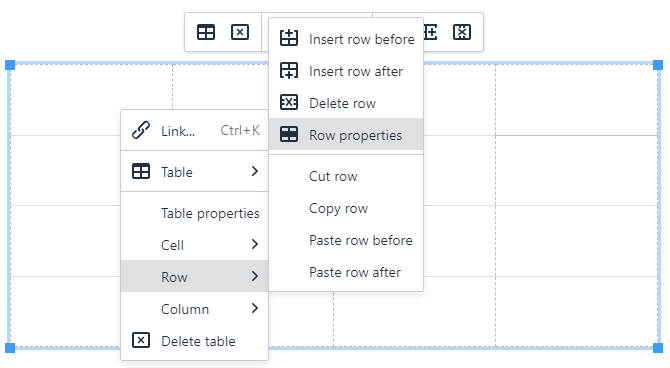
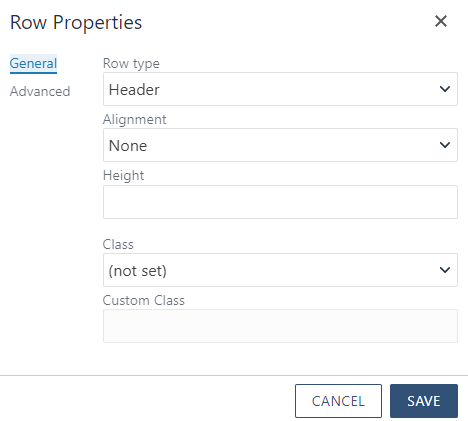
Step 5. Assign row header.
Place your cursor in the header row of the table then right-click and select "Row" and "Row Properties"
Step 6. Change row type.
In the Table Row Properties, change the Row Type from Body to Header then select Save. Doing so will format the row selected as a header for each column.
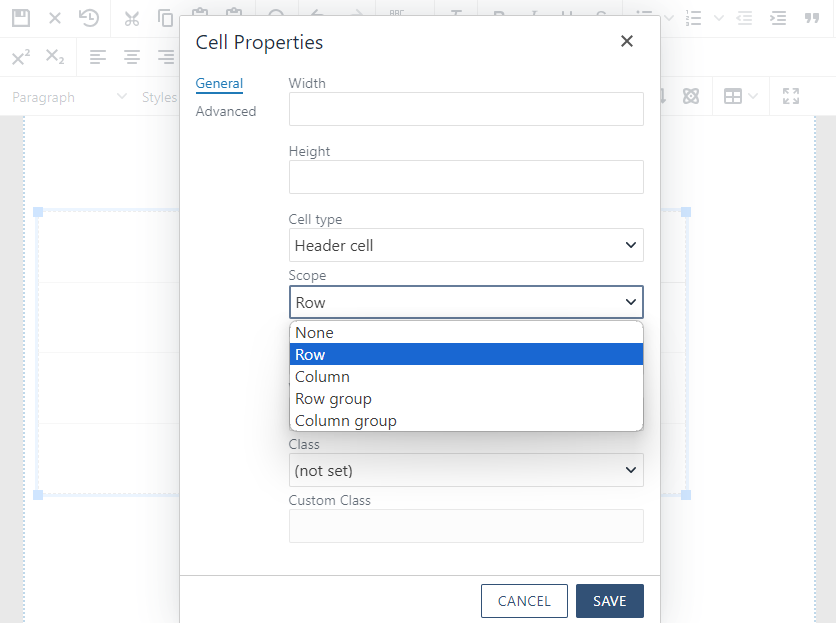
Step 7. Select column header cell.
If your table has a column which contains headers for each row, add a scope attribute to the table cells in that column. For each column header, place the cursor in the column cell header then right-click and select "Cell" and "Cell Properties".
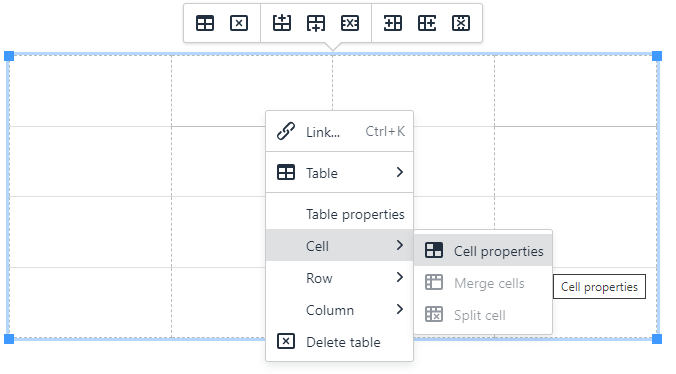
Step 8. Scope row.
Set Scope property to "Row" then Save. Do this for each cell in the header column (not including the Row header).