Accessibility
Adding Alternative Text to Images in Microsoft Office
Last modified 3/14/2025
Having accessible documents is an important resource for our campus community. Recent versions of Microsoft Office products have accessibility features built into the program to help you design and create accessible documents. All essential images, charts, and graphs must have descriptive alternative text (i.e. image descriptions, alt text). Use the following steps to add alternative text to non-text content in Office products such as Word, Excel, and PowerPoint.
Step 1. Select the Image.
Open the document and right click on the image. Select Format Picture/Chart/Shape to open the Format Pane (or use keystrokes Shift + F10, O on selected element).
Step 2. Open Size and Properties menu.
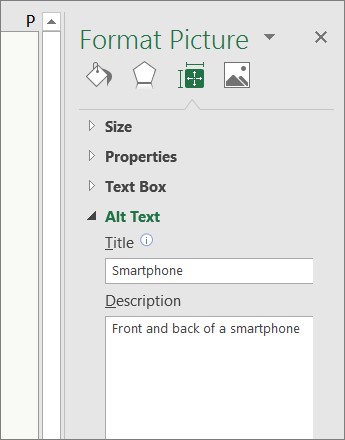
From the Format Pane, select the Size and Properties button, then select Alt Text.
Step 3. Enter a Description.
The alternative text for the image must be entered into the edit box marked Description. This is the information that will be passed to assistive technology such as screen readers. When entering a description, include the most important information in the first line, and be as concise as possible. Once done, select the X in the top right corner to the screen to close the Format Pane. As the Title field does not always transfer to assistive technology, please make sure the Description field has the alternative text.
Resources
Feedback
To suggest an update to this article, ISU students, faculty, and staff should submit an Update Knowledge/Help Article request and all others should use the Get IT Help form.
