Accessibility
Recording Captioned Lecture Videos with PowerPoint and Zoom
Last modified 11/4/2021
You can combine an Office 365 (online version only) PowerPoint presentation with Zoom to lecture with live auto-generated captions. Make sure your presentation is available on Office 365 PowerPoint. If not, import your presentation.
Step 1: Open Zoom Meeting
Open and host a meeting through Zoom Video Conferencing Tool.
Step 2: Share Your Screen
In Zoom, select the Share icon to share the computer screen.
Step 3: Open Office 365 PowerPoint
In a web browser, log into your Office 365 account and open the PowerPoint app. Choose the presentation you want to share.
Step 4: Select Slide Show
In the presentation editor, select the Slide Show link.
Step 5: Choose Always Use Subtitles
Under the Slide Show tool, choose the Always Use Subtitles option.
Step 6: Select From Beginning
Select the From Beginning option. This will open the slide show in full screen presentation mode.
Step 7: Start Recording
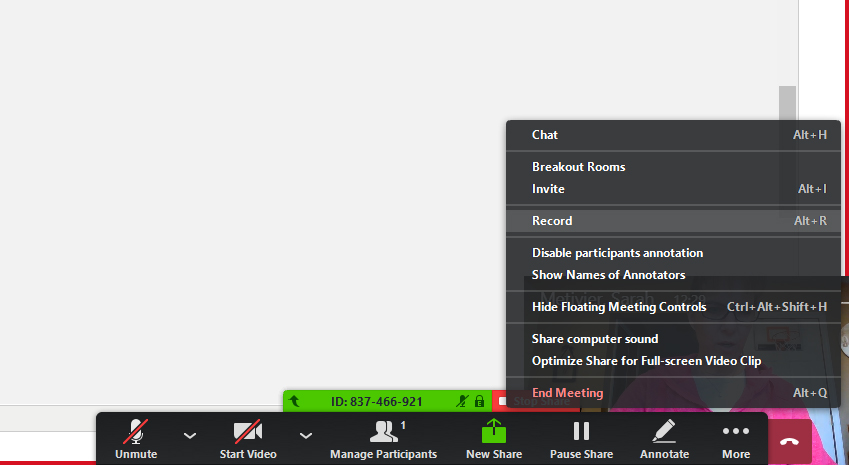
In Zoom, while sharing your screen, select More. From the More options, choose Record. You can also use the keyboard command Alt + R to begin recording.
Step 7: Begin Speaking
Begin speaking. Captions will appear below the slide. Be sure to speak clearly into the microphone to help with accuracy of the auto-generated captions.
Step 8: Stop Recording
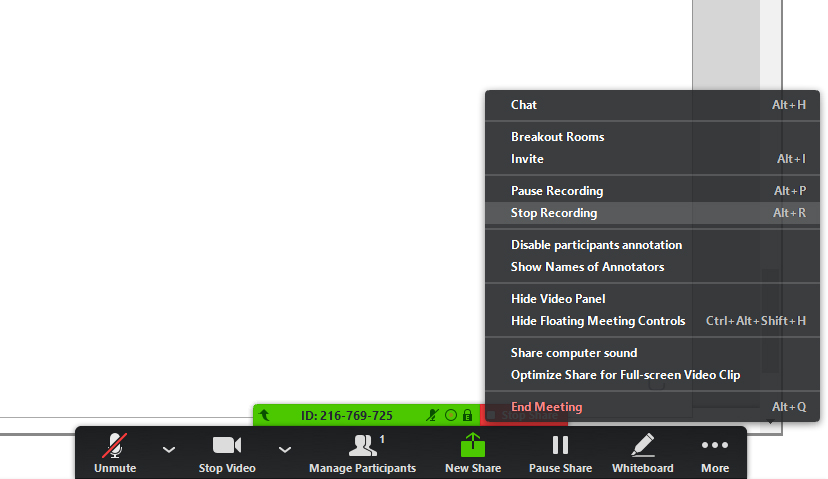
Once your lecture is done, choose More. From the More options, choose Stop Recording. You can also use the keyboard command Alt + R to stop recording.
Step 9: End the meeting
From the More options, choose End Meeting option.
Step 10: Save Recorded Video File
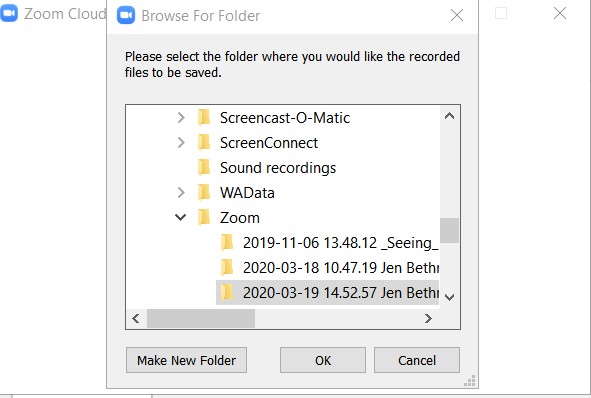
Browse for and choose a folder to save the MP4 video file then select OK. You now have a open captioned video you can upload to ReggieNet or other web services.
Feedback
To suggest an update to this article, ISU students, faculty, and staff should submit an Update Knowledge/Help Article request and all others should use the Get IT Help form.


