Technology
Managing your Microsoft 365 Calendar Visibility
Last modified 1/29/2024
All members of Illinois State University have the ability to manage their Microsoft (Formerly Office) 365 calendars. By default, Microsoft 365 calendars are set to view “Free/Busy” time. Free/Busy is being aware that another person has an appointment at a certain day and time. Please know that each user has the ability to control the amount of detail displayed on their calendar.
Users may manage their calendar settings in the Microsoft 365 portal, or in the Outlook email client. Instructions for each are below:
Manage Calendar Visibility Via the Microsoft 365 Portal
To change the level of detail shared on your calendar in Microsoft 365, please follow the steps below:
- Go to https://office365.illinoisstate.edu and login with your full ISU email and password.
- Once you are logged in and you arrive at the home page, click the Apps button on the left pane to view the calendar option. (Figure 1)
Figure 1:
- Click the Calendar tile to open the Calendar app. (Figure 2)
Figure 2:
- When you have your Calendar open, click Share on the top-right corner. (Figure 3)
Figure 3: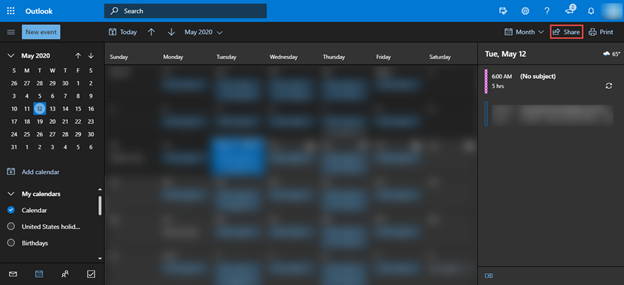
Note:
If you have multiple Calendars, click the Calendar Name you wish to change the permission level for.
- When the Share window appears, choose the level of access for anyone who may have access to your Calendar. (Figure 4)
Figure 4:
- People in My Organization (My Organization) will control your calendar accessibility to the campus community.
- To Hide your Calendar, choose Not Shared.
- To share your calendar with individual ISU members, type their name in the bar at the top and click Share. After choosing their level of access, they will receive an email with the invitation to share your calendar.
- Exit from the Window to Save your Changes.
Manage Calendar Visibility in Outlook for Windows:
- Open Outlook.
- Click File → Options → Calendar.
- Click the Free/Busy Options... button under Calendar Options. (Figure 5)
Figure 5: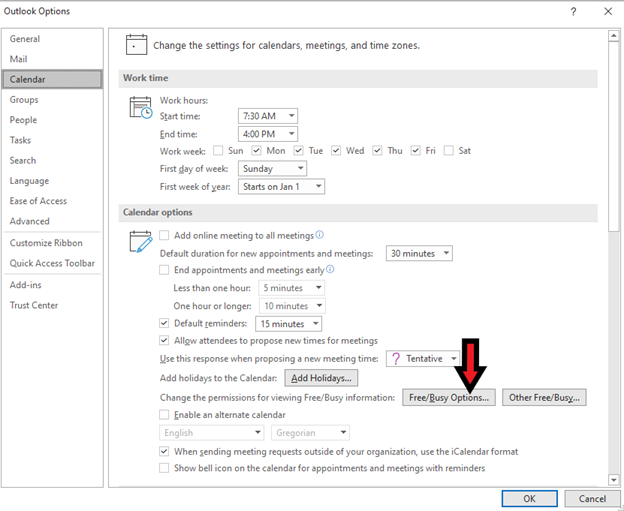
- Change the default permission level to None and uncheck the Folder Visible box.
- Click Apply.
- The Calendar will now be hidden from all members of the university.
Manage Calendar Visibility in Outlook for Mac:
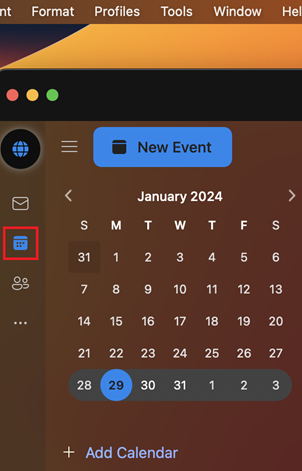
1. Open Outlook and navigate to the Calendar tab. This is located directly underneath the Mail tab on the left hand side. (Figure 6)
Figure 6:
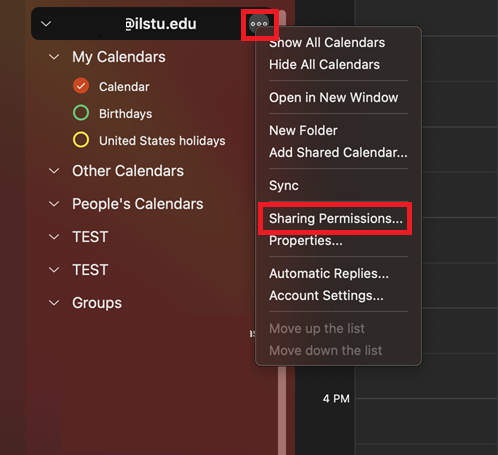
2. Click the Three Dots next to the calendar you are managing and choose Sharing Permissions. (Figure 7)
Figure 7:
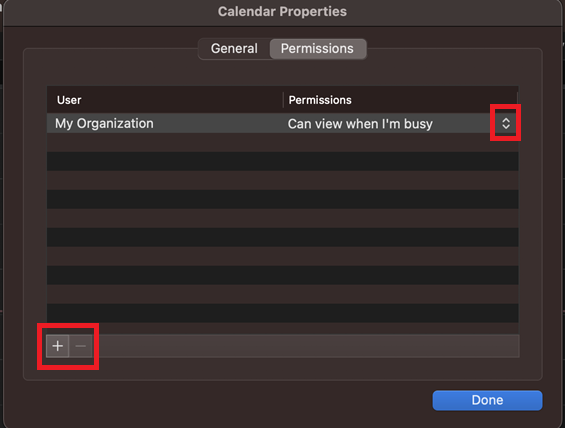
3. Here you can add and remove users using the "+" and "-" at the bottom of the screen. As well, you can set specific permissions as necessary using the up and down arrows next to the current permissions. (Figure 8)
Figure 8:
How to Get Help
- Technical assistance is available through the Technology Support Center at (309) 438-4357, by email at SupportCenter@IllinoisState.edu, or by Live Chat at Help.IllinoisState.edu.